~ * ~
This article is written by Kate Palmer (aka Sparkle Tart)
Today I’m going to show you all how to create a vibrant Rainbow Grunge Background suitable for cards, pages, journal backgrounds and even canvas! This background style is particularly useful for low mojo days as it is low stress, uses up extra paint, when finished can be used as a base for many different projects and of course, it can be created in any colours you like!
Journal Background
To create a page similar to mine you will need:
- Lindy’s Stamp Gang Starburst Spray: Time Travel Teal and Flat Fabios: Summer Lovin’ Sun, Ocean Breeze Blue, Hibiscus Rose and T-bird Turquoise
- Delta Ceramcoat Acrylic Paint: Seashell White, Royal Fuchsia, Deep Lilac and Laguna Blue
- Ranger Archival Ink Pads: Deep Purple, Aquamarine, Magenta Hue and Watering Can
- Delicata Ink Pad – Golden Glitz
Stamps:
- Dina Wakely & Stampington – Create with Abandon & Script Heart
- Stampers Anonymous – Spills & Splatters
- Pam Carriker – Honeycomb
- Kaisercraft – Bubble Wrap
- Old credit card or paint scraper
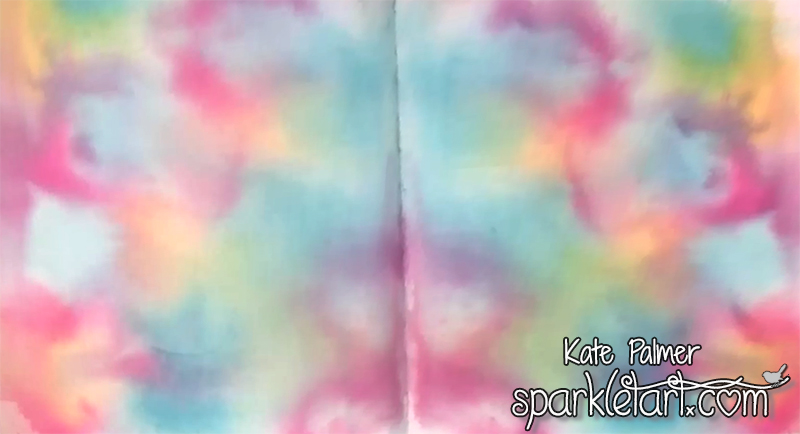
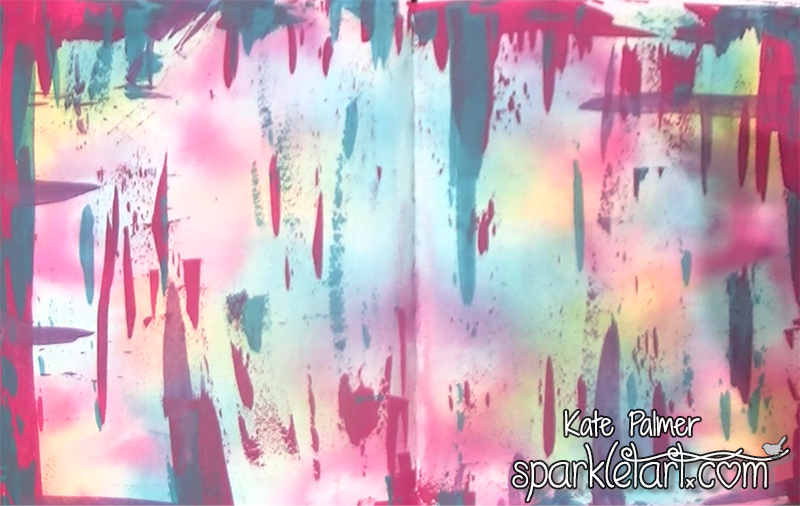
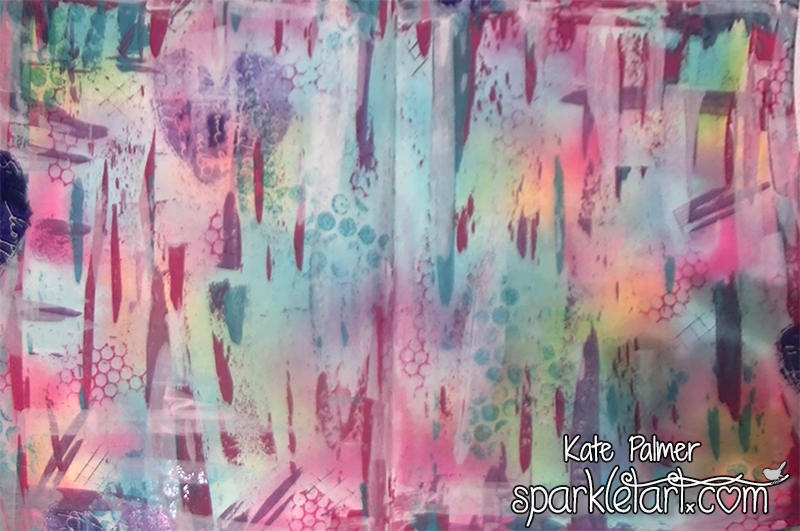
Step One – randomly spray paper or canvas with a variety of Lindy’s Stamp Gang Sprays and allow to dry.
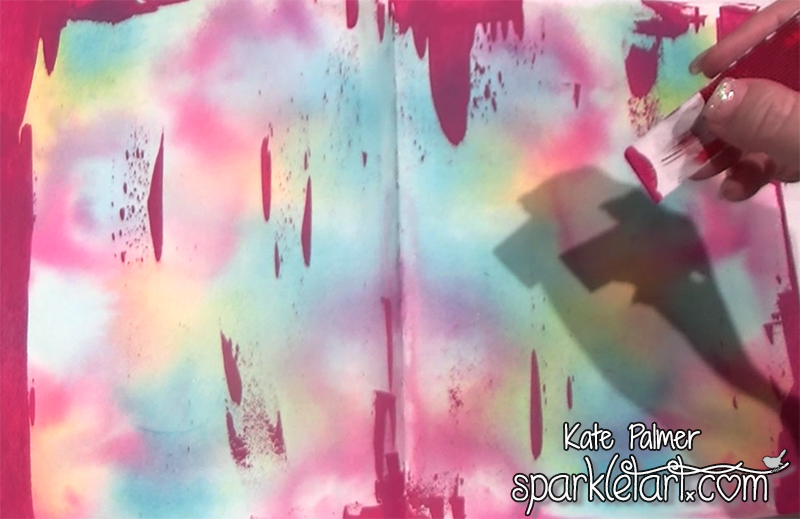
Step Two – using a credit card and Ceramcoat Royal Fuchsia paint, add a little paint to the background by dipping an edge into the paint (I squeeze a little onto my work surface to make this easier) and then scraping the edge along the paper. Make sure you only add a tiny amount of paint to the credit card otherwise you will end up covering far too much of the background, less is more definitely applies with this technique.
Step Three – using this same scraping technique add a little of the Laguna Blue – I like to overlap the colours a little – notice how they appear translucent and you can see one colour behind the other – this can only be achieved by scraping very thin layers of paint – add too much and you lose this effect.
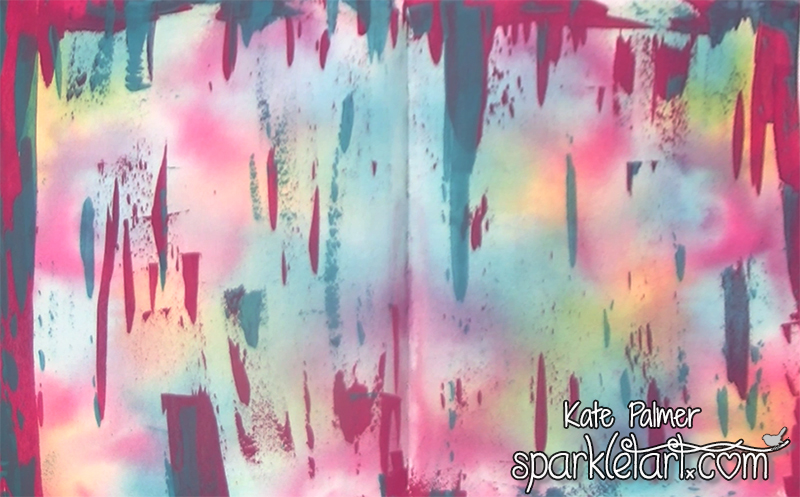
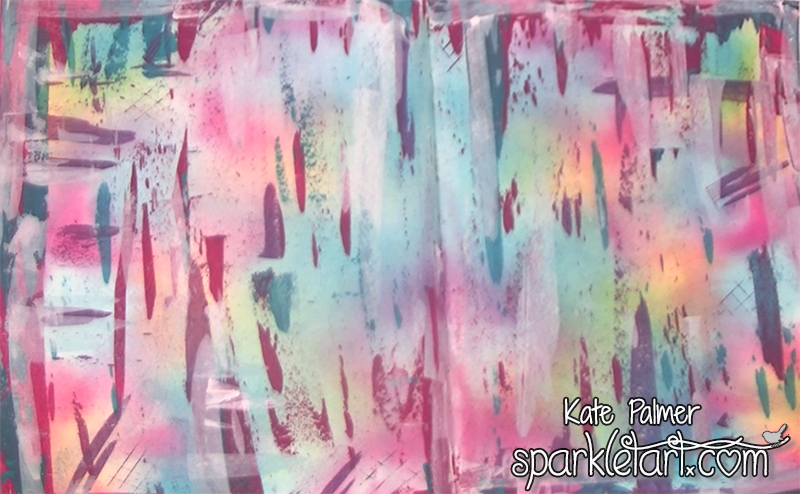
Step Four – is a little more subtle as a result of the colour of paint I used – Deep Lilac. In this step continue to scrape paint onto the background, but add a few horizontal elements. I like to make sure there is still uncovered background so the whole thing doesn’t end up looking too busy.
Step Five – time to tone it down a bit by adding some of the Seashell White (you could a watered down gesso for this if you need to). Add the white over roughly 1/3 of your paint in both horizontal and vertical directions – it helps to break up the paint streaks and tone down the colours a little.
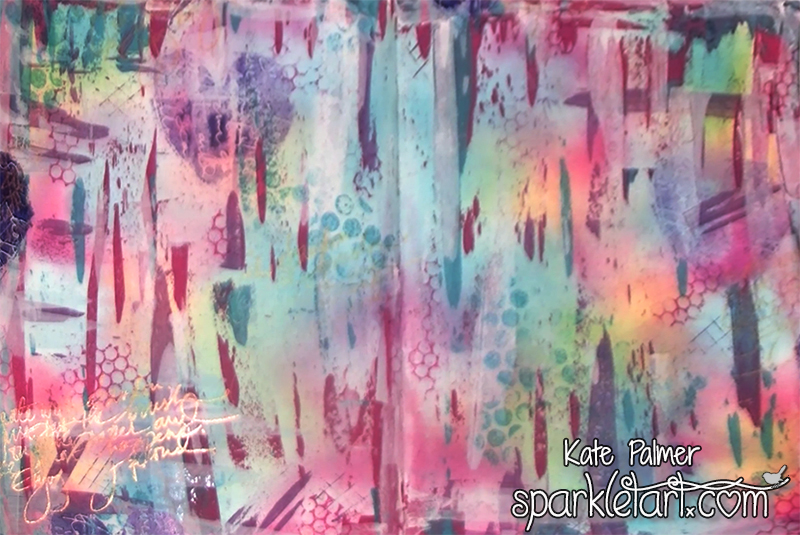
After you paint has dried it’s time to add some stamped images, using Ranger’s Archival Inks.

Step Six – using Aquamarine ink add some Bubble Wrap impressions, I like to hold the unmounted stamp in my hand to create these marks as you get a more random and less perfect impression.
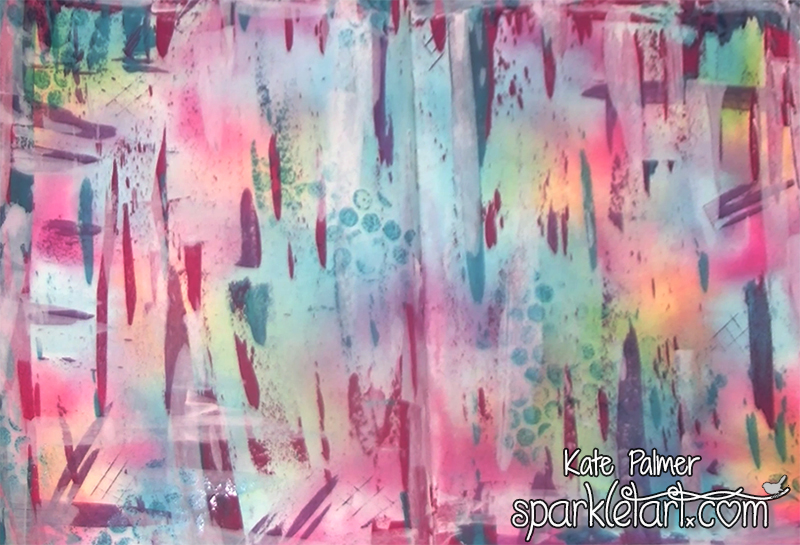
Step Seven – using Magenta Hue ink add some Honeycomb stamped images, notice how I’ve echoed the colours used on the first background layer in both the paint and ink layers – this helps to keep the background unified and stops it looking to overwhelming.
Step Eight – time to add a little darkness to the background – but be careful not to overwhelm the more delicately coloured layers underneath. I’ve used Deep Purple ink and the Script Heart stamp, but to keep it soft, for several of the stamped images I have inked my stamp then stamped lightly on scrap paper before stamping onto my project. This creates a lighter coloured impression.
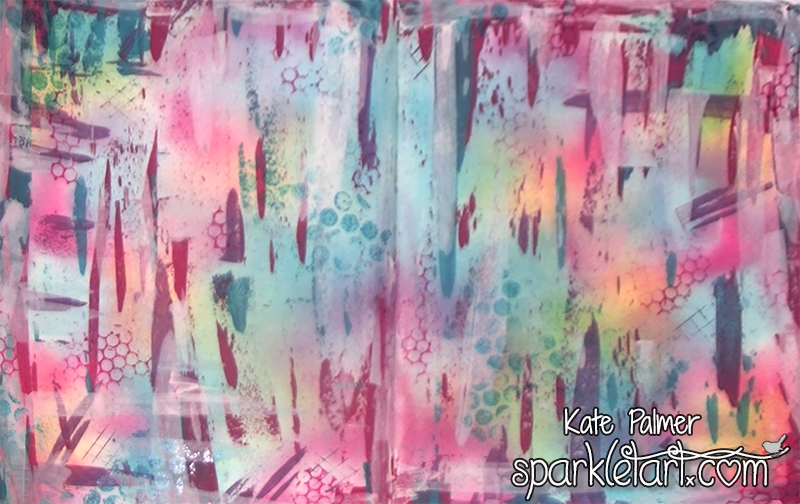
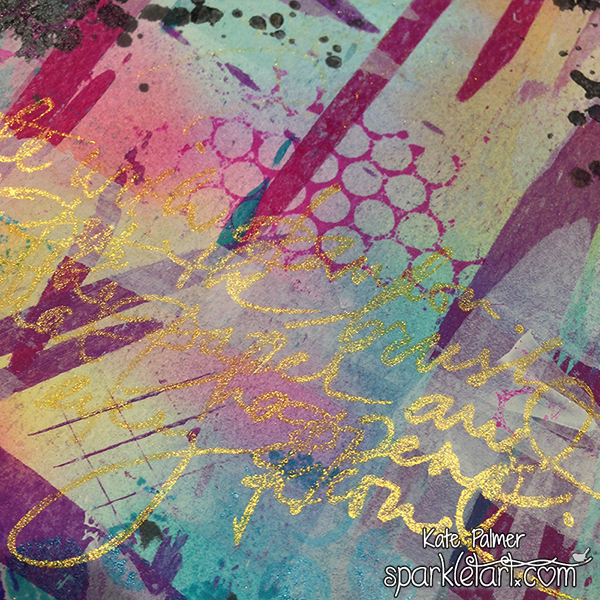
Step Nine – this is my favourite part, I’ve added the beautiful text stamp Create with Abandon using Gold ink – while it may not add any additional colour it adds a textural element to the page and catches the light.
Step 10 – this is the final background element and is the only additional colour I have used – Watering Can – a wonderful grey. I’ve used one of the Spills & Splatters stamps to add a little extra grunge to the background and tone it down a little more.
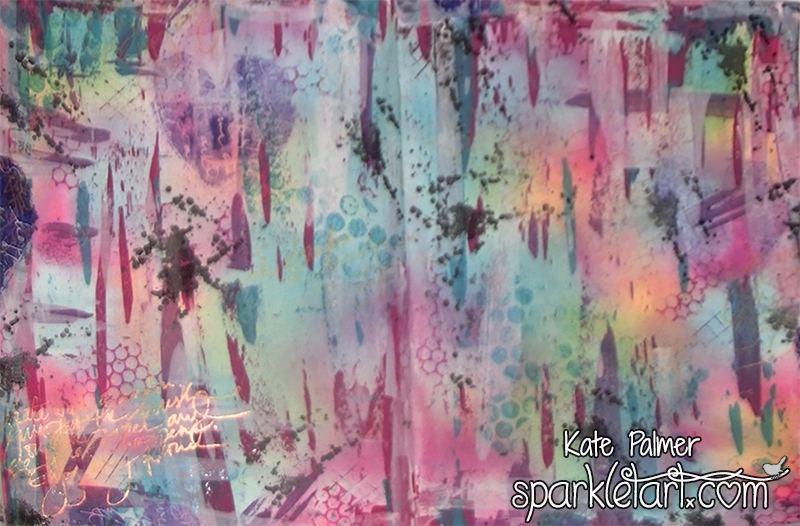
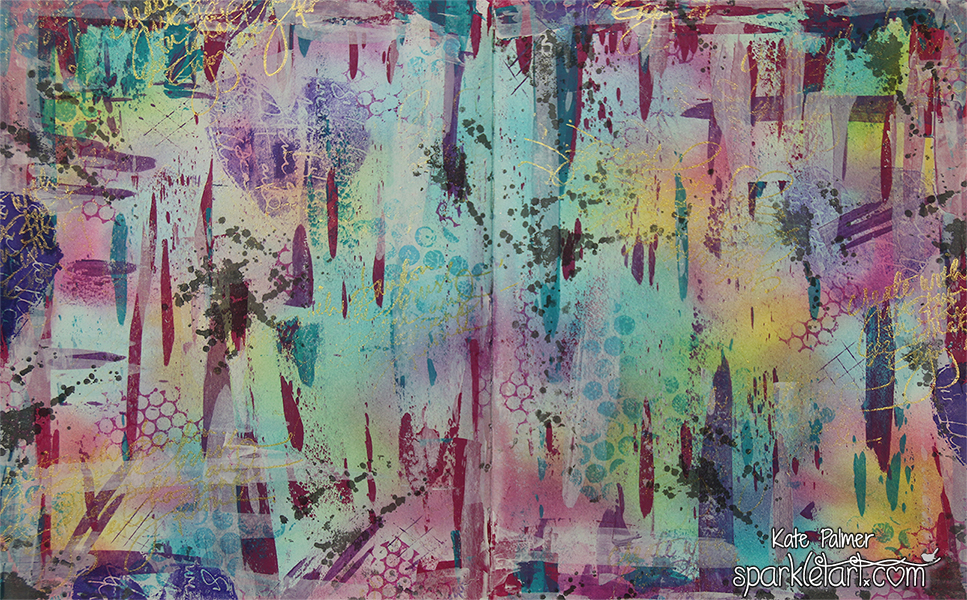
Now for a few close-ups so you can see the background elements.
It’s important to have a little bit of ‘something’ everywhere on the page as you never know which bits will be seen in the final piece. You can see all of the layers and elements – the translucent images and paint marks, really help to bring this background together.
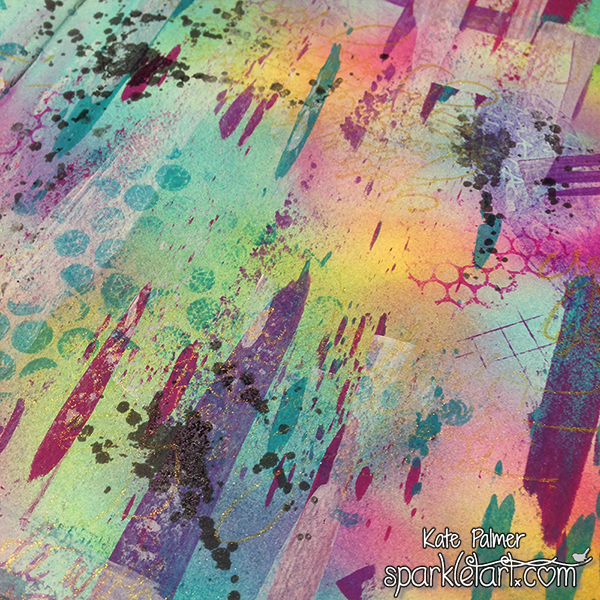
Just a little touch of gold can really lift the colours around it.
While I created this page in one session, the fantastic thing about this background is you could easily create it overtime with the leftovers from other projects. You could create the first layer from over sprayed liquid, the paint scrapings could be left over paint that you add as you need to (rather than waste it) and the stamped images could easily be added whenever you have ink left over on a stamp – you could even play with the order that each item is added to the page, eg: stamps then ink then paint, as each layer is translucent you will still see each element. Cool huh!
Challenge and Give-Away Winners
Now I’d like to issue a little challenge – I want to know how YOU would use this background – now that you’ve created it what would YOU use it for, what comes next? THANK YOU for all of your comments and inspiration – it is amazing what can be done with a wonderful background!
And the winners are:
Carole Furlong and Joan McAlpine
Carole Furlong says:
“I love this – the lovely warm yellow survives to the last layer – gorgeous. I would use as a background in my art journal. I think I’s do something like a technical drawing over the top – scaffolding, pipes, conveyor belts and that sort of thing – would be a great contrast to the prettiness of the background”
Joan McAlpine says:
What a beautiful, bright background. More like spring than dull and dark winter in Melbourne.
Firstly, I’d photocopy the original and then play to my hearts content with such things like a small Banksy stencil or a silhouette stamp in black archival ink on the top. Of course I could decorate my studio wall (only one with the window as it might be too much if I did more) and use it as wallpaper, then the colours are there all the time to remind me what works. This would be more interesting than the two colour wheels that hang there (obviously one is not enough as colour is sooo… important).” I love the idea or a living color wheel wall!
Ladies – please email Michelle [Michelle @ MixedMediaArt.net] and we will con-ordinate with Kate to get your prizes posted to you!
Plus a HUGE “thank you” to Kate for offering the give aways!
~*~*~*~*~*~*~*~*~*~*~*~*~*~*~*~*~*~*~*~*~*~*~*~*~
Kate Palmer though perhaps better known as Sparkle Tart loved playing with mixed media and techniques. Most of her work incorporates sparkly media of some sort, which is used on journal pages, canvases, scrapbooks or hand made cards.
You can see more of Kate’s work at Sparkle Tart or via Facebook – Keep It Simply Sparkly
~*~*~*~*~*~*~*~*~*~*~*~*~*~*~*~*~*~*~*~*~*~*~*~*~
.
.


Recent Comments