Do It Yourself Handmade Halloween Decorations

~ * ~

This article is written by Kim Kelley

Does it drive you crazy when you walk into a store in the middle of September and there are Christmas decorations up, but no Halloween ones? It does me. Seems like we are fast forwarding through life, always looking too far ahead, skipping sections that could be memory makers, instead of stopping and enjoying what time is right in front of us.

OK, OK I know I am feeling like life is going way to fast right now. My daughter just turned 18, is a senior and is looking at college. Just yesterday I dropped her off at Kindergarten and she looked up at me like I hung the moon.

handmade Halloween decorations are easy

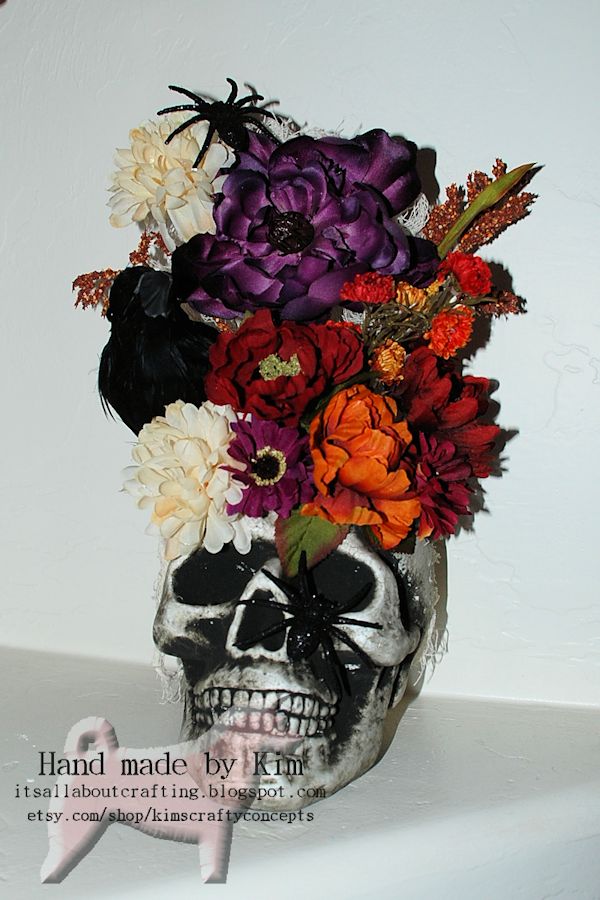
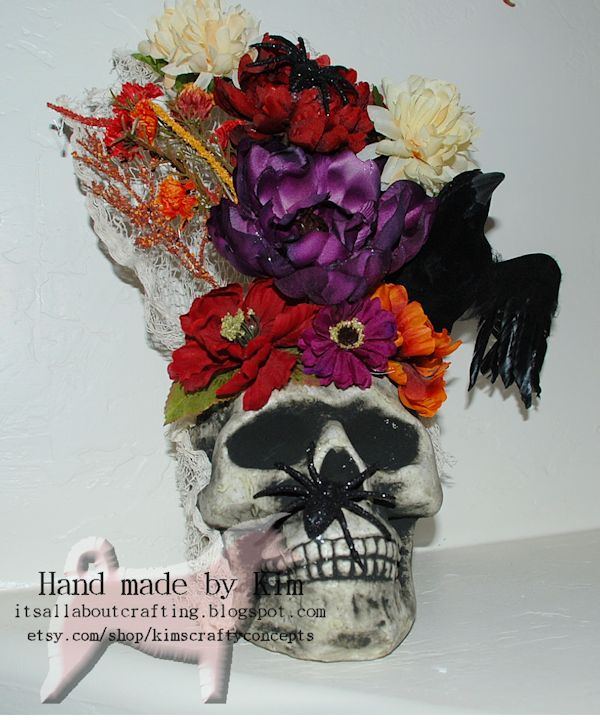
Anyway back to the task at hand…my Halloween project. This year I wanted to create something special for my BUNCO party. So I got an idea from Pinterest to decorate a skull. Now the photo I saw used real flowers, but needing something that would last I decided on fake ones. I also wanted to add a few spiders and a crow on each, thank God for Michael’s, I was able to get everything there and on sale for half off!
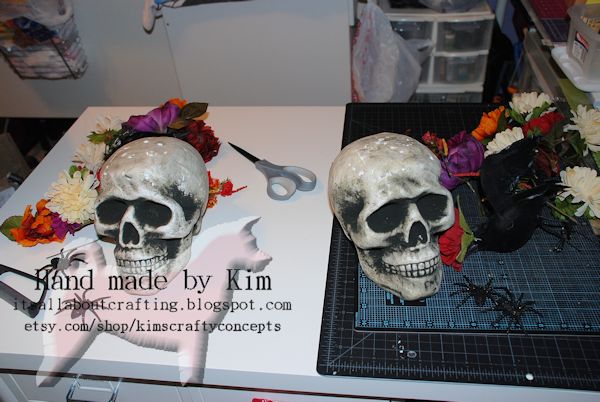
handmade Halloween decorations are easy

The Skulls

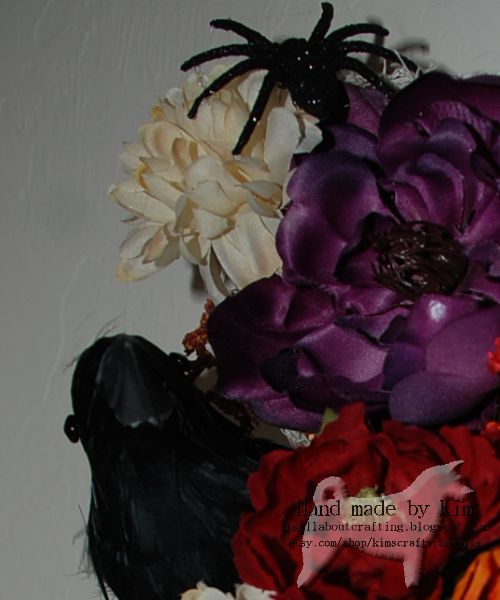
I used Styrofoam skulls so all I had to do was stick the flowers in where I wanted…you can see some of the holes in one of the pictures, I ended up pulling all of the stems out once and starting over wanting a different look. I did not like the way the stems showed from the back, so I added a thick, almost cheesecloth material hanging from the flowers and draping down the back of the skull. I glued one of the glitter spiders to the skull and one to the top of the highest flower and took my glue gun and created strings of webbing all over. All in all this was pretty easy to create.
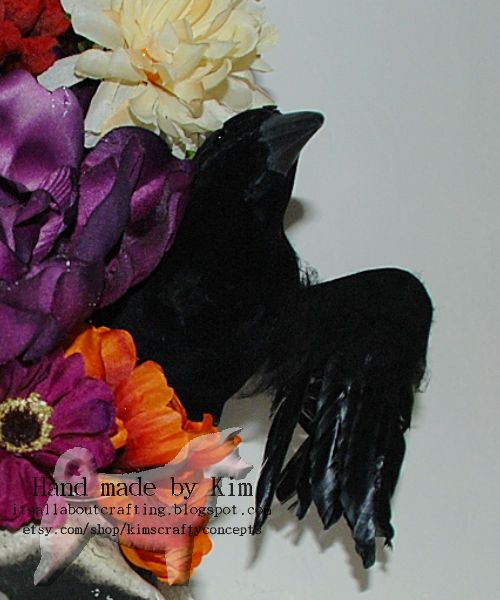
handmade Halloween decorations are easy

Crow 1

handmade Halloween decorations are easy

Crow 2

I usually take a lot more pictures, but figured there are only so many angles you can take of fake flowers!

handmade Halloween decorations are easy

Skull 1

I hope this inspires you to get a little creative with your Halloween decorations!

Life is short, do something creative every day!

~*~*~*~*~*~*~*~*~*~*~*~*~*~*~*~*~*~*~*~*~*~*~*~*~

Kim Kelley is borderline obsessive about her crafting and her art. She loves mixed media art because you are free to go beyond your comfort zone, using your imagination and exploring an anything goes mind set. Kim loves to learn and explore new techniques and hopes that any art she creates leads someone to find their inner creative artist!

Sites: itsallaboutcrafting.blogspot.com and kimscraftyconcepts

~*~*~*~*~*~*~*~*~*~*~*~*~*~*~*~*~*~*~*~*~*~*~*~*~

.

.

Halloween Decorations From Recycled Wood

~ * ~

This article is written by Shari Welch

Recently while cleaning my studio, I noticed that my wood bin had turned into 2 wood bins. I guess it was time to use some of those recycled wood pieces. I love creating handmade decorations for the holidays. What makes it even better is being able to recycle as well.

I am fortunate to have a creative reuse store in my town. SCRAP Denton is where 75% or more of my materials come from. You can also visit habitat for humanity stores and scrap wood bins at your local home improvement. Construction sites are begging to get rid of their small scraps of wood.

Halloween Decorations From Recycled Wood

Halloween Decorations From Recycled Wood

The first technique I will be doing is a crackling effect. There are a number of crackle products on the market and I have tried them all. I have found that I seem to get the best results using Elmer’s glue.

Halloween Decorations From Recycled Wood

First I painted the pieces the color I wanted the cracks to be. I decided to do this technique on the sides, top, and bottom so I taped the edges with painters tape. I applied a medium amount of Elmer’s glue. To achieve a smooth coverage I use my finger to spread the glue. You want to let the glue sit for a minute. The glue should be tacky not dry.

Next you want to use an inexpensive scruffy brush to apply the top coat like the one in a photo. I brush on the paint in random directions making sure that the bristles are slightly breaking through the glue. It will start to crackle almost immediately. TIP…. I suggest practicing this technique on a scrap piece of wood before you start your final project.

Halloween Decorations From Recycled Wood

I found that leaving it alone for a few hours or even better over night gave me the best crackle results.

Halloween Decorations From Recycled Wood

For the front and back I applied printed tissue paper with PPA adhesive. This adhesive is perfect for thin papers. Instead of a smooth application I choose to leave it a little wrinkly.

Halloween Decorations From Recycled Wood

The next technique used was distressing. I used Tim Holtz distress ink in black soot for the edges.

Halloween Decorations From Recycled Wood

To finish this project I glued all the pieces together, added some images, yarn and shiny embellishments.

Halloween Decorations From Recycled Wood
~*~*~*~*~*~*~*~*~*~*~*~*~*~*~*~*~*~*~*~*~*~*~*~*~

Shari Welch is a mixed media artist living in Denton Texas. She is known for using reuse and recycle materials in her artwork. She volunteers for SCRAP Denton  where she is on the education committee, teaches workshops, art camp, and performs art demos. She is passionate about mixed media art and enjoys helping others discover their creativity.

You can follow Shari and see her mixed media art at facebook.com/my.altered.life and on her blog Shariwelch.blogspot.com

~*~*~*~*~*~*~*~*~*~*~*~*~*~*~*~*~*~*~*~*~*~*~*~*~

.

.

Printers Tray Art

~ * ~

This article is written by Shari Welch

Type cases or printers trays were manufactured from around 1890 to the 1960’s. They are wooden trays divided into sections to hold the various letters of a typeface for print. All type cases were finished by hand and were fitted with a hanger. They were well constructed because metal type is heavy. The trays were stored in vertical racks, grouping the different type styles into families. Today artists take advantage of the unique frames to create one of a kind pieces of art.

close up tray

There are many printers trays out there. They come in different sizes, colors, shapes, and number of sections. You can find them at craft stores and online.

I was excited to share this project because there truly is not much skill to it. It is mostly a matter of layering different elements. You can create one that is very simple or more detailed. I will be demonstrating some mixed media techniques you may want to try to take it to the next level.

Lets get started!


With Halloween just around the corner, I decided to create a Halloween themed printers tray. I absolutely can not get enough of Halloween.

I chose a tray that was already black (as I was going to paint it black anyway) and had a lot of sections. I used washi tape to decorate the edge of the frame.

I chose a tray that was already black I used washi tape to decorate the edge of the frame

Next,to give it some interest, I used Tim Holtz distress paint (picket fence) to define some of the edges of the sections.

adding distress paint to add interest

I picked out a few interesting coordinating papers and printed cork sheets to fill up the backgrounds sections.

decorative paper and printed cork

Next came distressing a few of the papers edges using Tim Holtz distress ink (black soot) and sandpaper on Tim Holtz Kraft core paper. Note: Kraft core will hold up to sanding, tearing, embossing, distressing.

distressed paper with distress ink

kraft core paper
The fun really starts as you figure out what you want to put in the tray. You can add items from a trip, little bits and pieces of things you love, collections, photos, I could go on and on.

The fun starts when choosing your items

IMPORTANT:

One thing I can’t stress enough is that to lay everything out before you glue anything down. Not the background, the type, charms, nothing. I moved elements around a few dozen times or more before they found their permanent homes. I also glued down one section at a time after I was happy with the placement.

Helpful hints: Consider using 3D foam adhesive pieces to help your items look as if they are coming off the page. To age lace or ribbon you can soak them for a few hours in tea. I used Aleene’s tacky glue for the backgrounds and Weldbond glue for attaching my treasures.

Now it’s your turn to create your one of a kind piece of art.

finished tray


close up tray

spider ribbon tray

~*~*~*~*~*~*~*~*~*~*~*~*~*~*~*~*~*~*~*~*~*~*~*~*~

Shari Welch is a mixed media artist living in Denton Texas. She is known for using reuse and recycle materials in her artwork. She volunteers for SCRAP Denton  where she is on the education committee, teaches workshops, art camp, and performs art demos. She is passionate about mixed media art and enjoys helping others discover their creativity.

You can follow Shari and see her mixed media art at facebook.com/my.altered.life and on her blog Shariwelch.blogspot.com

~*~*~*~*~*~*~*~*~*~*~*~*~*~*~*~*~*~*~*~*~*~*~*~*~

.

.