Personalized Gift Tags – On the Gelli Plate

This article was written by Martice Smith II

Personalized Gift Tags

Who says small details don’t matter?! Not us mixed-media artists! As a mixed-media collage artist, I love building upon several layers of paint, doodles and various mark-making techniques to set my work apart from the rest.

If you’re looking to develop your own approach, try these ideas to create your own, personalized gift tags. There’s no need to spend a fortune on commercially made products when you can add a unique touch of your own- using what you already have. Just the extra spark needed for a one-of-a-kind gift!

Here are a few supplies to help get you started:

  • Gelli plate
  • acrylic paints
  • paintbrush
  • brayer
  • white ink pen (for doodling)
  • cardstock / kraft paper
  • stencils (I used Tags & Labels stencil from DecoArt)
  • metal eyelets
  • embroidery floss / twine

Personalized Gift Tags – on the Gelli Plate

1. Create the gelli prints, use prints from your stash, or paint directly onto paper.

Using acrylic paints, use a brayer and roll an even, smooth layer to the Gelli plate. You can also use a round tip paintbrush and paint directly on top of the Gelli plate. Make sure to paint loose brushstrokes, going in various directions. This will give you visual interest.

2. Next, lay down a sheet of cardstock (or your choice of paper) and pull a print.

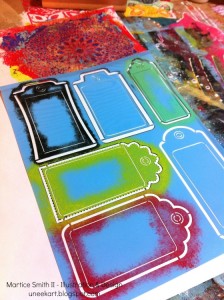
Photo of Tags and Labels stencil by DecoArt, Inc.

3. Use stencils.

Create a large tag template to use or trace through and cut out the Tags & Labels stencil from DecoArt.

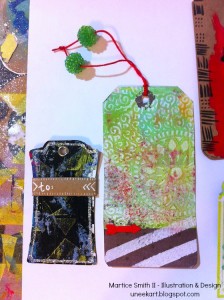
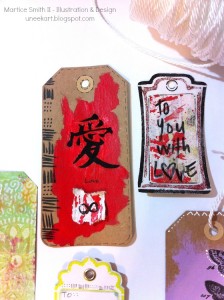
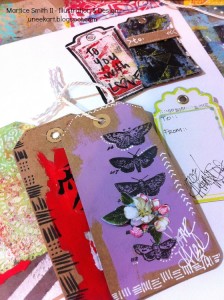
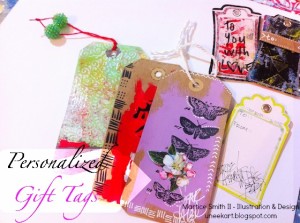
Example of embellished Gelli plate gift tags by Mixed media artist and designer, Martice Smith II

Example of embellished Gelli plate gift tags by Mixed media artist and designer, Martice Smith II

4. Preserve your work!

It’s important to seal the paintings on your tags, especially if there’s any water soluble media. I like to use a spray varnish first. (Remember to do this in a well-ventilated area, to avoid any irritation.)

For one of my tags, I’ve brushed on a thin layer of Crackle Glaze to give a cracked, eggshell appearance.

After drying for several minutes, I brushed on a layer of Triple Thick Gloss Glaze to keep my colors intensely vibrant and shiny. (Both products are from DecoArt.) 

5. Add the finishing touches. 

Eyelets, embroidery floss and twine makes these tags look more polished and really sets the tone for the special gift inside. I love things that twinkle, so I used Sheer Shimmer Spritz in Sparkle (from Imagine Crafts) for some drama.

Add other embellishments to underscore the theme of your tags and you’re done!

Check out these one-of-a-kind gift tags!

Example of embellished Gelli plate gift tags by Mixed media artist and designer, Martice Smith II

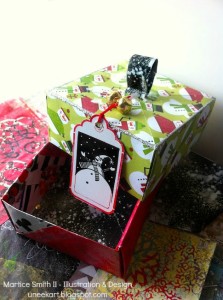
Example of gift tag on box by Mixed media artist and designer, Martice Smith II

I’ve used a combination of different elements and techniques, such as:

Acrylic paints and rub-on stickers on Kraft paper, DecoArt’s chalky finish paint (Remembrance), gelli paper scraps on foam dots, threading glass beads, faux stitching, and a cute snowman stamp from RubberMoon

Other ideas to try:

▪   Think about how the tag ‘feels’ in your hands. You may want your tags to have a smooth, velvety feel to them. If so, try Dura Clear – Soft Touch Varnish (from DecoArt). This stuff is really impressive!

▪   Incorporate symbols and doodles.

There’s nothing like the repetition of shapes to add dimension and rhythm to your tags. I’ll be sharing more doodling and intuitive painting techniques in my online, art course ‘Cultivate Your Symbology.

Check out sneak peeks of the lesson I’ll be teaching in the ‘My Color is Beautiful Art’ workshop HERE and HERE

Do you include gift tags on your presents? If so, do you prefer making them yourself or spending a little extra money for the pre-made ones? 

Happy creating!

~*~*~*~*~*~*~*~*~*~*~*~*~*~*~*~*~*~*~*~*~*~*~*~*~

Mixed media artist and designer, Martice Smith II

Martice Smith II is creative director of Martice Smith II – Illustration & Design Studio, based in Missouri and owner of Uneek Art Boutique. She established herself as a freelance Illustrator and graphic designer after receiving her Bachelor of Arts Degree. Her stunning illustrations reveals her love for fashion, typography and wildlife- using a combination of traditional and digital techniques

You can see more of her work via her Facebook page or The Uneek Art blog.

Be sure to join the Uneek Art Letter, -Martice’s monthly newsletter- that offers art biz tips, advice and more digital goodness that will keep you inspired to be the artist you envision yourself to be!

~*~*~*~*~*~*~*~*~*~*~*~*~*~*~*~*~*~*~*~*~*~*~*~*~

.

.
Creating Your Own One of a Kind ATC Backgrounds

~ * ~

This article is written by Shari Welch

I came up with this tutorial out of need. I needed to find a way to produce a series of artists trading cards with the same background color scheme, with each one being an original little piece of art in itself. I needed to get these out soon so I had to be creative with my time as well. GelliArts gel printing plate to the rescue!

Those of us who have used a Gelli plate will admit, it is VERY addicting. A few of the many facts I love about the gel plate is that it is reusable and cleans up easily. If you haven’t used one, the link below takes you to the Gelli Arts website. Their site will give you a better understanding of what the gel printing plate is, and what you can create using it. Besides instructions, projects, and a You tube video, you can order a plate too. www.gelliarts.com

I thought that I would print up two or three pages. But like I said, it is very addicting.

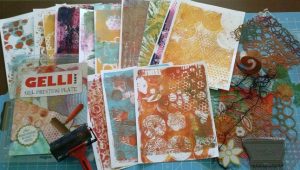
gelli plate, printed papers, and stencils

Materials I used:

  • 8×10 printing plate
  • Rubber brayer
  • White card stock 8.5×11 (cut to 8×10 after printing)
  • DecoArt acrylic paints
  • Yarn, texture tool, cut out decorative paper
  • Flower masks and stencils by Heidi Swapp
  • Stencils by Tim Holtz
  • Stencils by Prima

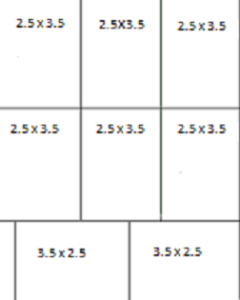
This template shows 8 artists trading card that can be produce out of a single gel print page if you are using the 8×10 size.

ATC template

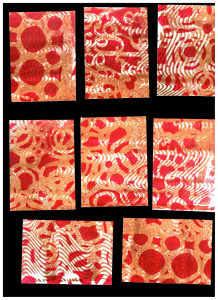
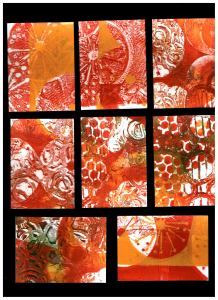
I had a fall color theme in mind, so here are the two finished ATC background sets I choose. I still have a lot of gel prints left for yet another project. I won’t complain.

Pic of 8 ATC cards
ATC cards 2nd sheet
~*~*~*~*~*~*~*~*~*~*~*~*~*~*~*~*~*~*~*~*~*~*~*~*~

Shari Welch is a mixed media artist living in Denton Texas. She is known for using reuse and recycle materials in her artwork. She volunteers for SCRAP Denton where she is on the education committee, teaches workshops, art camps, and performs art demos. She is passionate about mixed media art and enjoys helping others discover their creativity.

Shari studied graphic design in Portland, Oregon before moving to Denton. Besides writing for mixed media art, she is currently a blogger for DecoArt, was featured in Mixed Media May, and has been in a number of art shows in her hometown of Denton including GDAC “It’s in the bag”, Thirty for thirty art show, and 3arthwurks gallery show.

You can see more of Shari’s artwork at www.facebook.com/my.altered.life
and on her blog shariwelch.blogspot.com

~*~*~*~*~*~*~*~*~*~*~*~*~*~*~*~*~*~*~*~*~*~*~*~*~

.

.
Mixed Media Canvases with Plaid Folk Art Paints

~ * ~

This article is written by Michelle G. Brown

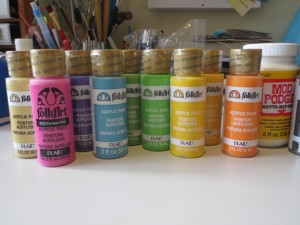
This week I got to play with some FolkArt paints, provided to us by Plaid, to see what I could do with them. I do love playing with paints; they are a relatively cheap materials, come in lots of wonderful colors and gives me the ability to coordinate all of the elements I need to create many types of mixed media art

Acrylic Paints Folk Art with mixed media collage

The colors looks all so nice together (I’m a real sucker for “Rainbow” colors) but I was worried about using so many colors on the one canvas, so I did some testing to find color combinations that I liked; remember that I’m not very brave when it comes to combining colors. These were the trials that I completed:

Acrylic Paints Folk Art

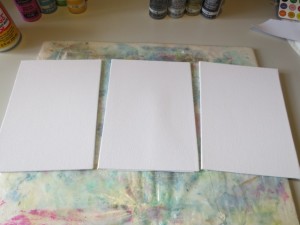
I actually liked most of them but only had three canvas panels so I narrowed it down to three combinations that used a variety of paint colors.

Acrylic Paints Folk Art

Top: Lime Green, Deep Ocean Blue and Ivory White

Middle:  Deep Ocean Blue, Perfect Purple and Toasted Vanilla

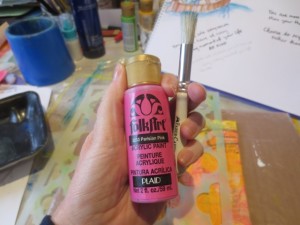
Bottom: Vivid Orange, Parisian Pink, Moon Yellow and Ivory White

With my color combinations selected, I was ready to get started.

Materials and Tools for the Mixed Media Canvases

– selection of acrylic paints: here I used Plaid FolkArt Paints

– 3 5”x7” canvas board panels

– collected ephemera; 5 different fonts

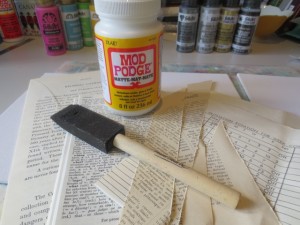
Matte Mod Podge and sponge applicator

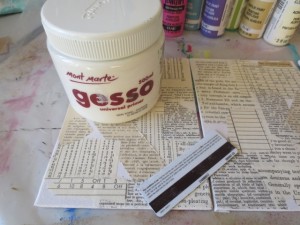
Gesso and applicator

Gelli Plate 8”x12”

Brayer

– Deli paper, ephemera and copy paper in A4

– Stencils: here I used Stencil Girl L174 Ward Quatrefoil Mix

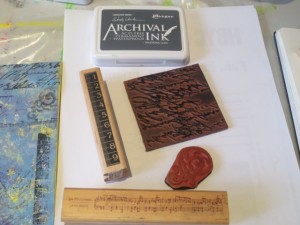
– Variety of rubber stamps and grey archival ink

– Watercolor pencils: black and white

– charcoal pencil and blender

– Markers and pens: I used Sharpie White, white gel pen, black Sakura Pigmento Micro 02 and Montana Extra fine Acrylic Marker filled with black Golden High Flow Acrylic in Carbon Black

Spray varnish

Creating the Background Layers

1. Lay out the canvas panels

Acrylic Paints Folk Art with mixed media collage

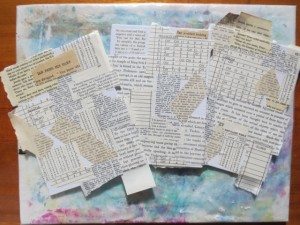
2. Collect a range of ephemera and tear into pieces. I like to use four to five different texts and fonts to make sure there is enough variety in the background. Get these ready before you start to get sticky.

Acrylic Paints Folk Art with mixed media collage

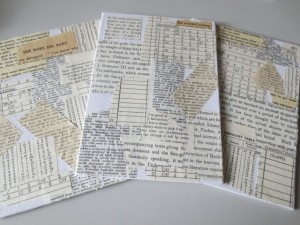
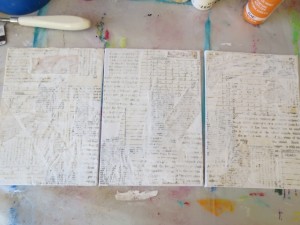
3. Adhere to the canvas panels, leaving some pale edges overlaying the edges

Acrylic Paints Folk Art with mixed media collage

4. Cut off the excess ephemera with a craft knife and use a sanding block to smooth the edges of the canvas

Acrylic Paints Folk Art with mixed media collage

5. Get out your Gesso and an old store card or spatula and roughly apply a layer of Gesso over the dried ephemera layer. Leave to dry.

Acrylic Paints Folk Art with mixed media collage

Acrylic Paints Folk Art with mixed media collage

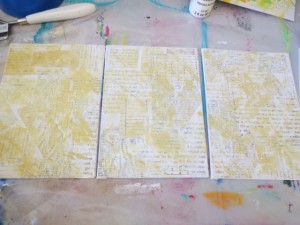
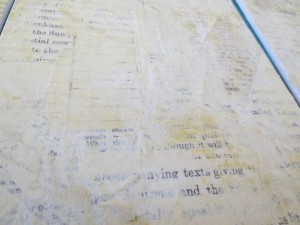
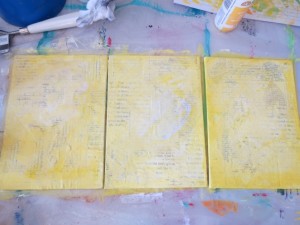
6. Add a layer of bone coloured acrylic paint, then a little ivory white and then a layer of yellow as a wash

Acrylic Paints Folk Art with mixed media collage

Acrylic Paints Folk Art with mixed media collage

Acrylic Paints Folk Art with mixed media collage

Leave canvases to dry.

Creating Color Coordinated Papers with Gelli Plates

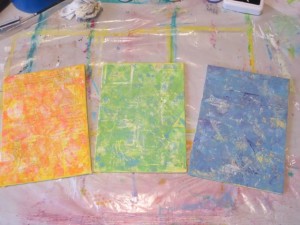
While the canvas panels are drying, get set up to create some color coordinated papers to add to the canvas panels. This is the advantage of using paints where we can make all of our bits and pieces match. Here I’ve used  a Gelli Arts Gelli plate, with the paints and stencils and a variety of ephemera.

creating prints with Acrylic Paints Folk Art

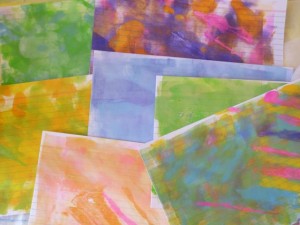
Firstly I used these colors to make a few pages

creating prints with Acrylic Paints Folk Art

creating prints with Acrylic Paints Folk Art

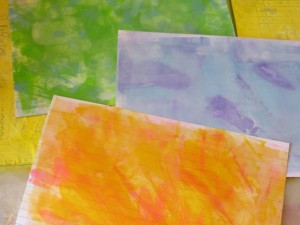
Then changed colors and created a range of prints with different patterns and color mixes. I created quite a few so I would have a range of prints to choose from when I completed the canvases.

creating prints with Acrylic Paints Folk Art

creating prints with Acrylic Paints Folk Art

Finishing off the Mixed Media Canvas

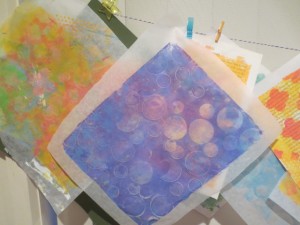
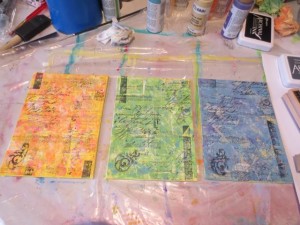
I lined up the three panels and added some stamping with grey Archival Ink

Plaid paints add color to mixed media collages

Plaid paints add color to mixed media collages

Plaid paints add color to mixed media collages

Then I decided to focus on one canvas at at time, starting with the orange and pink one.

I had created a few sketches in my art journal and transferred these images onto the printed papers to collage the image onto the canvas. For the brightly coloured canvas I used a bright flower, as well as clouds and a feather.

Plaid paints add color to mixed media collages

The flower was highlighted with water coloured pencils in black and white

Plaid paints add color to mixed media collages

A quote was added with the black Sakura Pigmento Micro 02 marker and Montana Extra Fine Acrylic marker filled with black Golden High Flow Acrylic Carbon Black

Plaid paints add color to mixed media collages

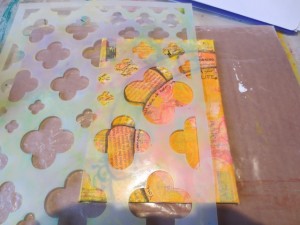
The stencil was used to add more Quatrefoil pattern into the pieces.

Plaid paints add color to mixed media collages

Here I used the pink paints with a stencil brush.

Plaid paints add color to mixed media collages

Plaid paints add color to mixed media collages

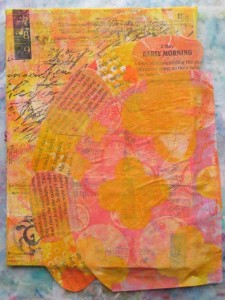
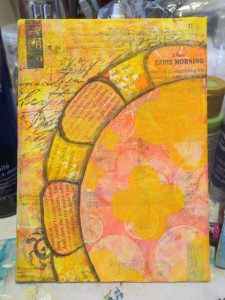
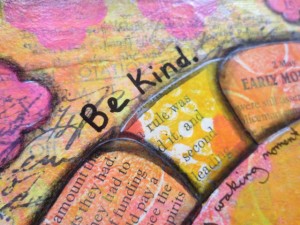
Then I highlighted a few of the shapes with charcoal pencil, smudged it a little and added highlights with white pen and marker, as well as adding more shading around the flower

Plaid paints add color to mixed media collages

I repeated these steps with the other two canvases. Here is a close up of the highlighted quatrefoil.

Plaid paints add color to mixed media collages

When all three were complete, I signed them and gave them a coat of spray gloss varnish to seal the charcoal and give them a nice, glossy finish.

Final mixed media canvas panels

Here are the finished canvas panels

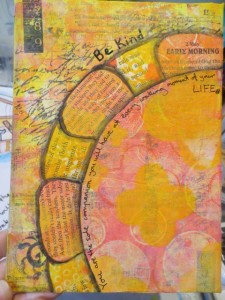
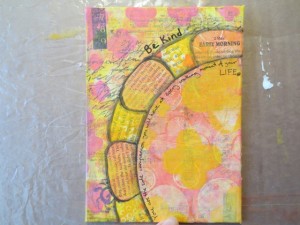
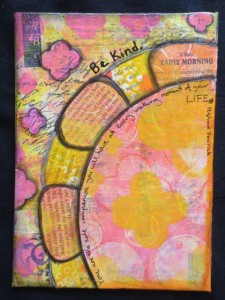
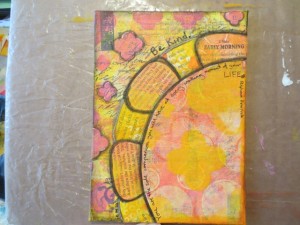
Be Kind: Vivid Orange, Parisian Pink, Moon Yellow and Ivory White

Folk Art paints to add color to mixed media collages

The quote reads “ You are the sole companion you will have at every waking moment of your life”

Folk Art paints to add color to mixed media collages

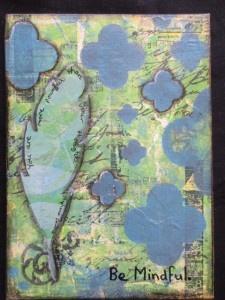
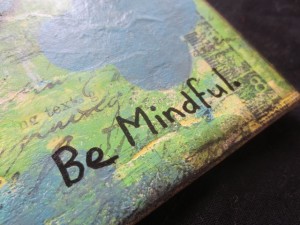
Be Mindful: Lime Green, Deep Ocean Blue and Ivory White

Folk Art paints to add color to mixed media collages

With the quote “You are more powerful than your thoughts.”

Folk Art paints to add color to mixed media collages

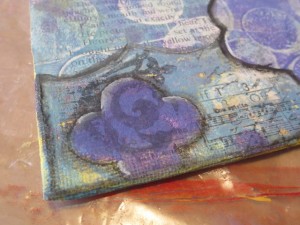
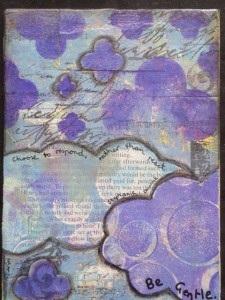
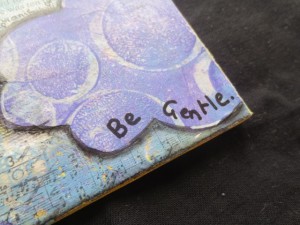
Be Gentle: Deep Ocean Blue, Perfect Purple and Toasted Vanilla

Folk Art paints to add color to mixed media collages

Quote: “Choose to respond, rather than react”

Folk Art paints to add color to mixed media collages

All of the quotes are by Stephanie Dowrick and her book Choosing Happiness

Gelli Printed Papers Giveaway

Michelle has a HEAP of Gelli printed ephemera left over from this project and wants to give YOU a chance to put them to good use and create your own mixed media collage. We are giving away THREE EPHEMERA kits, one in each of the three color combinations.

Michelle G. Brown creates fun papers

The winners have been announced ~ See the Announcement “And the Winners are…”

~*~*~*~*~*~*~*~*~*~*~*~*~*~*~*~*~*~*~*~*~*~*~*~*~

Michelle G. Brown is passionate about mixed media art and enjoys sharing her knowledge and techniques with you to allow you to express your own creativity. Michelle understands that many of us have an inner need to create. By learning a few basic techniques the amazing world of mixed media art is accessible to everyone!

Michelle lives with her husband and two boys in Melbourne, Australia.

~*~*~*~*~*~*~*~*~*~*~*~*~*~*~*~*~*~*~*~*~*~*~*~*~

Disclosure: These paints and Mod Podge were provided by Plaid for the purpose of review. All opinions are that of the MixedMediaArt team. The links on this page may include affiliate links and any purchases help to support the ongoing work by MixedMediaArt.
.

.
Handmade Candle Holder

~ * ~

This article is written by Sandra Parés

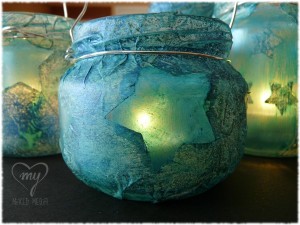
Today I am going to show you how to make a candle holder with a magic light to illuminate our summer nights.

Candle holders with a magic light for our most special nights

The supplies I will use are the following:

  • An open top container glass (to make these candle holders usually I use recycled glass jars)
  • white tissue paper
  • the big shot and a star die
  • 8”x10” Gelli Plate
  • a brayer
  • black acrylic paint
  • a stencil
  • extra heavy gel medium (gloss)
  • 2 paintbrushes
  • Facetten-Lack metallic platin Vica Deco
  • a makeup brush
  • Primary Elements of LuminArte
  • hairspray
  • wire and a candle

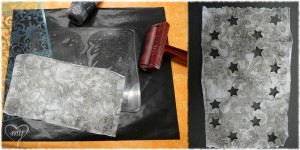
First of all we will start using the Gelli Plate: we will use the brayer to put the black paint over the stencil, then we will press the stencil over the gelli plate. With this step we can print the mark of the stencil over the gelli plate. Then we will take a piece of tissue paper, it must be large enough to surround our glass jar. And we put the tissue paper over the gelli plate to print the texture. With this step, the mark of the stencil will print in our tissue paper.

And with the Big Shot and the star die we will open a few holes in our piece of tissue paper.

Create a pattern with black ink and gelli plate over the tissue paper

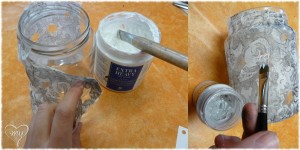
Then we will paste with extra heavy gel medium the tissue paper around our glass jar and we will leave it to dry. Then we will paint the holes with Facetten-Lack to give a touch translucent at the glass. For this step, also you can use any paint or paste that allows you to do this translucent effect.

Paste the tissue paper around the glass jar

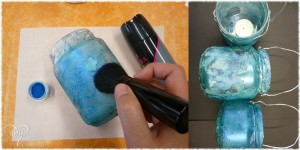
Once dried we can add the color. I will paint with the Primary Elements of LuminArte, I will use the pigment directly. First of all we have to spray the entire glass jar with hairspray, you will see how the jar is wet. Taking advantage of this dampness, we will catch the Primary Elements pigments (the color or colors that you want) with a makeup brush and we will paint with them making circles. When we run out of pigment or hairspray dries, we will go back to add more product to get the whole jar painted.

Finally, if we want to hang it somewhere, we only need to put some wire around the jar. And don’t forget to put the candle inside!

Painting with Primary Elements the whole glass jar

You will see that the result will be beautiful and shining: a candle holder with a magic light for our most special nights. The first time I used these candle holders was at my craft stop in the “Enchanted Night“, the shopping night from my city, and they produced an amazing shine!

Candle holders with a magic light for our most special nights

~*~*~*~*~*~*~*~*~*~*~*~*~*~*~*~*~*~*~*~*~*~*~*~*~

Sandra Parés loves working with mixed media! The colors and textures leave her amazed and she enjoys creating and getting their hands dirty with paint and gesso! On her site My mixed media you can find a mixed media online store, art and craft products, mixed media workshops in Spanish, tutorials, ideas and mixed media techniques.

~*~*~*~*~*~*~*~*~*~*~*~*~*~*~*~*~*~*~*~*~*~*~*~*~

.
.