Mixed Media Canvas – “Be Brave” Girl

~ * ~

This article and mixed media canvas was created by Melanie Statnick

1. Start with a blank canvas. I’ll be using a hard board canvas for more support. Cover the entire service with decorative tissue paper of your choice using Gel Medium. The paper creates great texture for this piece.

Printed tissue for canvas layering

2. After you’ve dried the tissue paper start covering the surface with white acrylic paint. Dry between layers of paint.

Printed tissue is covered with bright paints

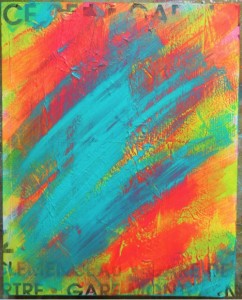
3. Start layering your background starting with the lightest paint colors first. Apply paint in a diagonal fashion using back and forth strokes with a med size brush.

Add more colours with diagonal strokes

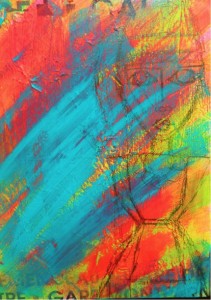
4. After your layers of paint have built a foundation as your background you’ll want to use an 8B graphite pencil to free hand sketch a character anywhere on your canvas.

Lightly sketch with graphite pencil

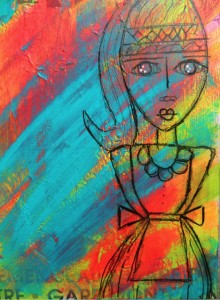
5. Next you’ll want to go over the pencil line using a black marker. I suggest a 1.2 mm.  Line the face and body. This will make your character stand out.

Define sketch with 1.2mm black marker

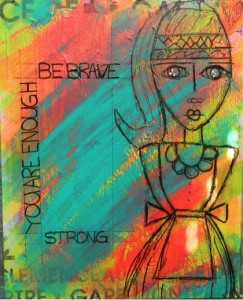
6. Using a ruler pick an open spot on your canvas to create a rectangular space to write. Using your black marker outline the rectangle twice creating blocks to write in words. Choose words that are inspiring to you.

Use ruler to add lines and words

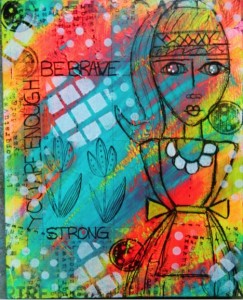
7. To complete the painting use stamps and stencils of your favorite and create the next layer to your back ground. In some spots you may want to layer over your character as you see here. Add details to your characters body face and clothing.  When using your stamps be sure to use permanent ink pad. I also suggest using lighter paint on a dark back ground when you stencil.

Stencilling and stamping add final touches to canvas

~*~*~*~*~*~*~*~*~*~*~*~*~*~*~*~*~*~*~*~*~*~*~*~*~

I’m a Canadian Mixed Media & Collage Artist out of North Carolina . I create art daily from my private studio. My artwork is fun and whimsy . I teach mixed media & Art Journaling online and in classroom. I hold mixed media workshops around the USA. My artwork can be found in art galleries and shops extensively in NC with international private collections. I have created my personal line of original stamps to purchase and use in your art. Look in my Etsy shop for my line.

Please visit my website to learn more about me and my work on Facebook.

~*~*~*~*~*~*~*~*~*~*~*~*~*~*~*~*~*~*~*~*~*~*~*~*~
.
Doing What you Love and Loving What you Do

~*~

This article is written by Stacy Steinborn

DO WHAT YOU LOVE, LOVE WHAT YOU DO…This quote has actually stirred controversy in the aspect of making a living and not making a living.  It is mostly interpreted in a thought of what you should do or not do to make money.   Whatever it is you do, you should love it.  The argument for some is, yeah, but you will most likely be broke. Living in Nashville Tennessee the music Capitol of the world, this city is full of thousands upon thousands of broken dreams and hungry musicians.   Now I can’t even begin to write about this argument.   I’m still figuring that one out.  However, I can look at this quote and read into it a little deeper.

Stacy Steinborn

But first, how I came to the conclusion of my interpretation.

As a creator of mixed media art, have you ever finished a piece and shown it to someone and they don’t really react like they like it. I truly feel some people just “don’t get” mixed media.  And I’ve simply come to the conclusion that, that’s okay.

This is a scenario that has happened to me on more than one occasion: At a gathering or function, a group will be talking and someone introduces you to an artist.  In the introduction they state that you do artwork as well.  Then you are questioned, what kind of art do you practice, what style of painting do you prefer? What do you use? And do you sale your art?  To answer these questions I usually say: mixed media, I guess my own style and, I have sold some pieces.  Then you are probed to show your work and you get out your phone show the other artist your pictures, and….crickets.  I find myself for a week or more after this scenario, questioning my talent, my ability, my work in general as an artist.  What an empty feeling to have when it comes to something I love so very much!

If you have ever had a doubt because of other opinions of your work, or because you are just not to the point that you are sure of yourself… I want to encourage you to think about you and your art in a new way.

That bookmark, painting, shadow box, frame, whatever you  have put your hands to do, to make; it has never existed before, not ever.   There may have been other things created like it or similar, you may have looked at something else for inspiration but that very thing you made is the only thing with the brush stroke you made, the glitter you sprinkled, the paper you added, whatever it is you do to your piece of art, it can never be duplicated.  It can never be done the exact same way again.

You are a creator.  You created something.

cre·a·tor   (kr-tr)

n.

1. One that creates

cre·ate   (kr-t)

tr.v. cre·at·ed, cre·at·ing, cre·ates

1. To cause to exist; bring into being. See Synonyms at found1.

2. To give rise to; produce: That remark created a stir.

3. To invest with an office or title; appoint.

4. To produce through artistic or imaginative effort: create a poem; create a role.

adj. Archaic Created.

What a great definition of you!

The next time an “artist” or the “art community” tries to snub, insult you or your work because your not in the right circle or are not up to their standards please read the above definition.  You my dear are amazing because you brought something into existence with your hands and your mind and it is here now.   Take joy in your creation!

This finally brings me to the quote, DO WHAT YOU LOVE, LOVE WHAT YOU DO.  Now think about it again.

DO WHAT YOU LOVE = If you love to paint in circles, in lines, sideways, cross-ways, glue everything but the kitchen sink to your painting, cut strips of paper, add salt to your watercolor, do image transfers, paint the same subject over and over, use stamps, whatever style it is that you use, and you love it…then DO it.

DO WHAT YOU LOVE! When it comes to creating YOUR piece of art…you are the only one who can decide if you love how you do it.  If you are passionate about it you will keep on working at it until you figure out what you love if your not there yet.

Now the second part to that quote.

LOVE WHAT YOU DO = If you have finished your work.  You owe it to yourself to love it. If your not in love with it, love the fact that you did it, you learned from it, even if its what not to do next time, love it.   Don’t let someone’s interpretation of your art become your interpretation of your art.  You did it, you LOVE it! Love your style, love your mistakes(this makes you grow, I promise) love your whimsy, love your boldness, love your subtleness, love the colors you put together, love the lines, love the stamps you chose to use, love your paint covered clothes, love it…love yourself!

If you’ve been struggling with your ability or your style, if its because you are still growing or you have been snubbed or insulted.  Remember three things..

You CREATE

DO WHAT YOU LOVE

LOVE WHAT YOU DO

Stacy Steinborn

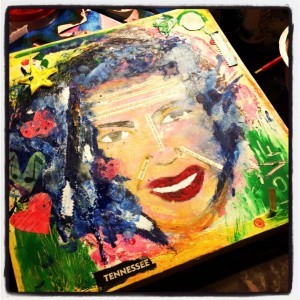
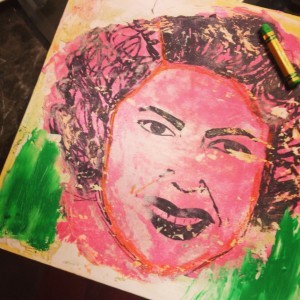
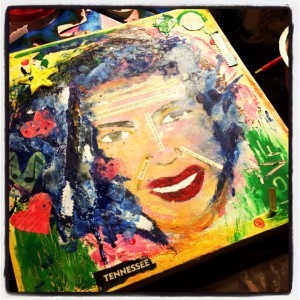
I’m closing with a painting that I created using an image transfer of a sketch I did with a sharpie on packing paper.  I used ephemera from an old love story from the thirties and the colors that make me think of the honky tonks in Nashville. I used a heavy gel medium and a stencil to make the star pop and added layers and scraped off layers until I had the texture I desired.   This lady looks as if she sang in the honky tonks of yesteryear and she was happy, because she did what she loved.

Stacy Steinborn

She has earned her laugh lines, her wrinkles from  her hurts and her worries.  She wore the stories of her life written on her face. But she smiled because she did what she loved.

Stacy Steinborn

I hope you are inspired to love what you do.

Flood your art with your inner light,

Stacy Steinborn


~*~*~*~*~*~*~*~*~*~*~*~*~*~*~*~*~*~*~*~*~*~*~*~*~

Stacy Steinborn lives in a little suburb outside of Nashville called Spring Hill TN in the USA. More of Stacy’s work can be found on her Flooded in Light blog.

~*~*~*~*~*~*~*~*~*~*~*~*~*~*~*~*~*~*~*~*~*~*~*~*~

.
.

Creating a Make-up Case with Image Transfer

~ * ~

This article is written by Cecilia Sanchez Peralta

The good thing about Mixed media techniques, is that you can use everything you have at your fingertips, and you can do all kinds of jobs.

A month ago, I launched my collection of digital stamps “Cecily Worlds”, a project I’ve been working a long time and will come out little by little.

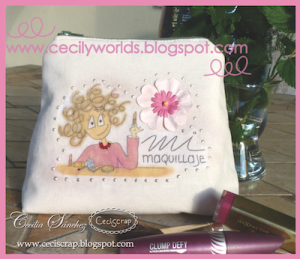
A Makeup case

Supplies:

Fabrics, digital stamp, printer, gel medium, beads, flowers, stickles, etc

Process

* First I used one of my digital stamps and paint it with photoshop. Then I printed as a mirror image to make the transfer.

* Then I searched several scraps of fabric and I cut the pieces to form my makeup case.

A Makeup case

* I put a generous layer of gel medium on fabric and over the printed image.

* Carefully I put the picture face down onto the fabric and pressed to stick it everywhere.

* Then let it dry for 24 hours. (You can also use a heat gun).

A Makeup case

* You must wet the paper with a sponge or “flus flus”
* You have to remove all paper using fingertips gently.
* At the end I decorated a little: A string of beads, some dots with Perfect Pearls, some Prima flowers with a brad … and everything you want.

A Makeup case

* Then I sewed the different pieces of fabric, I’ve lined and I put a zipper, and ready. Now I have my custom makeup case.

A Makeup case

A Makeup case

~*~*~*~*~*~*~*~*~*~*~*~*~*~*~*~*~*~*~*~*~*~*~*~*

My name is Cecilia Sanchez (CeciScrap) and I live in Málaga, Spain. I am married and we have three gorgeous sons. They inspire me every day with their crazy ideas.

In 2006, a few months after birth my twins, I discovered scrapbooking, digital first and then the traditional. I love to do 30X30 pages, cards and mini albums, and for a while now I am fascinated with the Art Journal and Mixed Media, and I do not imagine scrapbooking without getting my hands dirty.

I am inspired by everyday things, feelings … The art journal is a real diary for me, because sometimes I need to express feelings with colors and shapes.

I love learning and discovering new techniques and materials.

You can see more of me at: ceciscrap.blogspot.com.es or at www.facebook.com/ceciscrap

~*~*~*~*~*~*~*~*~*~*~*~*~*~*~*~*~*~*~*~*~*~*~*~*

.

.

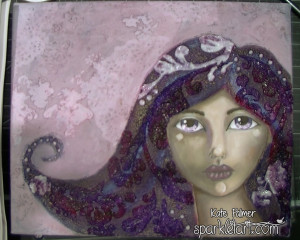
Creating Mixed Media Hair Tutorial

~ * ~

This article is written by Kate Palmer

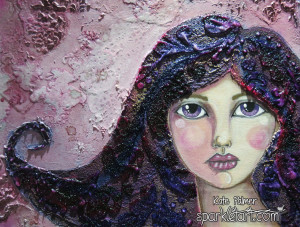
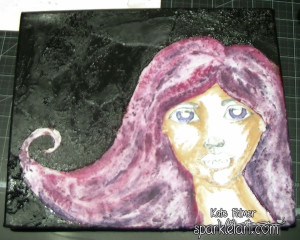
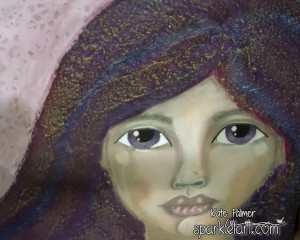
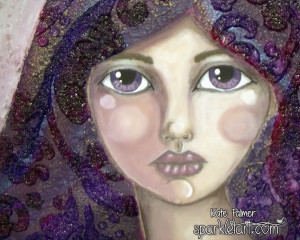
Today I’m going to show you how to create interesting Mixed Media hair with depth and texture.  You can use this technique on canvas or paper and it results in a project that you want to reach out and touch – to run your fingers over the pattern and surface (well I do any how!)

Mixed Media Hair

What I used:

  • Lindy’s Stamp Gang Products:
  • Magicals mixed with Gesso for pastel background – Cheshire Cat Cherry and Tea Pot Purple
  • Magicals mixed with Gel Medium for hair base – Cheshire Cat Cherry and Tea Pot Purple
  • Magicals mixed with water as ink – Cheshire Cat Cherry, Tweedle Dee Denim and Tea Pot Purple
  • Starburst sprayed over background for subtle shimmer – Cheshire Cat Cherry and Down the Rabbit Hole
  • Magicals mixed with acrylic paint for face – Cheshire Cat Cherry and Tea Pot Purple

Other Products:

  • Martha Stewart Gesso – white
  • Golden Mediums – Glass Bead Gel and Fiber Paste
  • Stencil Magic Stencil – Floral Accent
  • White pre-gessoed canvas

To Create the Mixed Media Hair:
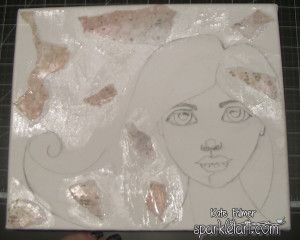
Sketch image onto your canvas
Mixed Media Hair

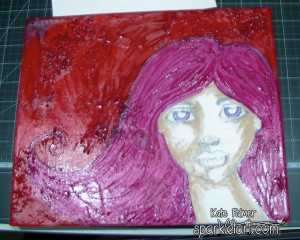
Colour the hair using Magicals (Cheshire Cat Cherry and Tweedle Dee Denim) mixed with Gel Medium to create a base layer.

Mixed Media Hair

I applied the cherry all over the hair and then added the denim to darken.

Mixed Media Hair

Once the base layer is dry, cover hair with texture paste, making sure to create loads of peaks and valleys as these will catch the colour and shimmer of subsequent layers.

Mixed Media Hair

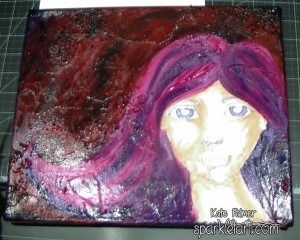
Once the texture paste is dry, mix Magicals (Cheshire Cat Cherry and Tea Pot Purple) with water to create a sparkly ink and apply over the hair, make sure to be heavy handed and allow the mica to settle into the valleys in the texture paste and allow to dry thoroughly.

Mixed Media Hair

Using your finger apply a light layer of Inka Gold to the high points created by the texture paste, this picks up the texture and breaks up the colours underneath a little.

Mixed Media Hair

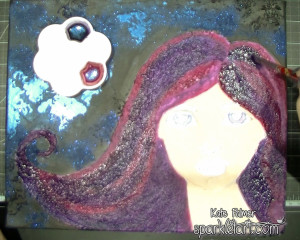
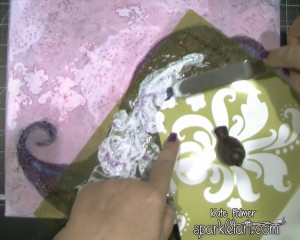
For the final step, you will need some Glass Bead Gel and a bold stencil.  Protect the face and apply the bead gel through the stencil onto the hair.

Mixed Media Hair

You will need to allow each section of bead gel to dry before applying the next.

Mixed Media Hair

Once dry, the bead gel takes on a wonderful glossy appearance and the clear beads pick up the colours from underneath and enhance the sparkle.

Mixed Media Hair

I really adore how this turned out, the hair in real life is truly a show stopper!
Kate

~*~*~*~*~*~*~*~*~*~*~*~*~*~*~*~*~*~*~*~*~*~*~*~*~

Kate Palmer though perhaps better known as Sparkle Tart loved playing with mixed media and techniques.  Most of her work incorporates sparkly media of some sort, which is used on journal pages, canvases, scrapbooks or hand made cards.

You can see more of Kate’s work at Sparkle Tart or via Facebook – Keep It Simply Sparkly

~*~*~*~*~*~*~*~*~*~*~*~*~*~*~*~*~*~*~*~*~*~*~*~*~

.
.