Encaustic Basics Part III – Adding Collage and Embedding Objects

This article is written by Elaine Brady Smith  

Welcome to Part III of Encaustic Basics Series on how to make it easy and economical to get started with encaustic painting. This article is about adding collage and embedding objects to your encaustic art. Adding collage with encaustic has always seemed like a natural practice to me. It is as though beeswax and paper were made for each other. Encaustic wax gives paper a luminous quality and sometimes makes it transparent, which is great for layering. Let’s get started!

Adding Collage

Collage is my all-time favorite medium and I love working with all types of paper. There are multiple ways to add collage paper to encaustic work and I will discuss two that work best for me. You can follow along as I build a collage piece in this article. I recommend you read the first two articles of the Encaustic Basics Series before you attempt the techniques in this article. You can find Part I and Part II to review them both.

Encaustic collage by Elaine Brady Smith

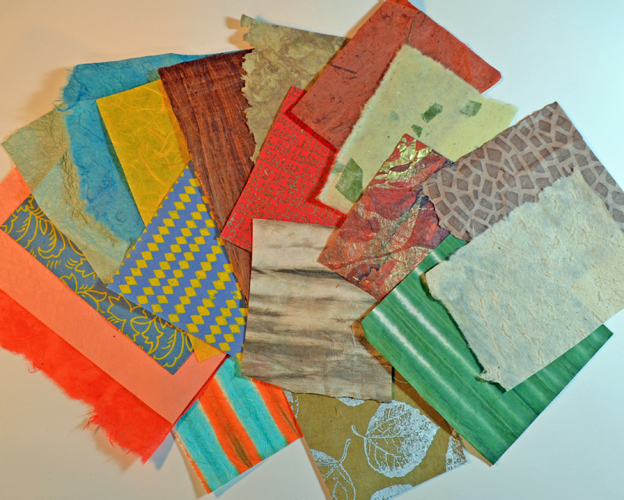
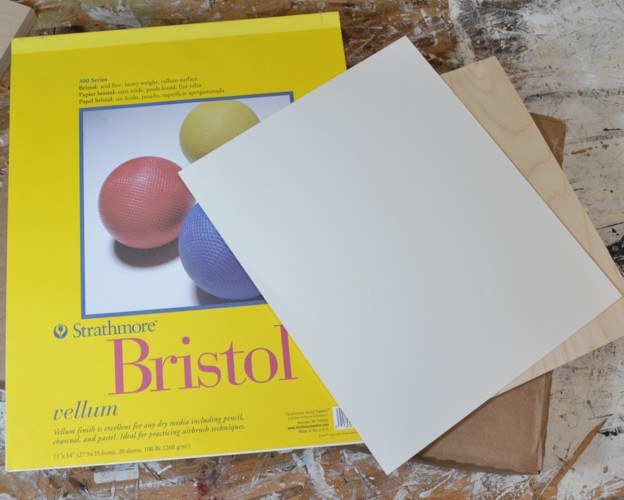
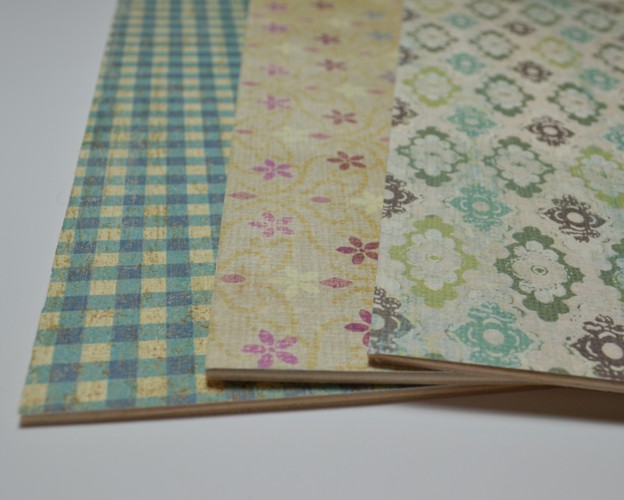
First let’s talk about the paper itself. Handmade papers such as Japanese mulberry or washi, Lokta, lace papers, your own handmade pulp papers, and other natural fiber handmade papers are perfect for encaustic collage. There are many sources to purchase handmade paper in art and stationery stores. Here are a few of my favorite online ordering sites:

Encaustic collage by Elaine Brady Smith

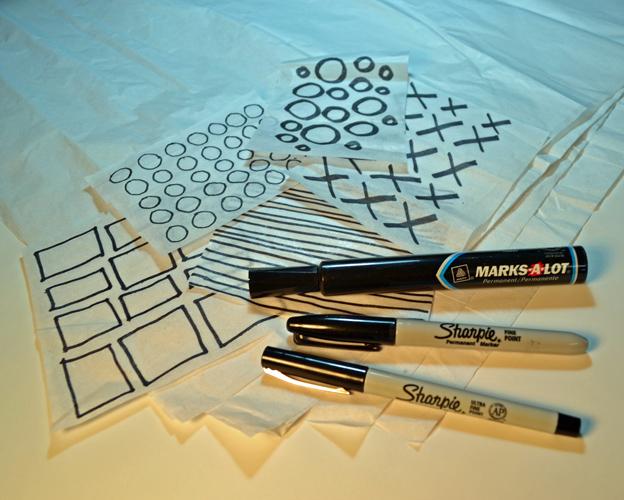
You are certainly not limited to handmade papers for encaustic collage. Tissue paper is a good and inexpensive alternative, whether it is white, colored, or printed. You can build up many transparent layers with tissue paper and incorporate your own marks by drawing or writing on it before you add it to your art. I’ve also known artists who print on tissue paper by running it through their printers on a carrier page, but I have not tried this yet. If you have, let me know how it works!

Encaustic collage by Elaine Brady Smith

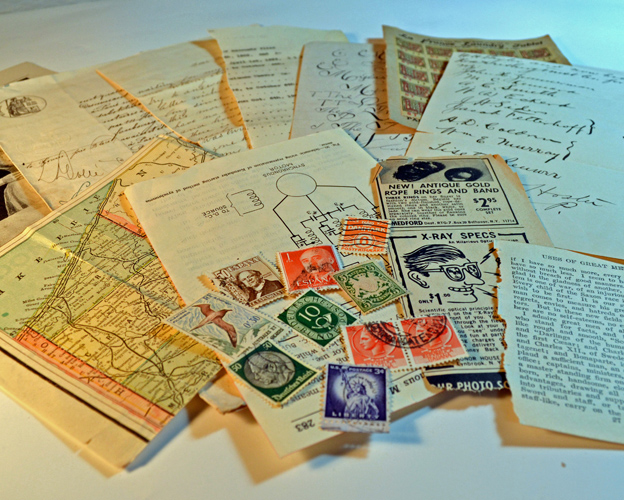
You may also have a stash of vintage papers such as old letters, postage stamps, book pages, or newspapers. I love using old handwritten letters in my art. One note of caution with vintage paper though, is that some older inks will run when dipped into encaustic wax. So it is best to test before you use it. Also wax will make most papers transparent, so whatever is printed on the back side will show through to the front side once it is waxed.

Another great item to use for encaustic collage is printed paper napkins. Just be sure to remove the white backing layers before using them in your art. It is best to just lay the napkin pieces down and fuse right on your surface, rather than a pre-wax method.

Any paper that you use should be absorbent and porous. Some glossy or coated papers, like magazine pages, waxed paper, cook’s parchment, and scrapbooking vellum might not be compatible with encaustic. It is a good idea to test papers with wax before adding to see how they react. One of the cool things about encaustic collage is that if you change your mind, you can always heat and remove a piece of collage from your art and replace it with something else. If you lift it carefully, the collage paper you remove is preserved, and you can reuse it again on another piece. To me this is a beautiful thing!

Methods for Adding Collage

Tacking Iron Method:

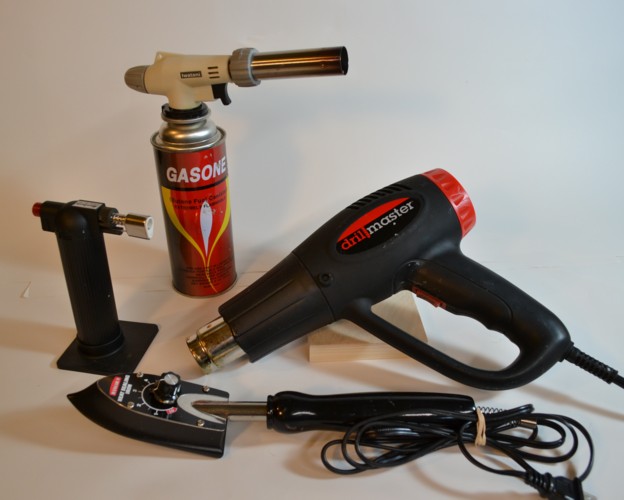
If you have a tacking iron and want to dedicate it to your encaustic work, it is a great tool to add and fuse collage papers in one step. A smaller version of the tacking iron is the Clover Iron, which works well for adding small pieces of collage paper. The tacking iron should have a temperature control, which should be set to about medium heat. Since the settings will vary on different irons, you should test the iron before using it on your art. Set it to just melt the wax, but not too hot that it will make the wax smoke.

Encaustic collage by Elaine Brady Smith

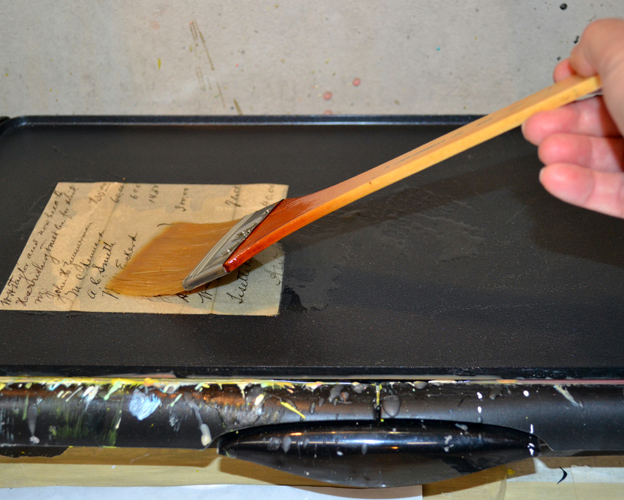
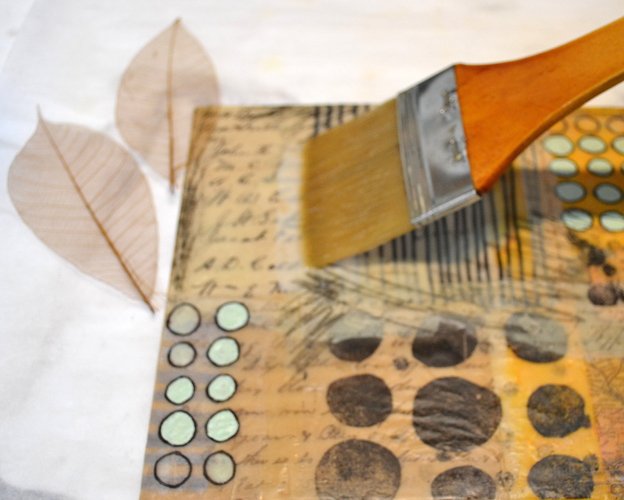
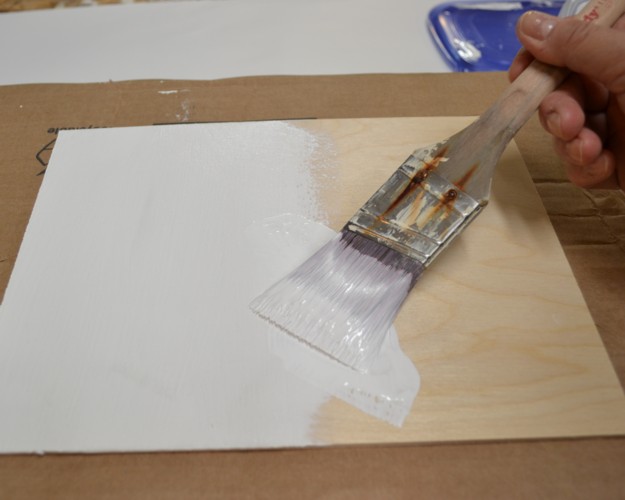
To pre-wax a piece of collage paper for the Tacking Iron Method, place the paper on your palette or griddle. Brush on a thin layer of clear encaustic medium.

Encaustic collage by Elaine Brady Smith

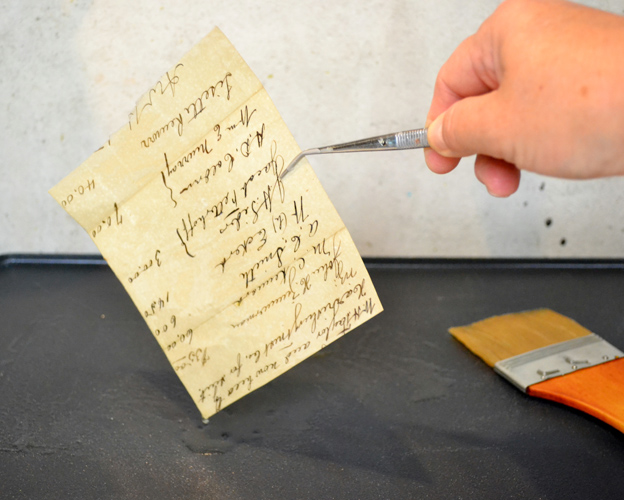
Pick the paper up with a pair of tweezers, and allow excess wax to drip off. It will begin to cool immediately and the wax will harden quickly.

Encaustic collage by Elaine Brady Smith

When the pre-waxed collage paper is cool, place it on the surface of your art. With a preheated tacking iron, gently iron the piece into place. Once the wax melts under the tacking iron, the collage piece will be fused. Remove the iron and allow the area to cool.

Encaustic collage by Elaine Brady Smith

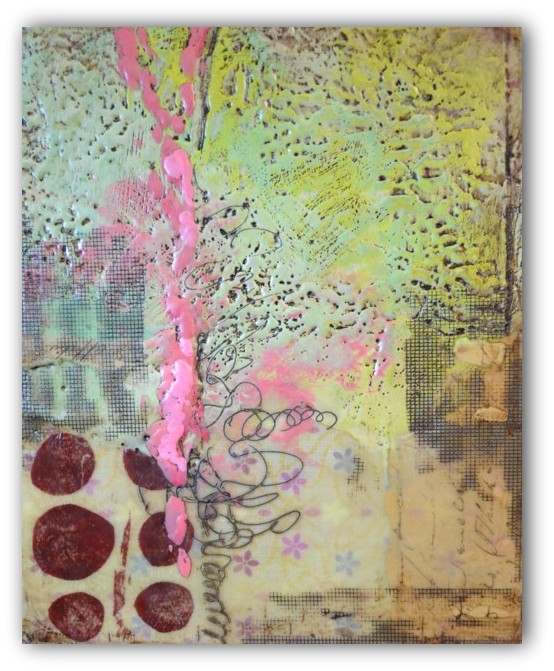
The process of using the tacking iron automatically fuses the wax layers, so there is no need to add any additional heat source. I have added several pieces of vintage handwritten letters and white tissue papers printed with Sharpie Markers.

Encaustic collage by Elaine Brady Smith

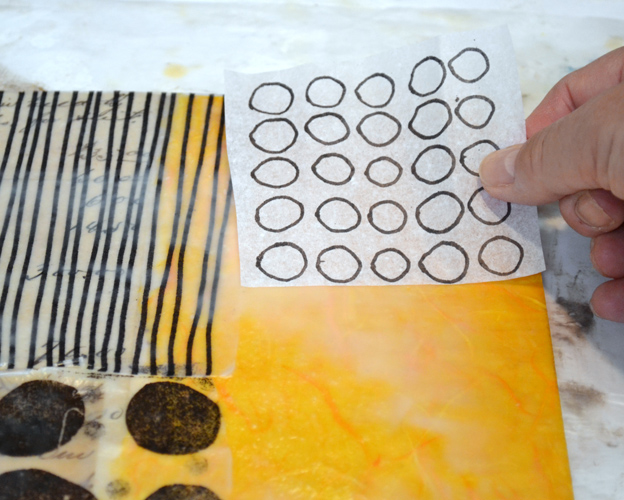
Some very thin papers, like tissue paper may not need to be pre-waxed if you already have a primer layer of wax on your art. Just lay the tissue onto your surface and use the tacking iron to fuse it into place. Once the wax cools, you can add more collage layers to your piece, overlapping them as you go.

Heat Gun/Metal Palette Knife Method:

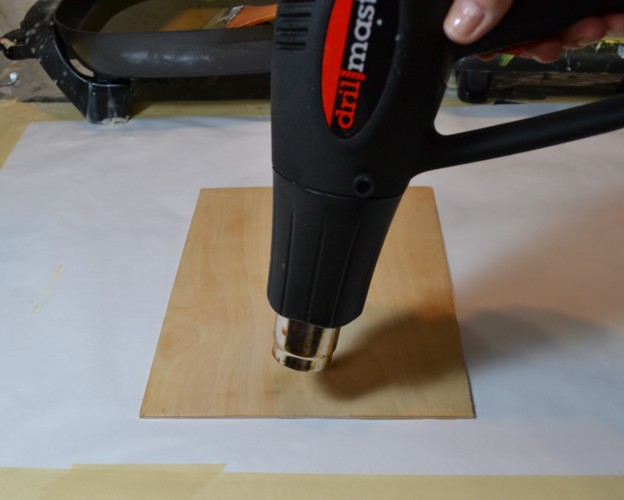
I have a tendency to work with as few tools as possible, so I have put aside the tacking iron these days and started using the Heat Gun/Metal Palette Knife method for adding collage layers to my work. I like it so much more for the simple reasons that I am using less electricity; have fewer tools on my work table and I have more control over how the collage pieces are applied.

Encaustic collage by Elaine Brady Smith

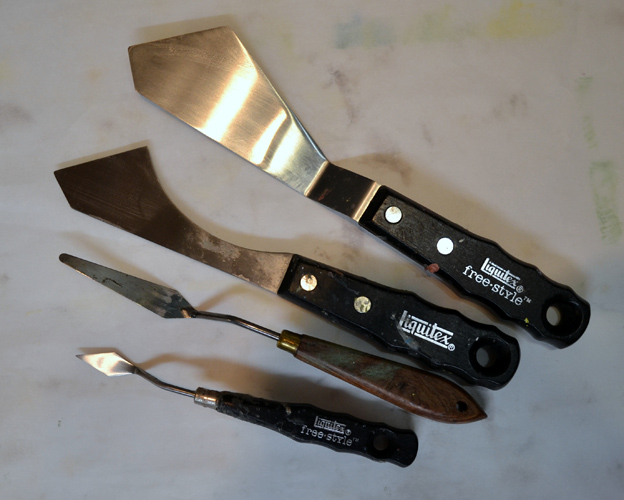
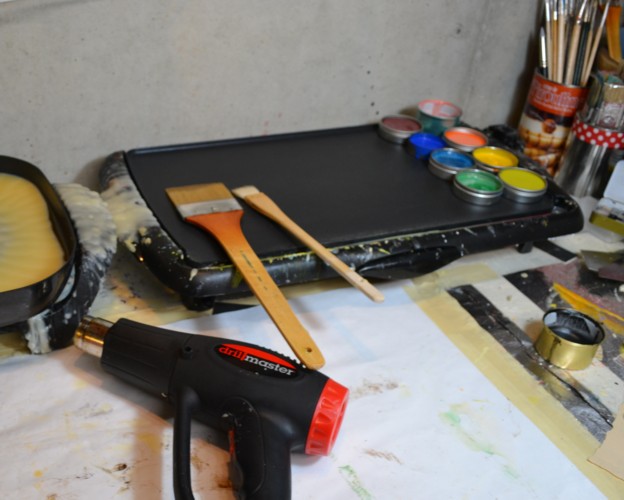
Use metal palette or painting knives for this method. Shown is a selection of my favorite palette knives that I use for encaustic collage.

Encaustic collage by Elaine Brady Smith

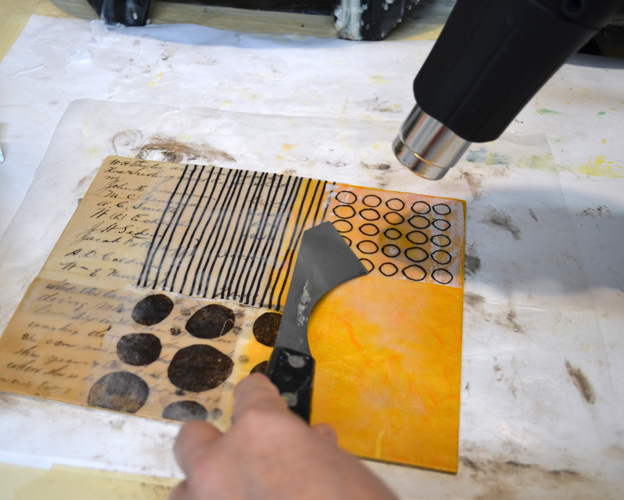
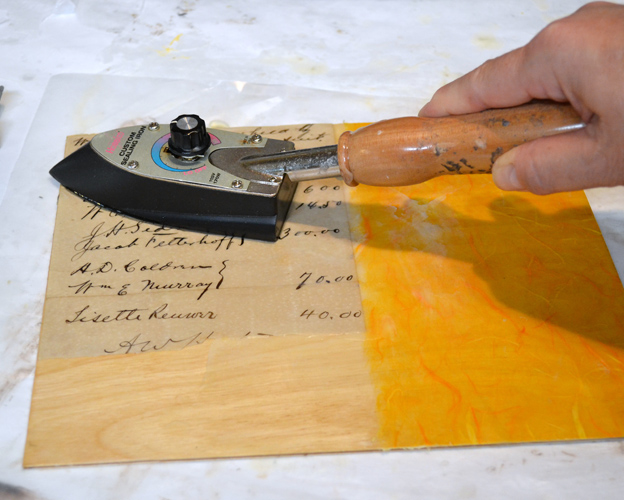
Pre-wax your collage pieces in the same way as the Tacking Iron Method on your hot palette. Place them on your surface and with the palette knife in one hand; use it to hold the collage piece in place. With the heat gun in your dominant hand, fuse the collage piece into place.

Encaustic collage by Elaine Brady Smith

As you are fusing, smooth out the collage piece with the palette knife. Note that this does take some practice, but is not so difficult that you cannot master it after a few tries.

Encaustic collage by Elaine Brady Smith

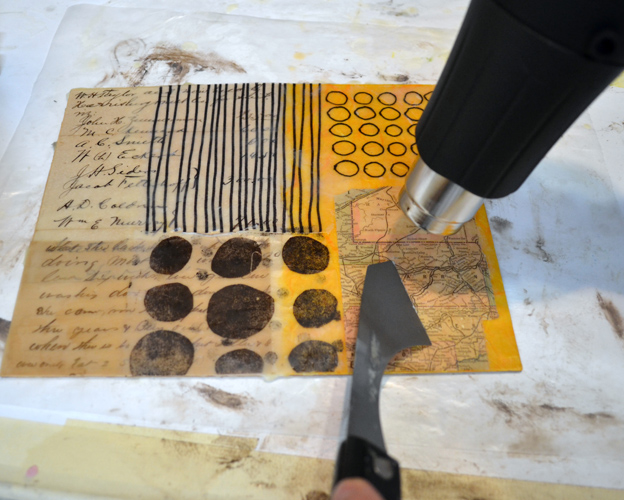
Use a smaller palette knife to smooth the collage piece down, scrapping off excess wax, and easing out air bubbles before the wax cools. I like to use a combination of large and small palette knives for this technique.

Once you discover adding collage to encaustic art, you will love the endless possibilities for adding paper to your work. As another alternative, you can also add non-synthetic or natural fiber fabrics to encaustic art. Natural fabrics like cotton, muslin, and silk work well with encaustic wax. The possibilities for printing and mark making on fabric is as limitless as it is with paper, but I’ll save that topic for another article.

Embedding Objects

Encaustic collage by Elaine Brady Smith

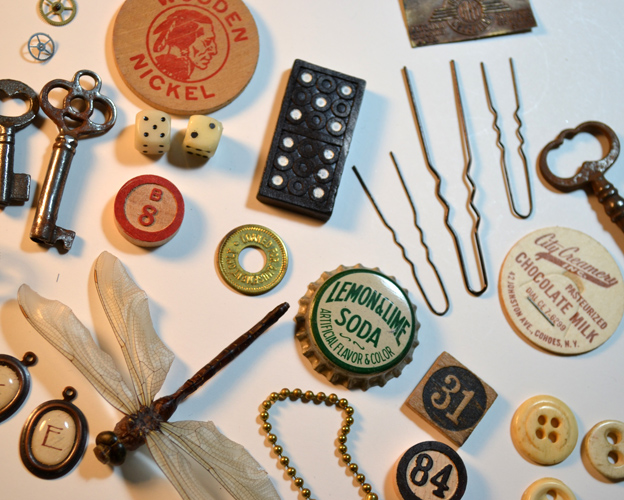
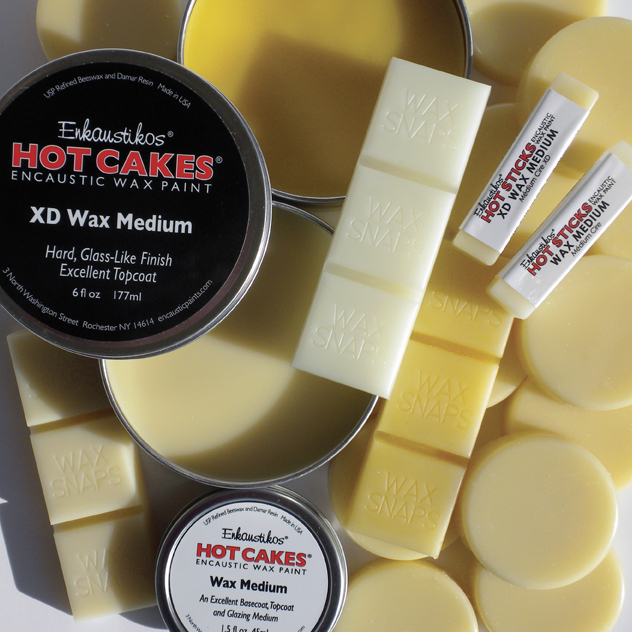
Encaustic wax is great for embedding three dimensional objects to your art. Some objects to add might be buttons, game pieces, jewelry pieces, and natural plant materials. Shown above is a variety of items I might want to embed in an encaustic piece. Encaustic wax offers great opportunities to include items in your work and preserves them literally for lifetimes.

Encaustic collage by Elaine Brady Smith

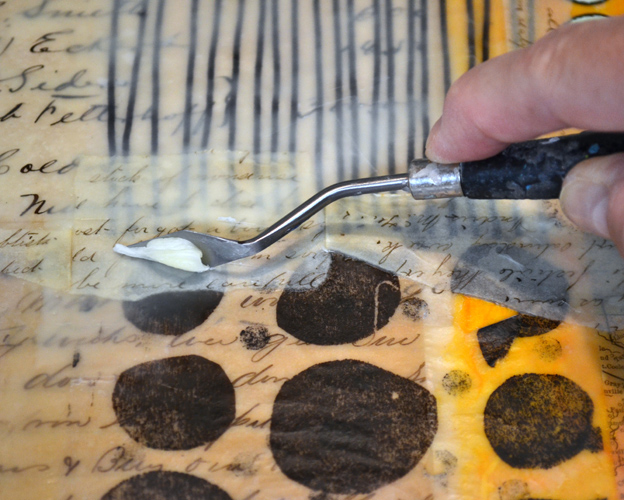
To add objects, brush a small puddle of encaustic medium to the area on your art where you’d like to place the object. Heat the puddle just before you add your object.

Dip your object into the encaustic medium and lay it on your hot palette to allow some of the excess wax to drip off. You can skip this step if your object cannot sustain the heat of the palette, or if you feel you do not need to pre-wax your object.

Encaustic collage by Elaine Brady Smith

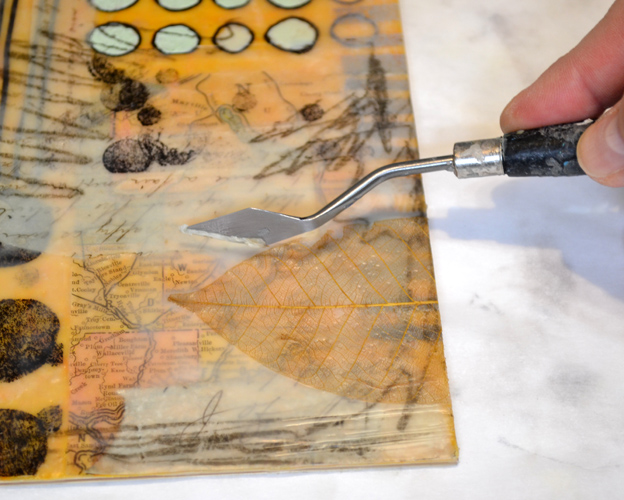
With a pair of tweezers, pick up the object and place it on the wax puddle on your surface. If your object is solid, give it a slight push into the warm wax to embed it in the surface. Fuse the area with a heat gun. If needed, with a small natural bristle brush, add more encaustic wax around the edges of the object to fill in any holes or gaps. I have added two skeleton leaves, which did not need pre-waxing, but I did add a thin layer of wax over top of each leaf before fusing. After the wax was cool, I scraped some wax off to reveal the lovely nature of the leaves.

The wax may sometimes appear cloudy when you are building layers to embed an object, but it should clear up as it cools. If it does not clear up to your liking or if you feel there is too much wax around your object, use a small palette knife to scrape away some of the wax and fuse again to smooth out any gouge marks.

You can still add encaustic paint or collage on top of objects if you’d like. I usually add objects as a final step, but it really depends on what your preferences are for your own work.

Encaustic collage by Elaine Brady Smith

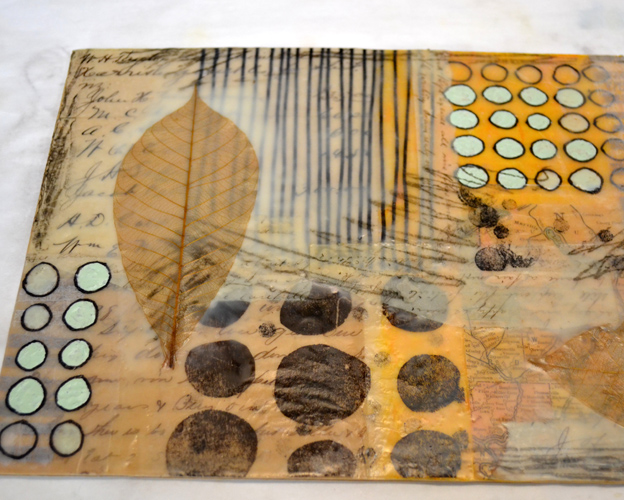
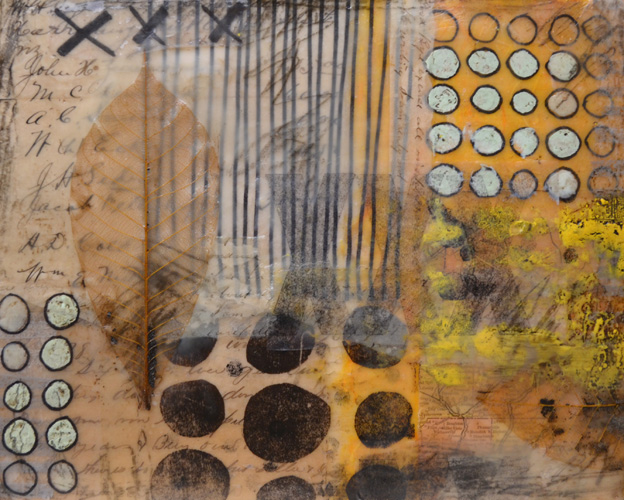
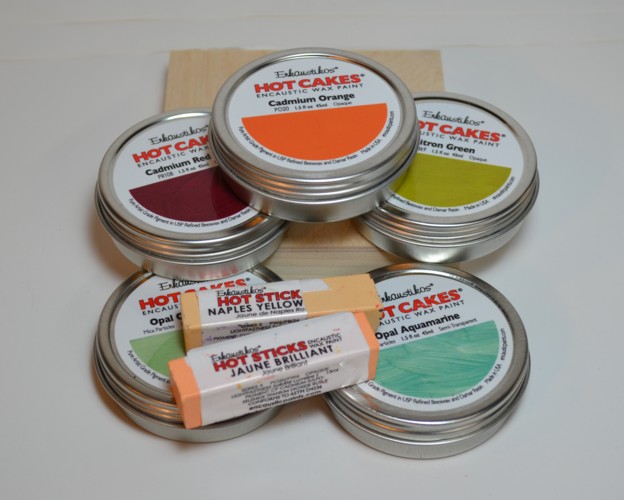
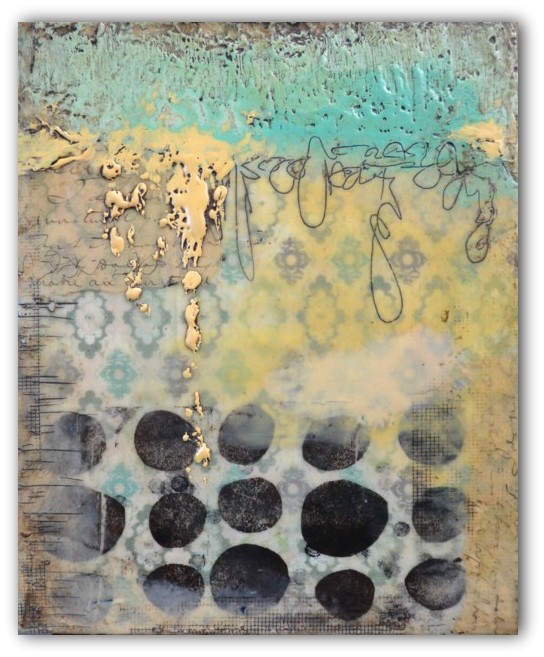
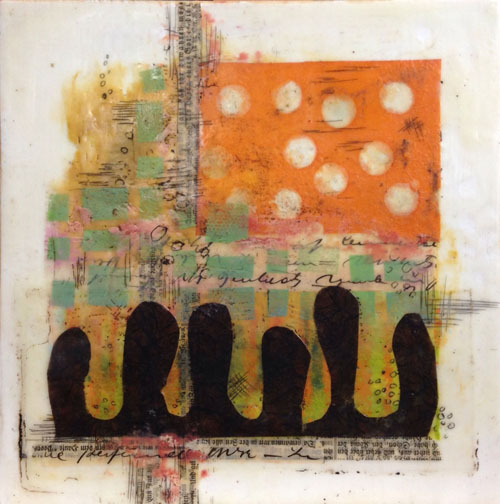
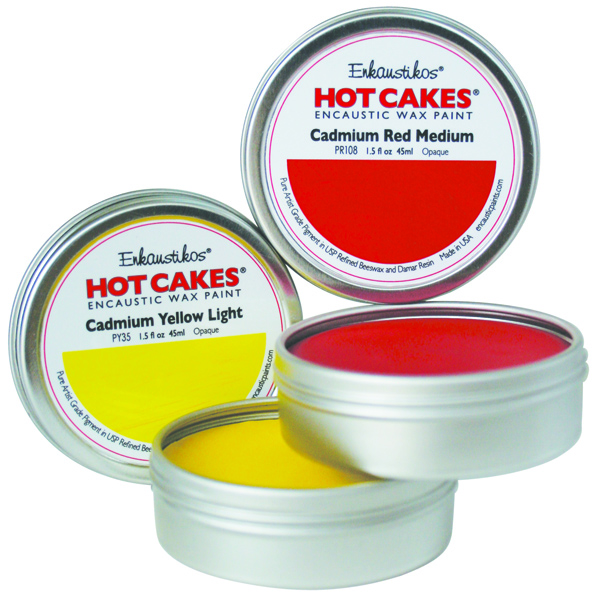
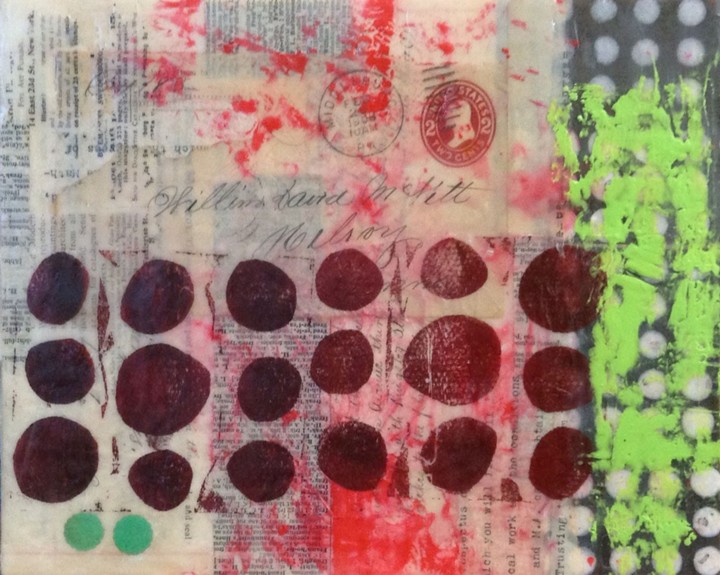
I continued to work my piece by adding some brighter colors with encaustic paint. I used Enkaustikos Hot Sticks Encaustic Wax Paint, Cadmium Yellow Medium on the right and Cobalt Blue Light, in the center of the black circles with a small brush. I also added some transfer lines around the perimeter of the piece with graphite paper. Once these additions were made, I lightly fused the whole piece.

Encaustic collage by Elaine Brady Smith

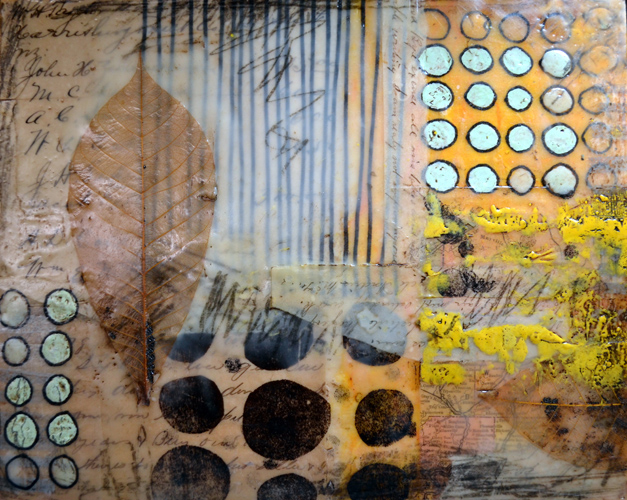
I still felt like there was something else needed on this piece, and after studying it for a while, I decided to add 2 sets of black x’s (Sharpie on white tissue paper in top left and stamped x’s on white issue paper with permanent ink in center) to balance the dark areas. Below is my finished piece.

Encaustic Basics Part III-Adding Collage and Embedding Objects. Learn how to add collage and assemblage items to your encaustic art.

You should now have enough information to get you started in encaustic painting. I have found this medium to be inspiring and exciting. I believe that if you practice these techniques, you will become more creative in encaustic painting. I will be writing additional articles here in the coming months about some of my favorite encaustic techniques. You can also visit my website, where I will be sharing more information about encaustic and mixed media painting.

Thanks for your interest!

~*~*~*~*~*~*~*~*~*~*~*~*~*~*~*~*~*~*~*~*~*~*~*~*~

Elaine Brady Smith loves creating encaustic and mixed media art. Key ingredients in her work are vintage papers and hand printed collage papers made with repetitive marks, simplistic shapes, and transparent layers. She also enjoys other art mediums, such as art journaling, oil painting, and colored pencil drawing. Among her other interests are writing, teaching and spending time with her family. Find more on her website: elainebradysmith.com and on Facebook: Elaine Brady Smith Art

~*~*~*~*~*~*~*~*~*~*~*~*~*~*~*~*~*~*~*~*~*~*~*~*~

Encaustic Basics Part II: Preparing Substrates, Fusing, Adding Color

This article is written by Elaine Brady Smith

Welcome back to the Encaustic Basics Series!!! This is Part II, on how to make it easy and economical to get started with encaustic painting. If you missed Part I, click here. In this article we will talk about how to prepare your substrates, fusing, and adding color to your work. So let’s get started!

Preparing Substrates

Encaustic wax will adhere to a variety of surfaces. It is important that the surface is absorbent and porous or it will eventually crack and flake off. So glass, plastic, smooth metals, and any surfaces painted with acrylic paint are not suitable for encaustic. I will be using ¼” birch plywood for the demo pieces in this article that I purchased from Dick Blick.

Encaustic Basics-Part II-How to do encaustic painting. Learn how to prepare your substrates, learn how to fuse, and how to add color to your encaustic paintings.

If you are doing 2 dimensional works, some good choices for substrates are: Birch Plywood, Regular Plywood, Unfinished Pine, Un-tempered Masonite, MDF, and Cradled Panels. When choosing your substrate, make sure that it has not been previously treated with any oils or chemicals. Once you decide what type of work you want to do, spend some time researching what substrate will best suit your needs.

Encaustic Basics-Part II-How to do encaustic painting. Learn how to prepare your substrates, learn how to fuse, and how to add color to your encaustic paintings.

To prepare your substrate, encaustic medium or plain beeswax can be applied directly to most unfinished wood. If you are doing a painting, preparing the surface with a ground of encaustic gesso will enhance and give brighter color results. R & F Encaustic Gesso is my go-to product for surface preparation for an encaustic painting. It is easy to apply and gives me a solid white background. It is important to know that regular gesso made for acrylic and oil painting does not work with encaustic painting. Encaustic gesso has a “higher proportion of solid to binder, making it highly absorbentR&F Paints.

If I plan to do a collage piece that will eventually be covered with paper, I don’t bother with the gesso, I just work on the raw wood. Also, as an alternative to encaustic gesso, you can glue any type of absorbent paper to your surface to serve as a ground. Bristol paper is a good choice for a white, smooth, consistent surface.

Encaustic Basics-Part II-How to do encaustic painting. Learn how to prepare your substrates, learn how to fuse, and how to add color to your encaustic paintings.

Steps for gluing paper to your board:

  1. Lightly sand your board and wipe away any dust particles.
  2. Cut your paper slightly larger than the size of the board.

Encaustic Basics-Part II-How to do encaustic painting. Learn how to prepare your substrates, learn how to fuse, and how to add color to your encaustic paintings.

  1. Brush an even layer of glue on to the board and on to the back side of the paper.
  2. Lay the glue side of the paper onto the board and brayer down to make even contact, smoothing out any air pockets.
  3. Place the board upside down on a sheet of wax paper and wipe away excess glue with a damp paper towel.

Encaustic Basics-Part II-How to do encaustic painting. Learn how to prepare your substrates, learn how to fuse, and how to add color to your encaustic paintings.

Encaustic Basics-Part II-How to do encaustic painting. Learn how to prepare your substrates, learn how to fuse, and how to add color to your encaustic paintings.

  1. Weight the board with a heavy object. I have inserted a thin piece of Masonite board (shown in photo above) between my boards and the books…my heavy object, to evenly distribute the weight.
  2. Allow to dry overnight.
  3. Trim excess paper from the edges with an x-Acto knife or single edged razor blade.
  4. Sand the sides of the board to remove dried glue.

In the photos above I have used 100lb Bristol Vellum Paper and white glue. You can also use gel medium or PVA as your glue, just make sure that your paper is evenly covered with glue and that none gets on the surface of your paper.

Encaustic Basics-Part II-How to do encaustic painting. Learn how to prepare your substrates, learn how to fuse, and how to add color to your encaustic paintings.

If you’d like a patterned background, you can glue collage paper directly to your board. This is a good way to add heavier papers that might be difficult to attach with wax. Shown above are boards that I have prepared with heavy weight scrapbooking paper. This is also an excellent way to incorporate drawings or artwork as background to your piece. Just make sure they have not been painted with any acrylic paint.

Note that the paper will absorb whatever glue you use, so be mindful that glue might seep through your paper if it is too thin or between cracks of adjoining pieces. If it is a lighter weight paper, don’t bother with glue; just attach it to the board with wax.

Another note about using paper with encaustic is that the wax will make many papers transparent or darker, so it is best to test before you start! We’ll talk more about adding collage paper to encaustic work next month in Part III of this series.

Fearless Fusing!!!

You should begin your painting with a primer layer of wax on your substrate regardless of what type of ground you chose. The layers of wax cool very quickly as you add them and will remain individual layers, one on top of the previous one until you fuse them together. It is necessary to fuse each and every layer to make it one with the previous layer. This may seem tedious at first, but after a while, you will begin to enjoy the Zen-like practice of fusing.

Encaustic Basics-Part II-How to do encaustic painting. Learn how to prepare your substrates, learn how to fuse, and how to add color to your encaustic paintings.

Fusing is the process of adding a heat source to the surface so the wax melts enough to bond with the layer beneath. It is possible to fuse very large areas with a heat gun or acetylene torch, and it is possible to fuse very small areas with a small butane torch or mini quilt iron. As you practice with different heat sources, you will begin to know which heat source you prefer and which to use for various techniques. In the photo above, I am showing the heat sources I use most often. I generally prefer a heat gun because of the amount of collage paper I use in my work. I don’t want any of it to catch on fire!

Encaustic Basics-Part II-How to do encaustic painting. Learn how to prepare your substrates, learn how to fuse, and how to add color to your encaustic paintings.

Steps for adding primer layers and fusing with a heat gun:

  1. Melt encaustic medium or plain beeswax directly on your heated palette or in a clean tin can.
  2. With a natural bristle brush, dip into the medium and paint an even layer onto your board. This should also be done on top of a collage paper ground. 2-3 layers are sufficient as primer for a painting. You will get the feel for how many layers are needed, depending on what techniques you plan to use next.
  3. Point the heat gun 4-6 inches away and perpendicular to the surface (depending on the air flow of your heat gun). Move it slowly across the surface until you see a slight shine on the wax. When you see the shine, move the gun nozzle on to the next area.
  4. Be careful not to heat too long in one spot, as this will cause the wax to spread and create bare spots on your surface. I recommend using your heat gun on the lowest setting until you get used to the process.
  5. When the shine disappears and the wax is dull again, your piece is cool enough to brush on another layer of wax and fuse again.
  6. Fusing takes practice, so don’t become discouraged if your first attempt isn’t perfect. And don’t be afraid to try all the types of heat sources, so you know what you will like! I know many artists who love the big acetylene torch!

Encaustic Basics-Part II-How to do encaustic painting. Learn how to prepare your substrates, learn how to fuse, and how to add color to your encaustic paintings.

And Finally – Adding Color!!!

Adding color to your work is the beginning of the real fun! In addition to adding color with collage papers, encaustic paints are available in readymade cakes. I recommend Enkaustikos brand pigment cakes, as they are affordable, good quality encaustic paints with a large variety of colors.

Encaustic Basics-Part II-How to do encaustic painting. Learn how to prepare your substrates, learn how to fuse, and how to add color to your encaustic paintings.

You can heat the pigment cakes in a tin on your palette, or if you only need a small amount of paint or want to mix colors together, melt the paint right on the palette. The pigment colors can also be thinned with encaustic medium to make glazes.

Use a natural bristle brush to apply the color to your piece. Once you use a brush for a particular color, it is best to dedicate the brush to that color, as it is difficult to completely clean wax from brushes.

Encaustic Basics-Part II-How to do encaustic painting. Learn how to prepare your substrates, learn how to fuse, and how to add color to your encaustic paintings.

Encaustic Basics Part II: Preparing Substrates, Fusing, Adding Color

Encaustic Basics-Part II-How to do encaustic painting. Learn how to prepare your substrates, learn how to fuse, and how to add color to your encaustic paintings.

Steps for adding encaustic paint to your work:

  1. Brush on the melted encaustic paint with a flat natural bristle brush.
  2. Fuse the paint to the surface.
  3. Add more of the same color or add another color to the surface.
  4. Fuse this layer to the previous layer.

You will notice as you fuse multiple colors, you will be able to use the heat gun to move the wax around to blend them and create new colors. This is the fun and unpredictable nature of encaustic painting.

Here are the three boards I started earlier with scrapbooking paper. They may or may not be finished. I never really know until I look at them for a while! I’ve added more collage paper, encaustic paint, and an incised line technique. Let me know what you think.

Encaustic Basics-Part II-How to do encaustic painting. Learn how to prepare your substrates, learn how to fuse, and how to add color to your encaustic paintings.

Encaustic Basics-Part II-How to do encaustic painting. Learn how to prepare your substrates, learn how to fuse, and how to add color to your encaustic paintings.

Encaustic Basics-Part II-How to do encaustic painting. Learn how to prepare your substrates, learn how to fuse, and how to add color to your encaustic paintings.

So I have given you a lot of information, but these instructions are by no means the whole ball of wax (no pun intended!). There are many more techniques to discuss, but you can see that getting started is very simple. It is not beyond your reach to learn encaustic painting. I will keep sharing information here and on my blog www.elainebradysmith.com about encaustic painting and some of my other favorite mixed media techniques. Next month in Part III of the Encaustic Basics series, we will discuss adding collage and embedding objects to your work. So until then, go play and have fun with encaustic painting!!!

~*~*~*~*~*~*~*~*~*~*~*~*~*~*~*~*~*~*~*~*~*~*~*~*~

Elaine Brady Smith loves creating encaustic and mixed media art. Key ingredients in her work are vintage papers and hand printed collage papers made with repetitive marks, simplistic shapes, and transparent layers. She also enjoys other art mediums, such as art journaling, oil painting, and colored pencil drawing. Among her other interests are writing, teaching and spending time with her family. Find more on her website: elainebradysmith.com and on Facebook: Elaine Brady Smith Art

~*~*~*~*~*~*~*~*~*~*~*~*~*~*~*~*~*~*~*~*~*~*~*~*~

.

.

Basic Encaustic – Part 1: FAQ’s about Encaustic Painting

~ * ~

This article was written by Elaine Brady Smith 

A lot of people are fascinated by encaustic painting. I meet so many that say…”oohh, I’ve always wanted to learn how to paint in encaustic!” And I love to hear that kind of enthusiasm for this medium. However, getting started in encaustic painting can seem like a daunting task, especially when you don’t even know yet if you will like it or not.

I’d like to help take the mystery out of “getting started” with encaustic painting and show you how to gather tools and equipment in an easy and economical way in this 3 part series. Yes, there is a lot of information to relay, but I want you to be thoroughly informed so you will have fun with this exciting medium. Here is what will be included in each of the articles:

  1. July – Encaustic Basics-Part I-FAQs about Encaustic Painting
  2. August – Encaustic Basics-Part II-Preparing Substrates, Fusing Methods, Adding Color
  3. Sept – Encaustic Basics-Part III-Adding Collage and Embedding Objects

Learn how to do encaustic painting. Learn how to paint with beeswax. Set up your own encaustic studio and learn the basics of getting started in encaustic painting.

What Does Encaustic Mean?

“The word encaustic originates from the Greek word enkaustikos which means to burn in, and this element of heat is necessary for a painting to be called encaustic.” Wikipedia.com

Encaustic painting is an extremely versatile medium with techniques and styles that are as individual as the artists who use them. There are numerous techniques to use in encaustic painting that can produce a wide range of results from a smooth flat finish to very textural surfaces. Encaustic can also be used to add collage and assemblage elements to your work and surprisingly it is also a superb sculpting medium. I am always amazed at how different artists approach encaustic with similar techniques and get such varied results. It’s really incredible!

There are many artists using plain beeswax for collage art and that is perfectly okay provided it is done on a stable surface and fused properly. I will be discussing “encaustic painting” here, which uses a medium made of beeswax and damar resin and the paint (color) made from encaustic medium and powdered pigments.

Learn how to do encaustic painting. Learn how to paint with beeswax. Set up your own encaustic studio and learn the basics of getting started in encaustic painting.

What is Encaustic Medium?

Encaustic medium is made with beeswax melted with Damar resin. I usually purchase refined beeswax and Damar resin from Swan’s Candles to make my own medium.

The ratio between the beeswax and damar resin can be 5:1 up to 10:1. I prefer the 5:1 ratio for hardness and shine factor. It is not recommended to ever use bleached beeswax for encaustic painting. And if you have a local beekeeper who can supply you with beeswax, that is fine to use too. Just know that there will still be a good amount of pollen suspended in the beeswax, which acts as a pigment and darkens the color of the wax.

It is less expensive to make your own encaustic medium than to purchase ready-made medium; however, ready-made medium is as clean and pure as you can get for clear coverage and bright colors. I make my own medium to economize, but I also love using ready-made encaustic products for their convenience and consistency.

Milled, powdered pigments are added to the medium to make colored pigment cakes that are used as your paint. You can make your own pigment cakes with medium and powdered pigments, but it is labor intensive and extreme safety precautions must be taken when handling the dry pigments.

Learn how to do encaustic painting. Learn how to paint with beeswax. Set up your own encaustic studio and learn the basics of getting started in encaustic painting.

Learn how to do encaustic painting. Learn how to paint with beeswax. Set up your own encaustic studio and learn the basics of getting started in encaustic painting.

For beginners, I recommend purchasing medium and pigment cakes from Enkaustikos. They are one of my favorite companies and the quality vs. cost of their products is outstanding. They have made encaustic painting affordable with convenient product sizes and pricing. Go to their website to find a retailer near you to purchase their products. There are also many online sources for Enkaustikos products like The Fine Art Store.

What Substrates Can I Paint Encaustic On?

Wax will adhere to a variety of surfaces. The most important thing to remember is that the surface must be absorbent and porous. If it is not absorbent and porous, the wax will eventually crack and flake off the surface.

Some excellent choices are: Birch Plywood, Regular Plywood, Unfinished Pine, Un-tempered Masonite, MDF, and Cradled Panels. The wax can be painted directly onto most unfinished wood surfaces, but by preparing the surface with Encaustic gesso or Bristol paper, the look of the piece will be enhanced and give brighter color results. I’ll cover prep of wood surfaces in the next article.

Stretched canvas is not a good surface for encaustic work. It is too flexible and the give is too unstable over a long term. Most paper is absorbent and porous and does provide a good surface for encaustic monotype and printing. It does not, however hold a great amount of wax and will become saturated at some point.

There are many surfaces available for purchase from retail artist supply companies that are perfect for encaustic art. More and more companies are making products that are compatible with encaustic work. I often purchase ½” unfinished pine boards from the lumber yard and have them cut into convenient sizes. Many hardware stores like Home Depot or Lowe’s (in the US) will cut the wood for you, but I like a bit more control over my sizing, so I usually ask a friend to make the cuts for me. You can also purchase unfinished wood painting panels from many art stores and online.

What Equipment do I need for Fusing?

Each layer of wax that you brush onto your painting surface cools very quickly and hardens almost immediately as you work. As you add additional layers of wax they each become individual layers, one on top of the other. If you were to leave them as separate layers, they would eventually become unstable and begin to flake off over time. And you wouldn’t want that to happen after you have worked so hard on a piece!

It is necessary to fuse, or add heat to each and every layer in encaustic painting. This may seem tedious at first, but it is a necessary part of the process. As you fuse, each layer becomes one with the previous layer. As you add layers and fuse after adding each layer, your work becomes one solid layer of wax. This will make it strong and last many lifetimes.

Fusing is the process of adding heat to the surface until you see a slight shine, then remove the heat and allow the wax to cool. It is possible to fuse very large areas with a heat gun or acetylene torch, and it is possible to fuse very small areas with a small butane or crème Brule’ torch or a mini quilting iron. As you practice with different heat sources, you will begin to know which you prefer and which to use for different techniques.

I prefer a heat gun that has low/high settings so I can control the amount of air when fusing my layers and I believe the heat gun is the best heat source for beginners. There is no flame involved and that alone eliminates much fear when you are just learning. The torches are great for large works of art and to experiment with, but I recommend getting used to the basic process of encaustic before using them!

Inexpensive heat guns are available at many hardware stores. I purchased one for $15 at Harbor Freight. I have used many other more expensive heat guns, but this by far my favorite!

Learn how to do encaustic painting. Learn how to paint with beeswax. Set up your own encaustic studio and learn the basics of getting started in encaustic painting.

Can I do Encaustic Painting in my House?

You do need a bit of space to work on encaustic, and just like many other art mediums, in an area of your house that you do not have to worry about the mess. You should have a sturdy table to work on, be close to electric outlets and have sufficient ventilation. My work station is in my basement studio near a window and I have a fan sitting in the window to draw the air out of the room. As long as your area is well ventilated and your wax in not heated at too high a temperature, you will be fine. The proper temperature for melting encaustic medium and encaustic pigment cakes is between 170 degrees and 200 degrees. If anything starts smoking, you know your temps are set too high.

What Equipment do I need for Encaustic Painting?

You will need a palate on which to melt your medium and pigment cakes. Many encaustic artists start out using a pancake griddle, which is an easy item to find. I checked on Amazon.com and for $25-30, there is a huge variety of pancake griddles so I won’t recommend a specific one. I would however, recommend getting one with a numbered temperature gauge to control the heat setting. If you have a griddle that has low/high heat settings, then I would recommend getting a flat surface thermometer. There are commercially made encaustic electric palettes with anodized aluminum surfaces that are great, however I would recommend starting with an inexpensive pancake griddle until you find what suits your needs.

Learn how to do encaustic painting. Learn how to paint with beeswax. Set up your own encaustic studio and learn the basics of getting started in encaustic painting.

What Other Tools do I need for Encaustic Painting?

In addition to a heat gun (or other heat source) and pancake griddle (palate), you need tools to apply the wax to your surface. Cheap bristle brushes are great for this and can be purchased at the hardware or craft store. Don’t use synthetic brushes, as the heat will eventually melt them. And once you’ve used a brush with pigmented wax, it is best to dedicate the brush to that color, as it is difficult to completely clean brushes once they are used with wax. In fact the tools I use for encaustic are all dedicated to just encaustic work. You will also need metal containers to hold your medium and paints. I used aluminum or tin cans. It’s a great way to recycle cat food or tuna cans. Just make sure they are very clean and dry before putting your encaustic paints in them.

So this is basically what you will need to get started in encaustic painting. Of course there are many more tools that you might collect to use in your encaustic work, but this is a basic list to show you that it is not that expensive or difficult to get started. You can begin to collect your tools and equipment and next month we will discuss how to prep your substrates, fusing methods and adding color to your work. There is a lot more to talk about. We are just beginning to have fun!!!

 ~*~*~*~*~*~*~*~*~*~*~*~*~*~*~*~*~*~*~*~*~*~*~*~*~

Elaine Brady Smith loves creating acrylic mixed media and encaustic collages. Key ingredients in her work are vintage papers and her own collage papers made with repetitive marks, simplistic shapes and transparent layers.  She also enjoys other art mediums such as art journaling, oil painting and colored pencil drawing in addition to writing, teaching and spending time with her family. Find more on her website: elainebradysmith.com and on Facebook: Elaine Brady Smith Art

~*~*~*~*~*~*~*~*~*~*~*~*~*~*~*~*~*~*~*~*~*~*~*~*~

.

.