Getting Started with Beeswax Collage

~ * ~

This article is written by Debbie Davis from In Art Therapy.

Debbie has previously shared her Christmas beeswax collages with us. Now she is back to step us through the process of getting started with this interesting medium.

claybord beeswax mixed media collage

Introduction

Beeswax is a wonderful medium to use in art. It can be used as a decoupage medium for adhering papers and objects to a number of surfaces. It can be stamped into to add texture to your art and rubbed with an oil pastel to add color.

There are many options available when choosing a substrate upon which to create your collage. Here are a few:

  • Wood
  • Masonite
  • Paper
  • Canvas (small gallery wrapped or canvas panel)
  • Encaustic board
  • Clayboard
  • Metal

I have read that you should not apply beeswax over acrylic paint because it will eventually fall off. I do use small canvases that have been primed with acrylic gesso and have never had a problem with it coming off. I wouldn’t use a wrapped canvas any bigger than 5×5 inch because there isn’t as much support. I find the 4×4 inch to be the perfect size. You could also use a canvas panel which would be much sturdier.

Choosing your wax

Beeswax is sold in one or two pound blocks. It is also available in bags or jars that contain small pellets. It can be yellow (natural) or white (filtered) in color.You can find beeswax online or at a number of craft and hobby stores. Prices will vary but I usually pay around $11.00 for a 1lb block.

Heating tools options

  • Crock pot
  • Griddle
  • Melt Pot (made by Ranger)
  • Heat Gun
  • Mini iron (I love using my Clover mini iron)
  • Travelers iron (without holes)

If using a block of wax, you will need to break off pieces for melting. Put the wax in a plastic bag and hit it a few times with a hammer. Melting the wax can take a while, depending on how much you put in your pot. I like to use a small crock pot I bought at a yard sale. You should be very careful not to overheat the wax. Put it on the medium to low setting.

You could also use an electric griddle and put a pan on top with the wax in it. Just remember that whatever you put the wax in, you will not be able to use it for anything else.   Keep the temperature setting around 200 degrees. If the wax starts to smoke, the temperature is too high.

I love to use a mini iron to smooth the wax out after adding elements to the collage.  A heat gun can be used to fuse layers of wax together. You can also easily fix mistakes by melting the wax and removing any elements you are not happy with. All of these tools can be found on-line or at your local craft stores.

When painting the wax onto your substrate, use a natural bristle brush because synthetic brushes will melt. I just buy the cheap chip brushes. Also know that once you use the brush in the wax, you will not be able to use it for anything else. The wax will harden quickly on the brush but will melt again once placed back in the hot wax.

Items to use in your collage

  • Any type of paper (Scrapbook, dictionary pages, vintage book pages, magazine clippings)
  • Old photos or printed images
  • Buttons
  • Keys
  • Dried flowers
  • Found objects
  • Material
  • Lace
  • Ribbon
  • Paper napkins
  • Gift wrap tissue
  • Pattern tissue

This is where you can really have fun because if you don’t like where you put something, you can melt the wax, move the object and start over again. No need to worry about ruining your substrate.

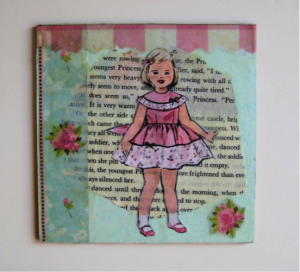
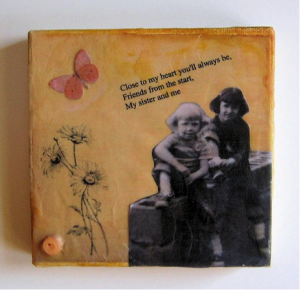
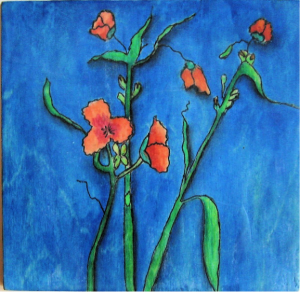
Here are some examples of collages I have created on various substrates:

canvas beeswax collage

Collage on Canvas using an image of my sweet cousins, flowers and a poem stamped onto white tissue paper along with a paper butterfly and a button.

wood substrate beeswax collage

Beeswax on Wood – Ink and watercolor painting coated in Beeswax

claybord beeswax collage

Beeswax on Clayboard – I used tissue paper, scrapbook papers, a page torn from a vintage children’s book and an image printed from my inkjet printer.

I hope you have fun experimenting with this new medium – it’s perfect for a range of mixed media projects!


~*~*~*~*~*~*~*~*~*~*~*~*~*~*~*~*~*~*~*~*~*~*~*~*~

My name is Debbie and I live in Morton, Illinois, USA. I’m happily married and have a wonderful family that includes a daughter, son, son-in-law and 2 of the sweetest grandchildren ever!

What I love most about mixed media art is that you don’t have to be an expert at anything to create beautiful art. It is a great way to recycle found objects. Art is such a wonderful stress reliever. I just wish I had more time to play!

I have a shop on Etsy called Artful Explorations where I place some of the art I have created for sale. Having been inspired by others who are willing to share their techniques and ideas, I decided to start a blog called In Art Therapy and hope you will visit me there.

~*~*~*~*~*~*~*~*~*~*~*~*~*~*~*~*~*~*~*~*~*~*~*~*~

For further reading:

.

“Share the Moments of Joy” through Mixed Media Painting

~ * ~

This article is written by Marilyn Harris Mills

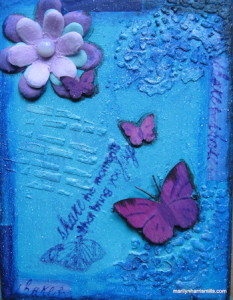
Creating mixed media feeds my soul. When I need to immerse myself into creativity and inspiration, I reach out to my supplies that are beckoning me to discover fresh ideas of using them.

I’m a Golden lover!  I use the Golden line of products exclusively, whether it be their fluid, open or heavy bodied acrylics or their abundant choice of mediums.  There is nothing better than to leave my studio gummed up with molding paste and dried paint!

See Marilyn’s video on her mixed media painting process

This project I’ve created for you is about using various supplies to create a small work of art.  As artists, we tend to overload on our addiction for art supplies.  Consequently we don’t always take the time to co-mingle the supplies working them in tandem with each other to create something that they lead us to discover.  In this project I’ve reached for and used fluid acrylics, molding paste, a rubber stamp, twinkling H2O’s, washi tape, dye ink sprays and pads, and embellishments such as  flowers, buttons & wooden butterflies.  What didn’t I use?!!  These products are my favourites…ones I reach for time and again.  Using embellishments I’ve collected over the years, it is fun to combine them into an art piece.


I create based on my intuition….my inner voice tells me the journey to take while I reach for my supplies during the process. I have no pre-conceived notions of where I will end up.  I choose the colours of my paints & the mediums first….then the supplies that will add the meaning to the project; in this project I chose a rubber stamp ….next I simply reach for “do-dads” as I call them (embellishments)  to enhance the project. The final step is to bring harmony to the project.  In this particular piece, I used an old toothbrush to splatter white paint over everything….creating harmony and cohesiveness in the project is an important step I believe and one that is often overlooked.

Each project is as they say “a labour of love”…..but it’s not labour, it’s simply my inner muse, my soul coming out to play….the process is the love part.  An opportunity to express with art what I cannot say with words. With this project, I’m sharing with you the moments of joy this creation offered to me.

~*~*~*~*~*~*~*~*~*~*~*~*~*~*~*~*~*~*~*~*~*~*~*~*~

A bit about Marilyn Harris Mills:

I’m passionate, creative and eccentric, at least that’s what my girlfriends tell me! I’m a professional published artist, designer and teacher living in Ottawa Canada.  I journey through life with my dogs Lucy and Mozart. Practicing yoga, journaling, meditating and walks in the forest nourish and excite me. I did try knitting once but gave that up…couldn’t remember to count the stitches. In my free time, I practice Zentangles and Mandalas. I also love creating mixed media art – it feeds my soul.  I volunteer, teaching art to teenage girls at a treatment centre.  It is the most rewarding endeavour of my life. One of my favourite quotes is “I work in whatever medium likes me at the moment!” (Marc Chagall)

~*~*~*~*~*~*~*~*~*~*~*~*~*~*~*~*~*~*~*~*~*~*~*~*~

.
.

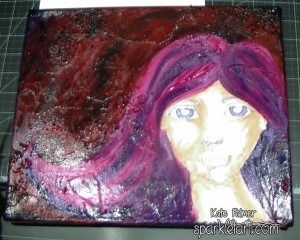
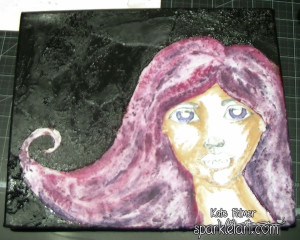
Creating Mixed Media Hair Tutorial

~ * ~

This article is written by Kate Palmer

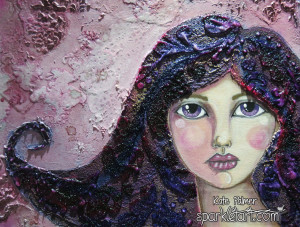
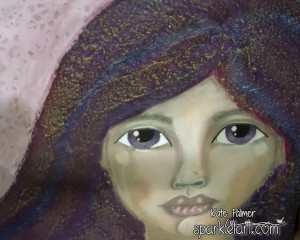
Today I’m going to show you how to create interesting Mixed Media hair with depth and texture.  You can use this technique on canvas or paper and it results in a project that you want to reach out and touch – to run your fingers over the pattern and surface (well I do any how!)

Mixed Media Hair

What I used:

  • Lindy’s Stamp Gang Products:
  • Magicals mixed with Gesso for pastel background – Cheshire Cat Cherry and Tea Pot Purple
  • Magicals mixed with Gel Medium for hair base – Cheshire Cat Cherry and Tea Pot Purple
  • Magicals mixed with water as ink – Cheshire Cat Cherry, Tweedle Dee Denim and Tea Pot Purple
  • Starburst sprayed over background for subtle shimmer – Cheshire Cat Cherry and Down the Rabbit Hole
  • Magicals mixed with acrylic paint for face – Cheshire Cat Cherry and Tea Pot Purple

Other Products:

  • Martha Stewart Gesso – white
  • Golden Mediums – Glass Bead Gel and Fiber Paste
  • Stencil Magic Stencil – Floral Accent
  • White pre-gessoed canvas

To Create the Mixed Media Hair:
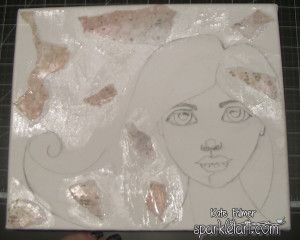
Sketch image onto your canvas
Mixed Media Hair

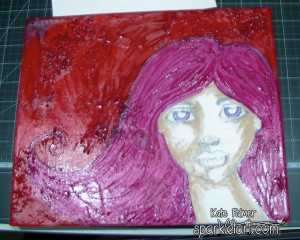
Colour the hair using Magicals (Cheshire Cat Cherry and Tweedle Dee Denim) mixed with Gel Medium to create a base layer.

Mixed Media Hair

I applied the cherry all over the hair and then added the denim to darken.

Mixed Media Hair

Once the base layer is dry, cover hair with texture paste, making sure to create loads of peaks and valleys as these will catch the colour and shimmer of subsequent layers.

Mixed Media Hair

Once the texture paste is dry, mix Magicals (Cheshire Cat Cherry and Tea Pot Purple) with water to create a sparkly ink and apply over the hair, make sure to be heavy handed and allow the mica to settle into the valleys in the texture paste and allow to dry thoroughly.

Mixed Media Hair

Using your finger apply a light layer of Inka Gold to the high points created by the texture paste, this picks up the texture and breaks up the colours underneath a little.

Mixed Media Hair

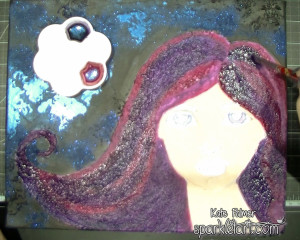
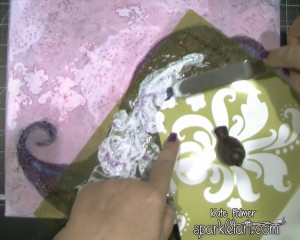
For the final step, you will need some Glass Bead Gel and a bold stencil.  Protect the face and apply the bead gel through the stencil onto the hair.

Mixed Media Hair

You will need to allow each section of bead gel to dry before applying the next.

Mixed Media Hair

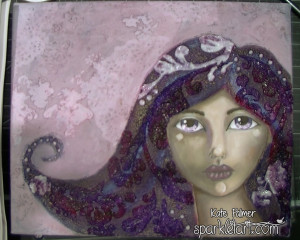
Once dry, the bead gel takes on a wonderful glossy appearance and the clear beads pick up the colours from underneath and enhance the sparkle.

Mixed Media Hair

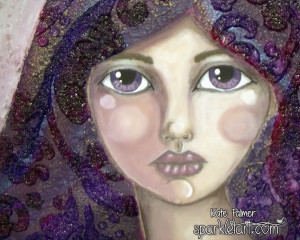
I really adore how this turned out, the hair in real life is truly a show stopper!
Kate

~*~*~*~*~*~*~*~*~*~*~*~*~*~*~*~*~*~*~*~*~*~*~*~*~

Kate Palmer though perhaps better known as Sparkle Tart loved playing with mixed media and techniques.  Most of her work incorporates sparkly media of some sort, which is used on journal pages, canvases, scrapbooks or hand made cards.

You can see more of Kate’s work at Sparkle Tart or via Facebook – Keep It Simply Sparkly

~*~*~*~*~*~*~*~*~*~*~*~*~*~*~*~*~*~*~*~*~*~*~*~*~

.
.

Mixed Media Canvas With Copics

~ * ~

This article is written by Kim Kelley

Today I am going to show you a canvas I made using a digital image and Copic markers. I love to create a canvas that has not only texture but depth to it as well. Adding a digital image or a stamped image that has been “stamped” several times and layered allows me to do this.

Using Copic Markers with a mixed media canvas

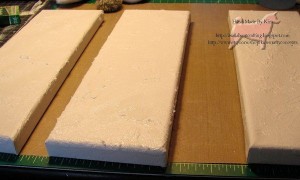
I started with 3 3” x 12” canvas’ and applied some matte gel medium all over, including the sides.

Copic Markers add cold to a mixed media art canvas

Canvas with medium

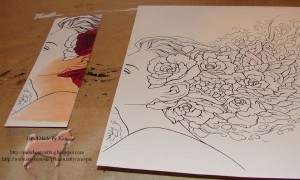
I chose “Beloved” from Aurora Wings.  I chose a digital image that I could blow up enough and would not become pixelated. And one that was large enough to expand across the 3 pieces of canvas. I printed it 4 times so that I could have my layers. I colored the images with Copic markers trying to make sure each section was similar in coloring so that it would flow after I added it to the canvas.

Copic Markers add cold to a mixed media art canvas

Printed digital image

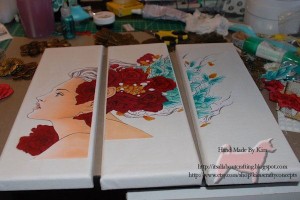
After figuring out I wanted the canvas pieces to be offset I laid my image across the canvas’ to get the right measurements and cut it. I adhered it to the canvas with more matte gel medium and let it dry for a few hours.

Copic Markers add cold to a mixed media art canvas

Image on canvas

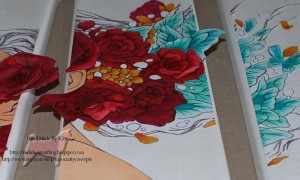
After the drying process I started adding my extra layers. I chose to pop up some of the flowers and butterflies. And had some of the pieces even extend over the edge. I glued them on with Tombow glue.

Copic Markers add cold to a mixed media art canvas

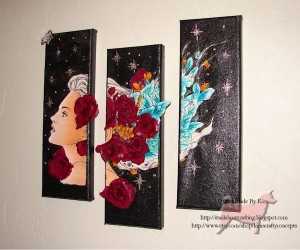
I decided I wanted to have a big contrast between the background and the image, so I mixed some black acrylic paint, iridescent acrylic paint and matte gel medium together for my background. Using a sponge I added the mixture, even going over the edges of the image a bit, leaving some of it in peaks. After that dried I added some stars using Stickles and added a jewelled flower that I cut in half.  I felt that is needed a few more flowers so I cut a few more out and added them. Then using some Mod Podge I sealed the entire project, adding some glitter sprinkled around.

Using Copic Markers with a mixed media canvas

Finished project

Couple of tips:

  1. When doing layers, color the back of each layer as well.
  2. When adding an image you color the edges.
  3. With flowers, you can use a pen or stick to curl the petals.

Life is short, do something creative every day!

~*~*~*~*~*~*~*~*~*~*~*~*~*~*~*~*~*~*~*~*~*~*~*~*~

Kim Kelley is borderline obsessive about her crafting and her art. She loves mixed media art because you are free to go beyond your comfort zone, using your imagination and exploring an anything goes mind set. Kim loves to learn and explore new techniques and hopes that any art she creates leads someone to find their inner creative artist!

Sites: itsallaboutcrafting.blogspot.com and www.facebook.com/kimscraftyconcepts

~*~*~*~*~*~*~*~*~*~*~*~*~*~*~*~*~*~*~*~*~*~*~*~*~

.
.