~ * ~
This article is written by Barbara Rankin
What exactly is Viva Décor Paper-Soft-Color?
How does it differ from other products you may already own? This article is intended to demystify this product.
When you open the jar, you will see a jar that appears to be full of paint on a sponge.
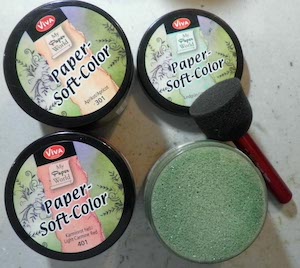
Removing the top sponge reveals the paint distribution system. You will need to replace the top sponge for use.

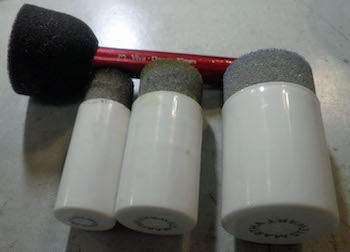
The best way to apply this product is with a sponge brush. Here are two examples of sponge brushes that I think work well. The red handled sponge applicator is by Viva Décor, and the white handled applicators are by Martha Stewart. A nice, dense sponge works best.
Paper-Soft-Color is perfect for making soft, gradated colored backgrounds. They blend extremely well and are super simple to use. If you are familiar with distress inks and how to blend them, then you will find that Paper-Soft-Color is much easier to blend, and you can obtain more even coverage in a shorter amount of time. The colors are very soft and they are quite transparent. There are 20 colors.
First, load the sponge brush by dipping it into the jar’s sponge. You will use very little paint, thereby making it excellent for stenciling with very little to no bleeding. Using different colors will give you a graduated, soft effect, to make a beautiful background. You can even stamp with Paper-Soft by dabbing the color onto your rubber or silicone stamp for amazingly crisp results.
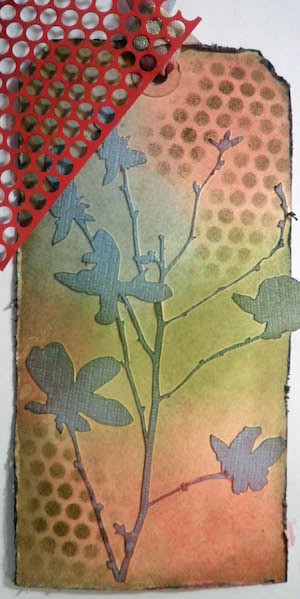
For my example, I first cut a silhouette flower image onto light blue adhesive-backed card stock with a cut file from my Silhouette machine. I adhered it to a #8 manila tag and began coloring the background, beginning with the lightest colors: Lime Green, Light Carmine Red, Moss Green, and Light Blue. I used a heat gun to dry the tag between each color while using a separate sponge for each color.
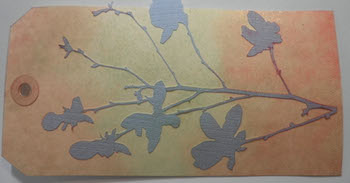
Not only can you see how well the colors blended into each other, but also how the colors on the light blue die cut changed, as well.
I love distressing the edges of most everything I make, and so I distressed the edges of the tag all around and colored with Walnut Brown Paper Soft. The technique would be the same as when you do this with distress inks and a foam blending tool, but again, the Paper-Soft-Color process is much faster and just as effective.
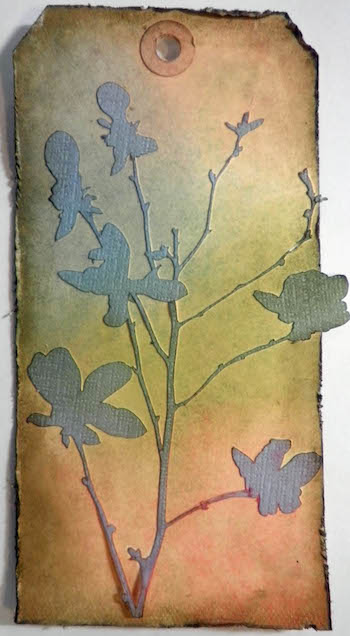
I wanted to share the stencil technique with you, also, so I used a scrap of Punchinella to stencil the dots with the Walnut Brown Paper Soft. I deliberately sponged some areas darker than others to show how you can blend the stenciled areas right into the background.
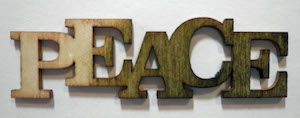
Moss Green Paper Soft was sponged directly onto the “PEACE” wood veneer and adhered at the bottom of the tag, thereby proving it works well on wood, too.
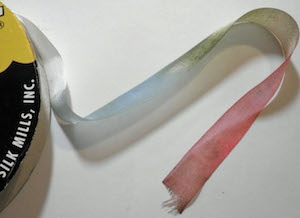
Moss Green, Light Blue, and Light Carmine Red Paper Soft colors were added in sections to a piece of off-white seam binding and thread through a decorative button, then through the tag hole at the top. Again, this product works well on fabric, too!
Scrap lace was added to the bottom of the tag.
One last thing I wanted to share is how to take a simple silhouette image and give it some detail. By simply adding a large dot of the Cream Pearl Pen and pulling it out towards the end of each flower with a pin, it dries shimmery and dimensional. You can also apply the paint through a stencil with a spatula for a dimensional look. Add glitter to the paint while still wet for added sparkle.
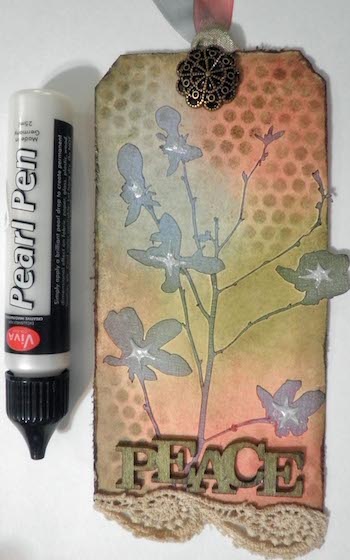
You can further embellish the tag to your heart’s content.
~*~*~*~*~*~*~*~*~*~*~*~*~*~*~*~*~*~*~*~*~*~*~*~*~
Barbara Rankin is a mixed media artist who loves to teach. She loves to learn new techniques and to share her knowledge with other artists. She is a contributing artist in a book: Make it in Minutes: Mini Albums, and has been published in several paper and online magazines. She is currently on two design teams, Sin City Stamps and Altered Pages, and has served as a design team member for The Robin’s Nest and Creative Paperclay®, as well as guest designer for Craftwell USA and an upcoming issue of Unruly Paper Arts.
She lives in the Memphis, Tennessee, with her very supportive husband of 32 years, and her two Yorkies, Chloe and Zoe.
You can see more of Barbara’s work on her blog at Black Hole Art Studio or via Facebook – Black Hole Art Studio
~*~*~*~*~*~*~*~*~*~*~*~*~*~*~*~*~*~*~*~*~*~*~*~*~
.
Aweber code:
.


Just wanted to know if you send free samples?
Wow! Barbara you did a fabulous job! I love it!
Woozer…I can’t wait to get me some Viva Decor Paper Soft Color…I love the distress look and am anxious to try this product out. Love your tag and all the depth you achieved. Thanks for sharing with us.
Great review and lovely examples, Barbara is a consummate paper artist!
Barb looks amazing and love the colors you used.
Thanks Barbara, I really learned a lot, I need to try this!
Great post and a stunning tag thank you for the info 🙂
These are very nice. I had never heard of them. You did a great job in the demo……Maggie
beautiful!!! love your tag!
Very nice, Barbara! Love your art.
Great introduction, Barbara–and such beautiful results, you make me want to play, too!!!
🙂
How long does the paper soft color to dry on a canvas?