~ * ~
This article is written by Barbara Rankin
Barbara shows you how to make these beautiful 3D altered art flowers using simple household products. All you will need is a roll of heavy duty aluminum foil and a roll of paper towels, along with some white gesso, acrylic paints, and flower dies or punches. Barbara will also show you several ways to colorize and alter these beauties, and how to apply them in your art.
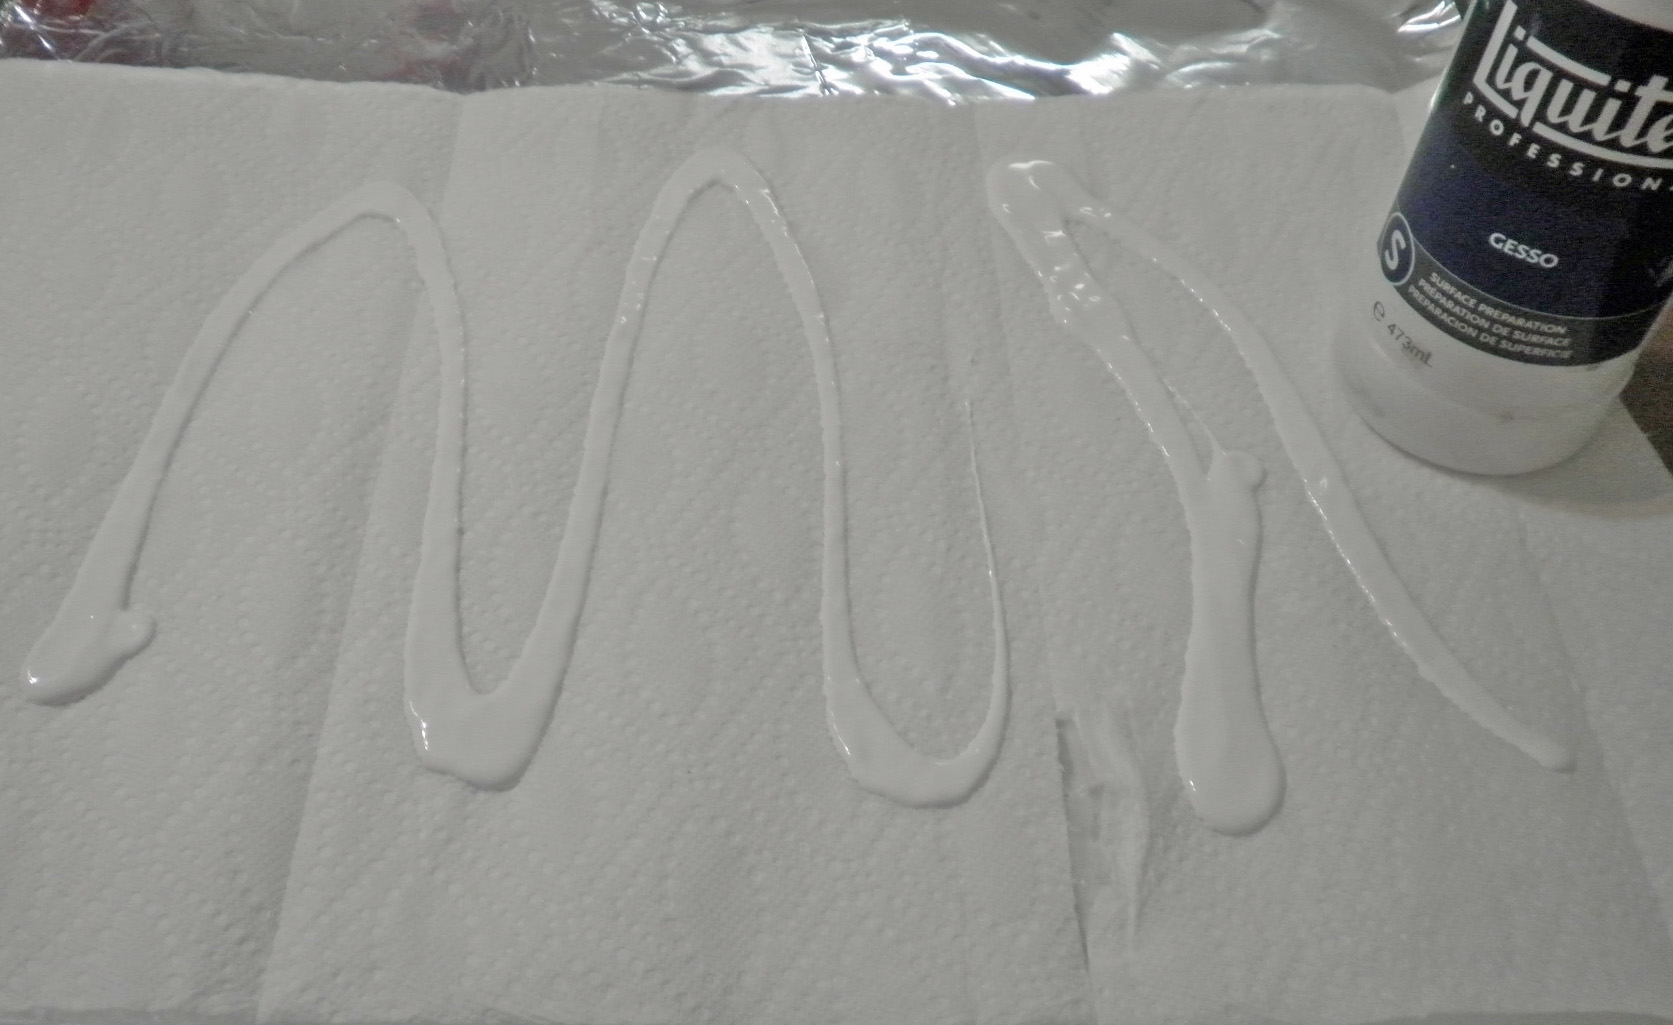
Spread some white gesso over the foil, lay paper towel on top and continue spreading gesso over the paper towel, ensuring the two adhere to each other well and there are no air bubbles. You may find that you need to do this in sections before the gesso dries. Do not worry about wrinkles; they add texture.
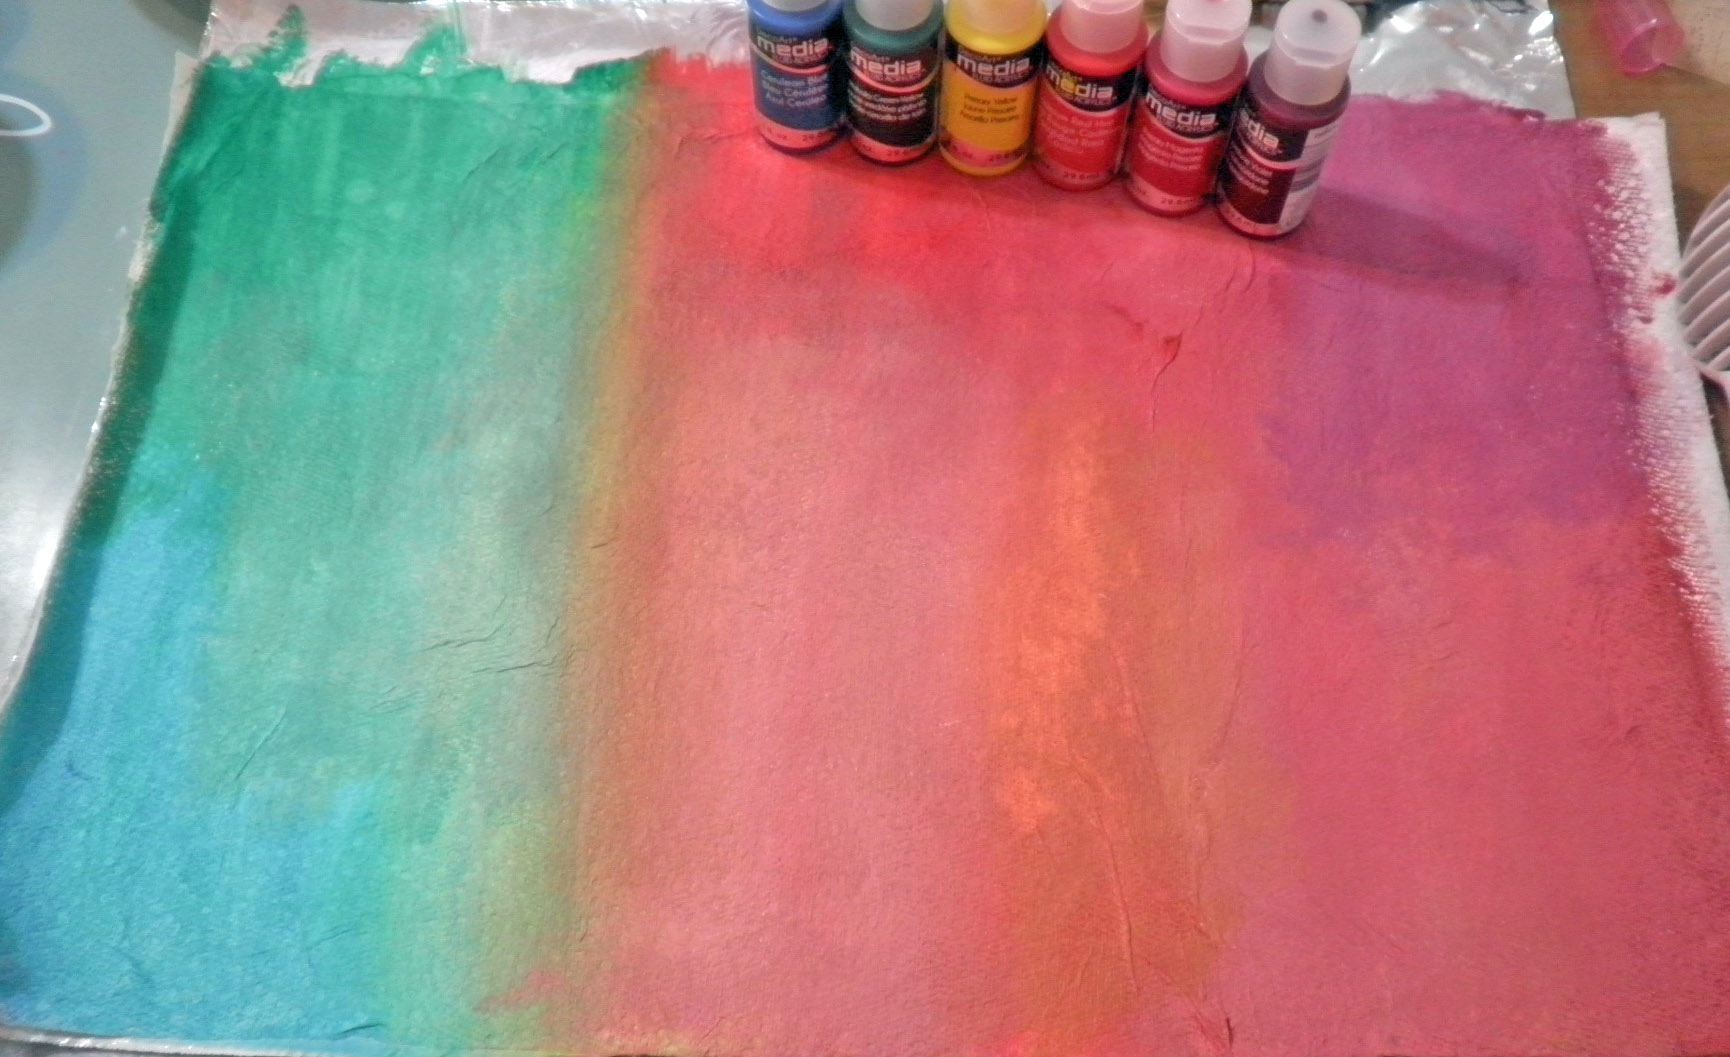
Add DecoArt fluid acrylics in colors of your choice. I used Phthalo Green-Yellow, Cerulean Blue, Titanium White Primary Yellow, Cadmium Red Hue, Primary Magenta, and Quinacridone Violet.
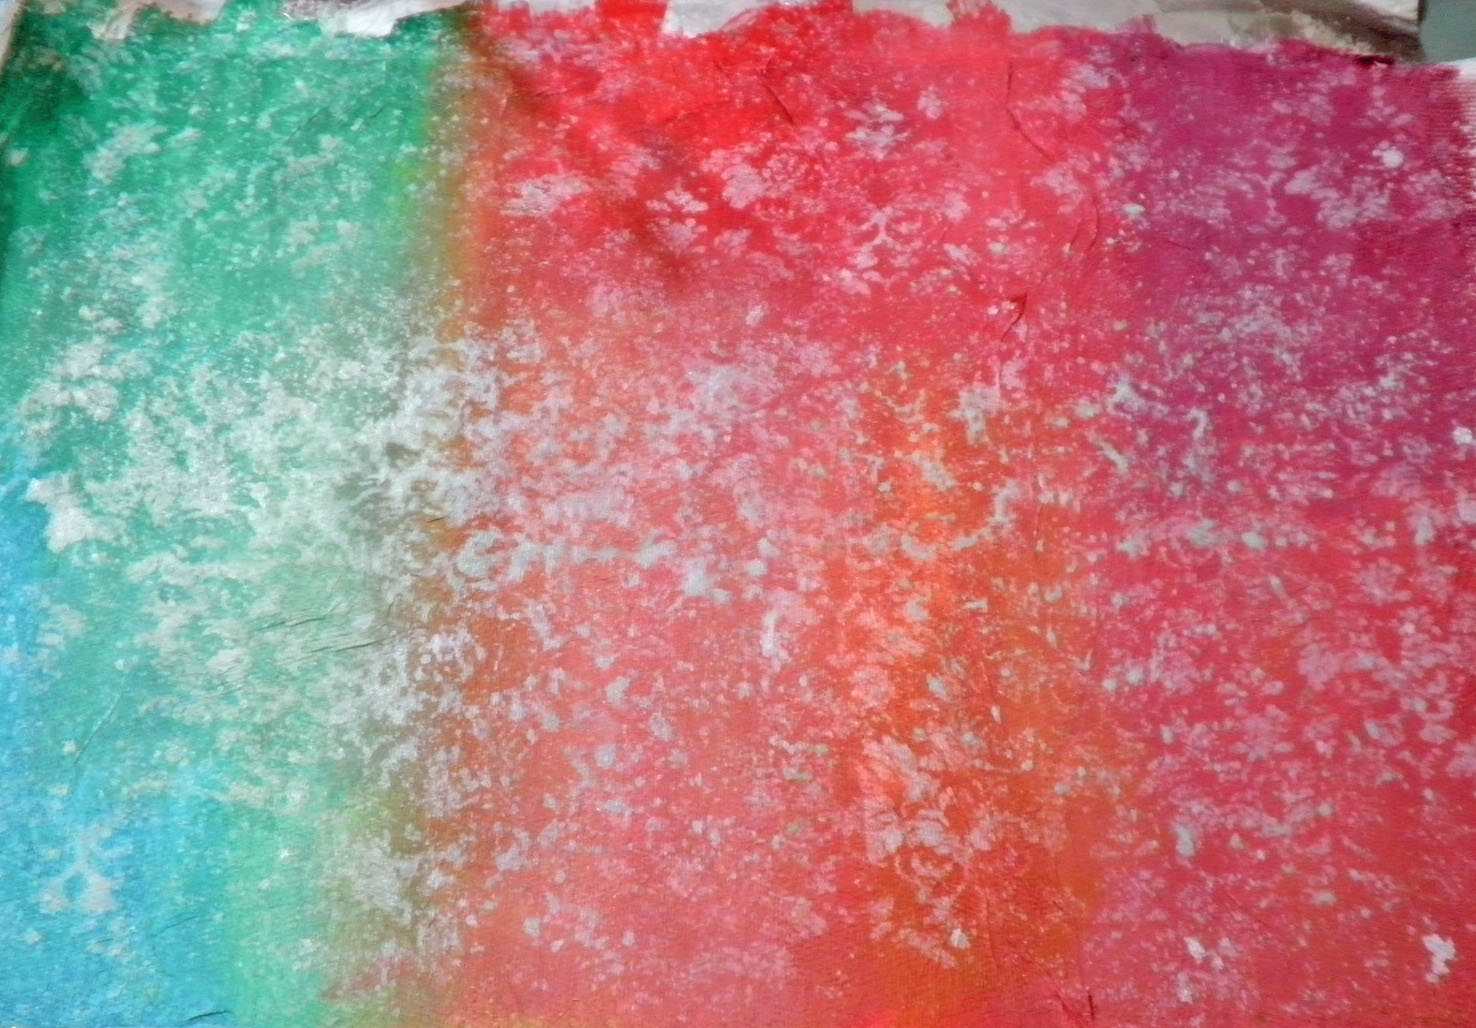
Spray DecoArt white mist through a damask stencil. The white spray mist will pick up some of the color beneath it and give you a lighter shade of each color. Perfection is not necessary because this is all going to be die cut into smaller pieces.
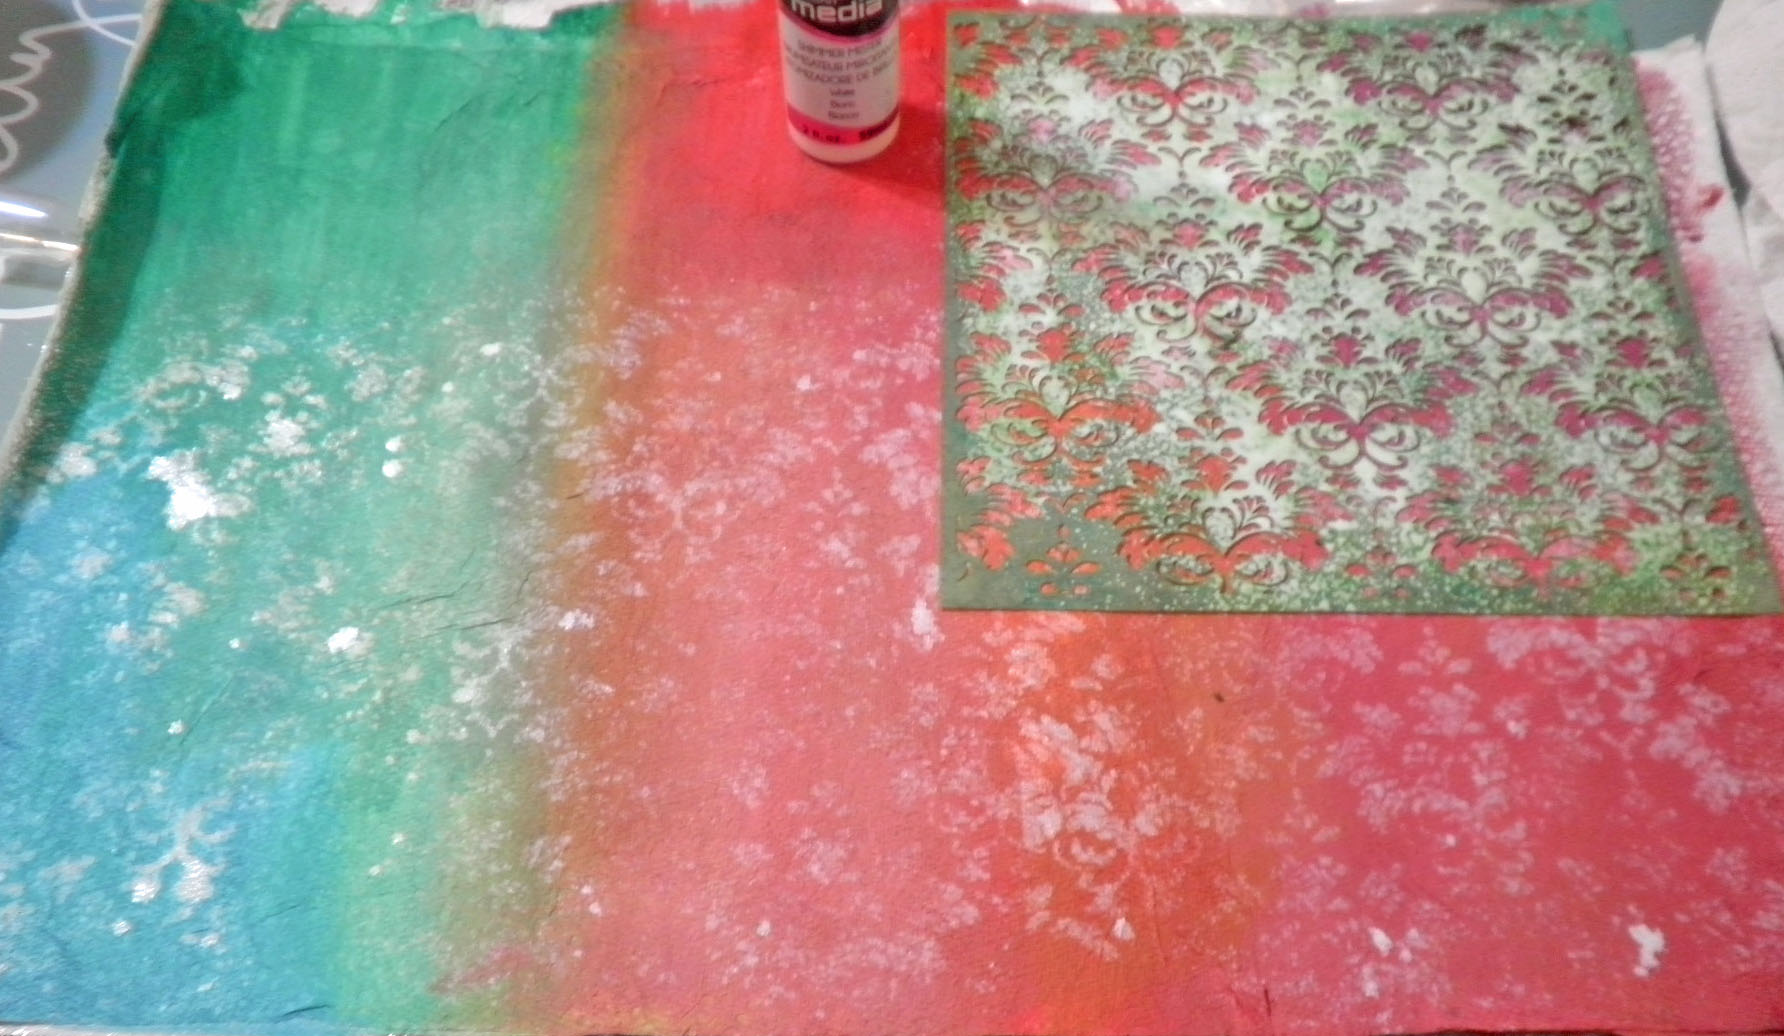
As you can see, this disguises the separation of colors and makes it all cohesive.
Die cut flowers with any flower die. I used the Tim Holtz Tattered Florals die. You could also free-hand cut them. You will have a nice selection of tattered floral pieces that all work well together.
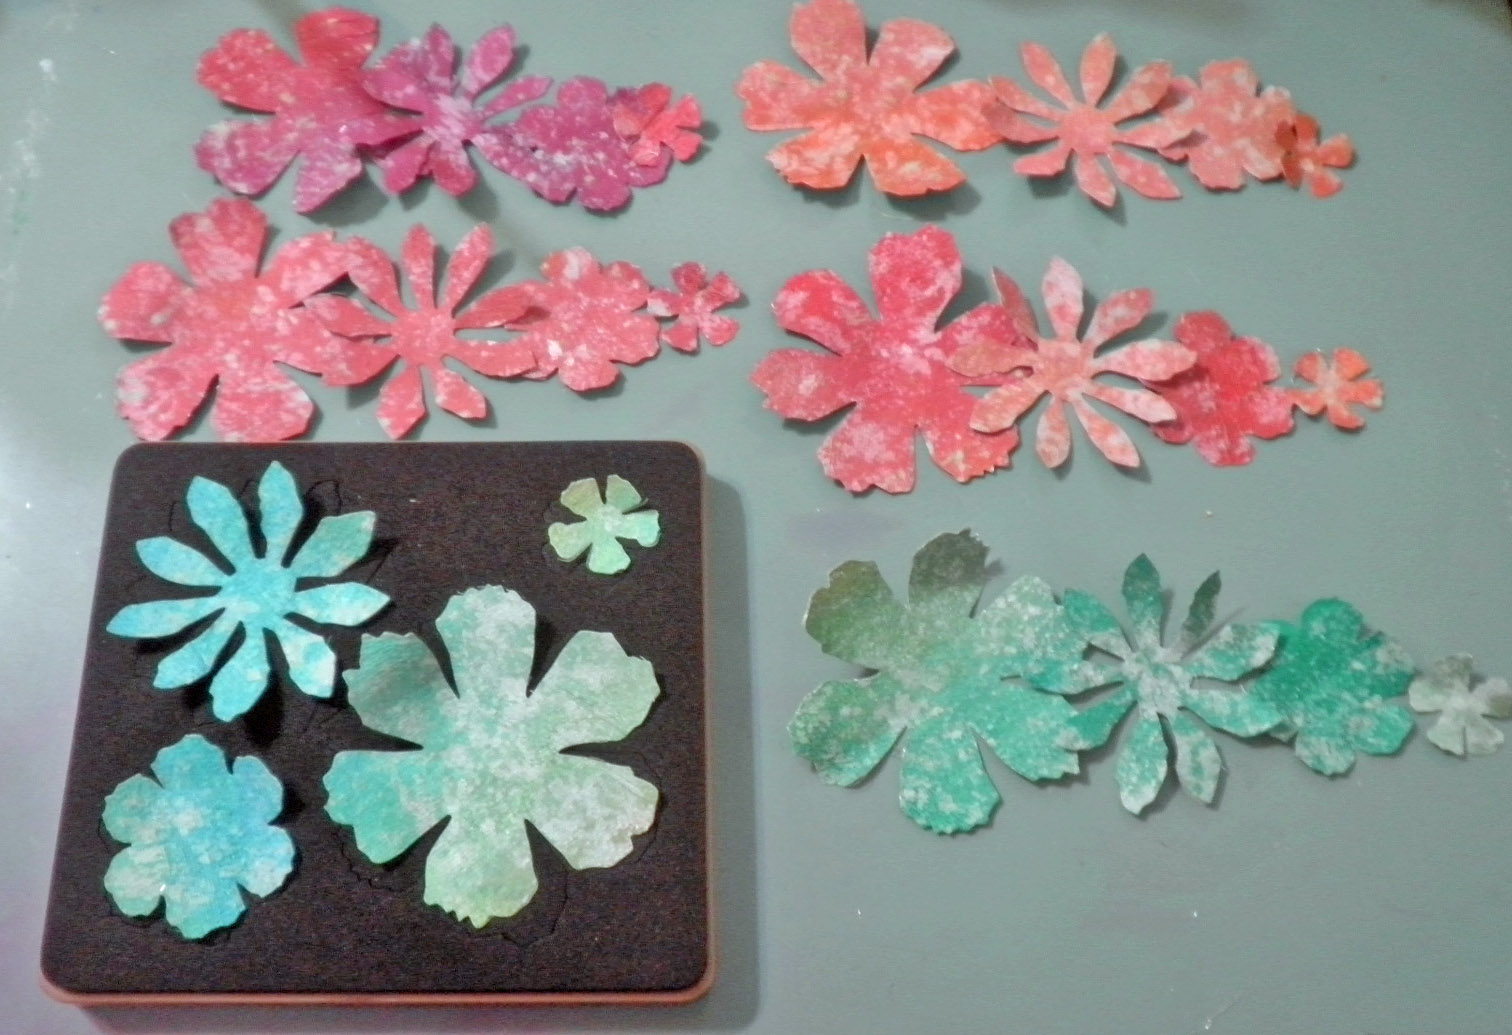
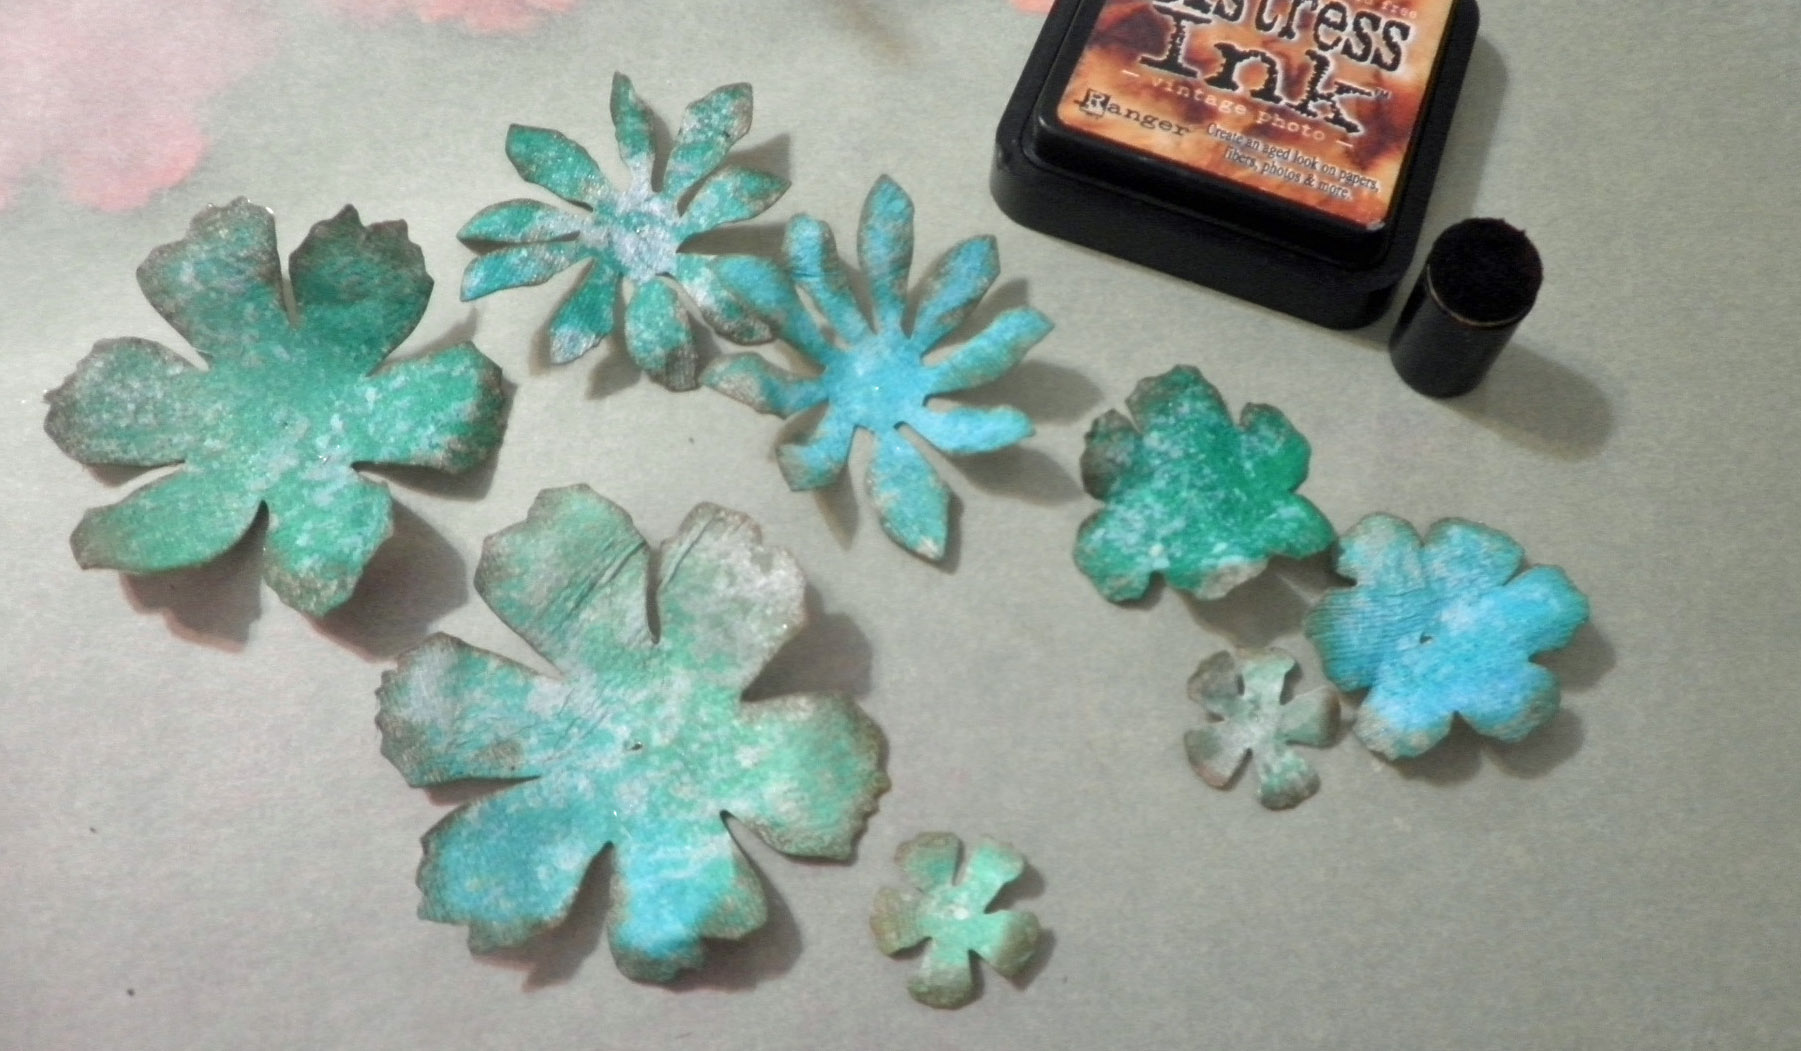
Use two sets of the flowers from the same or similar colors to make a single, fluffy flower. Before layering the petals, ink the edges with Vintage Photo distress ink. This will give some added depth and dimension.
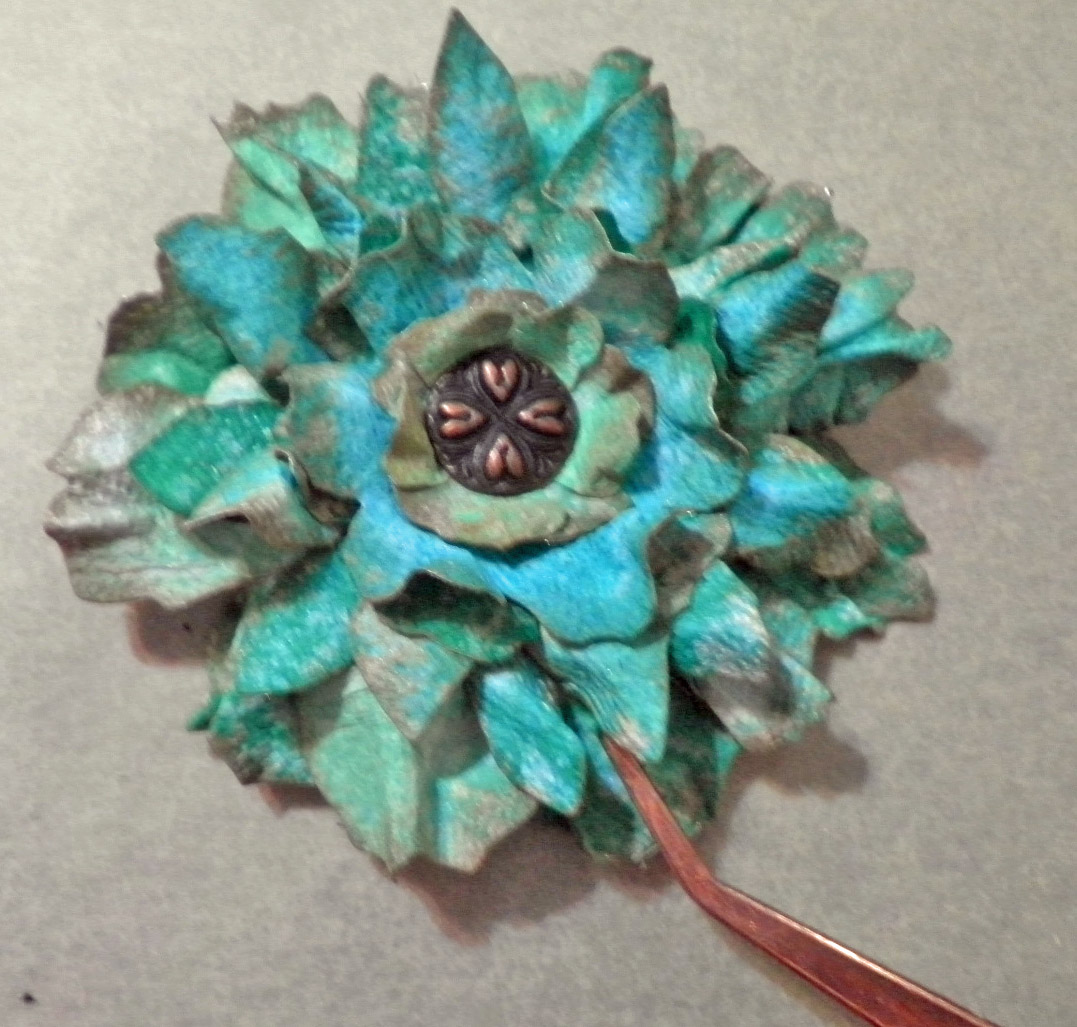
Layer the petals, largest to smallest. Make a hole in the center of each petal and add a decorative brad to keep them together. Pinch and twist the petals to form a fluffy and full flower. I used tweezers in one hand so I could grab each petal easier, while pinching them with my other hand.
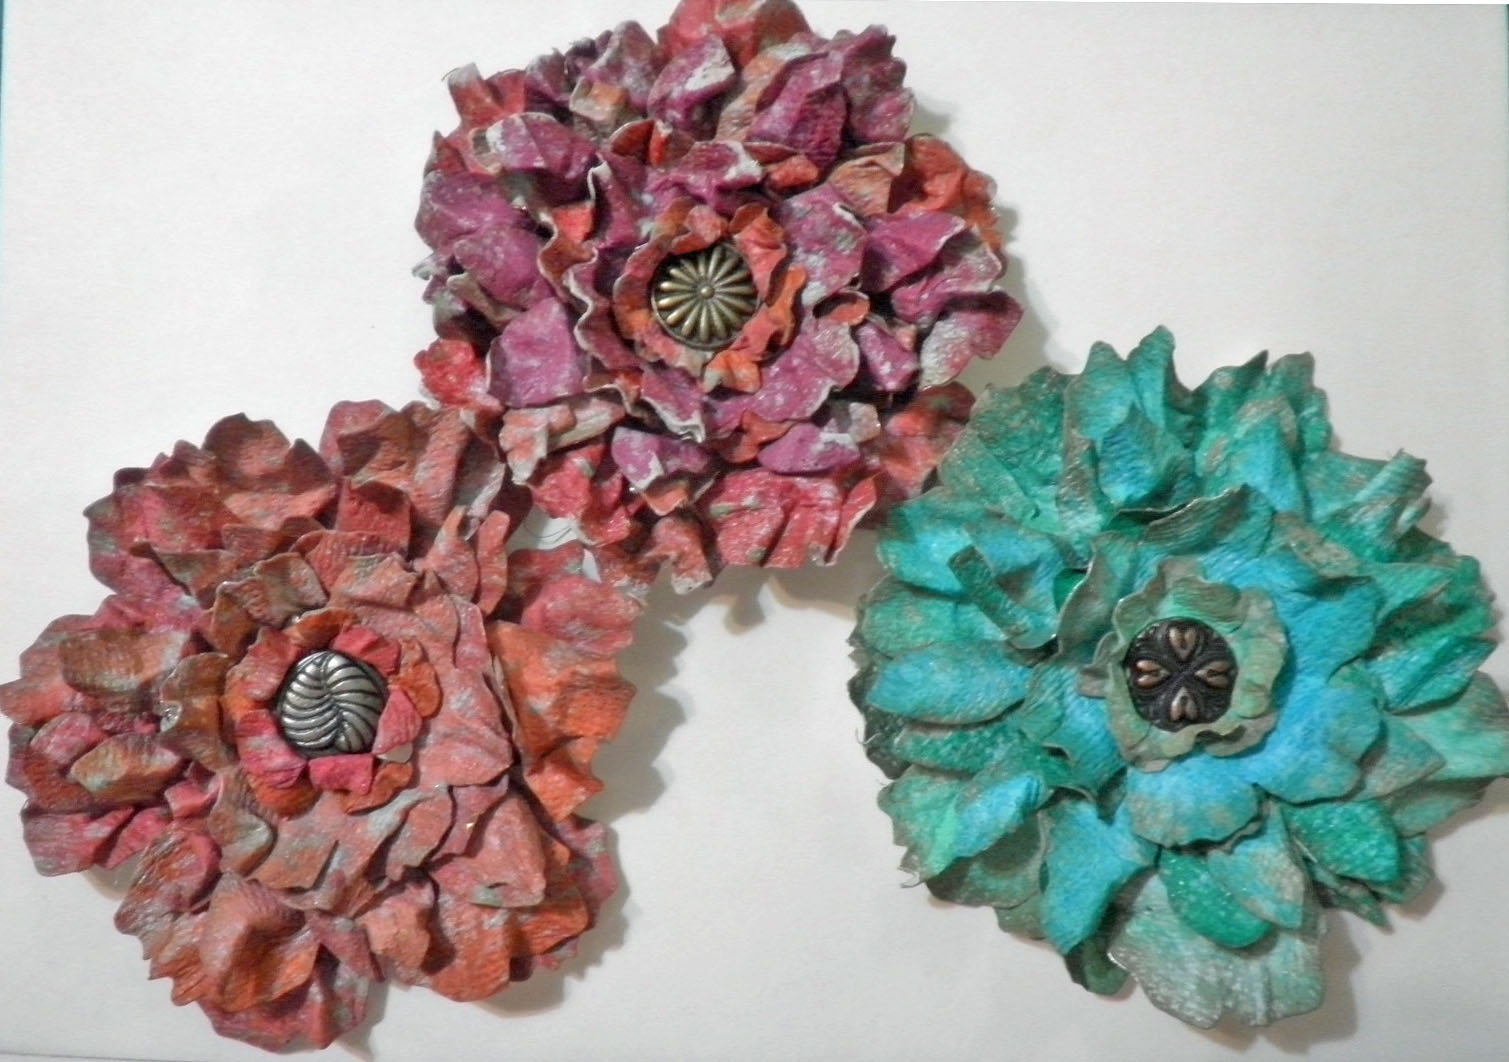
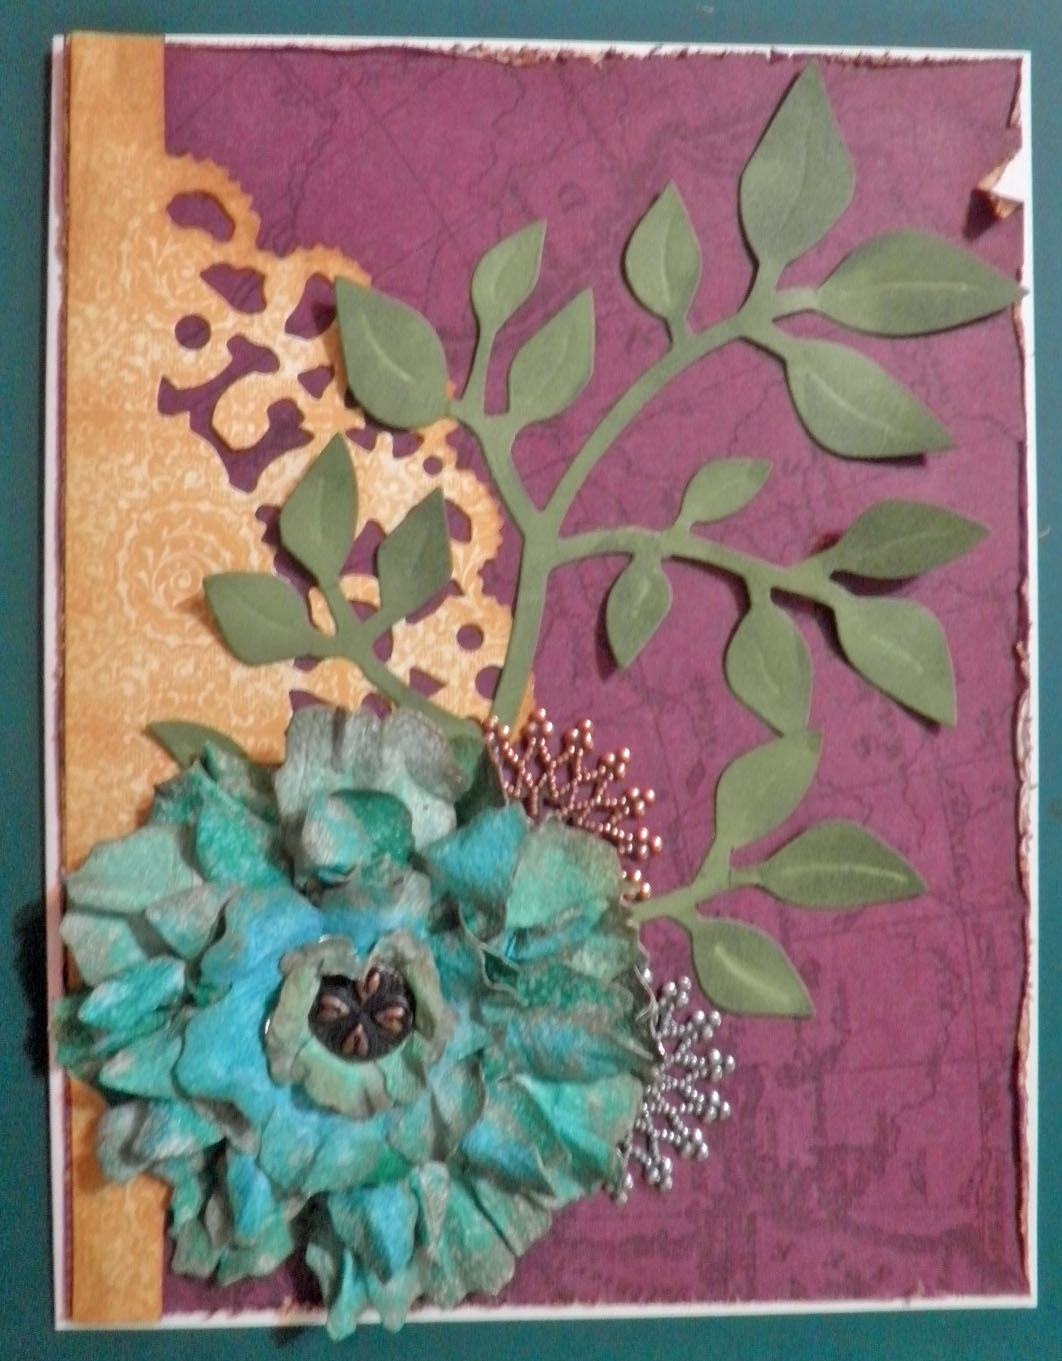
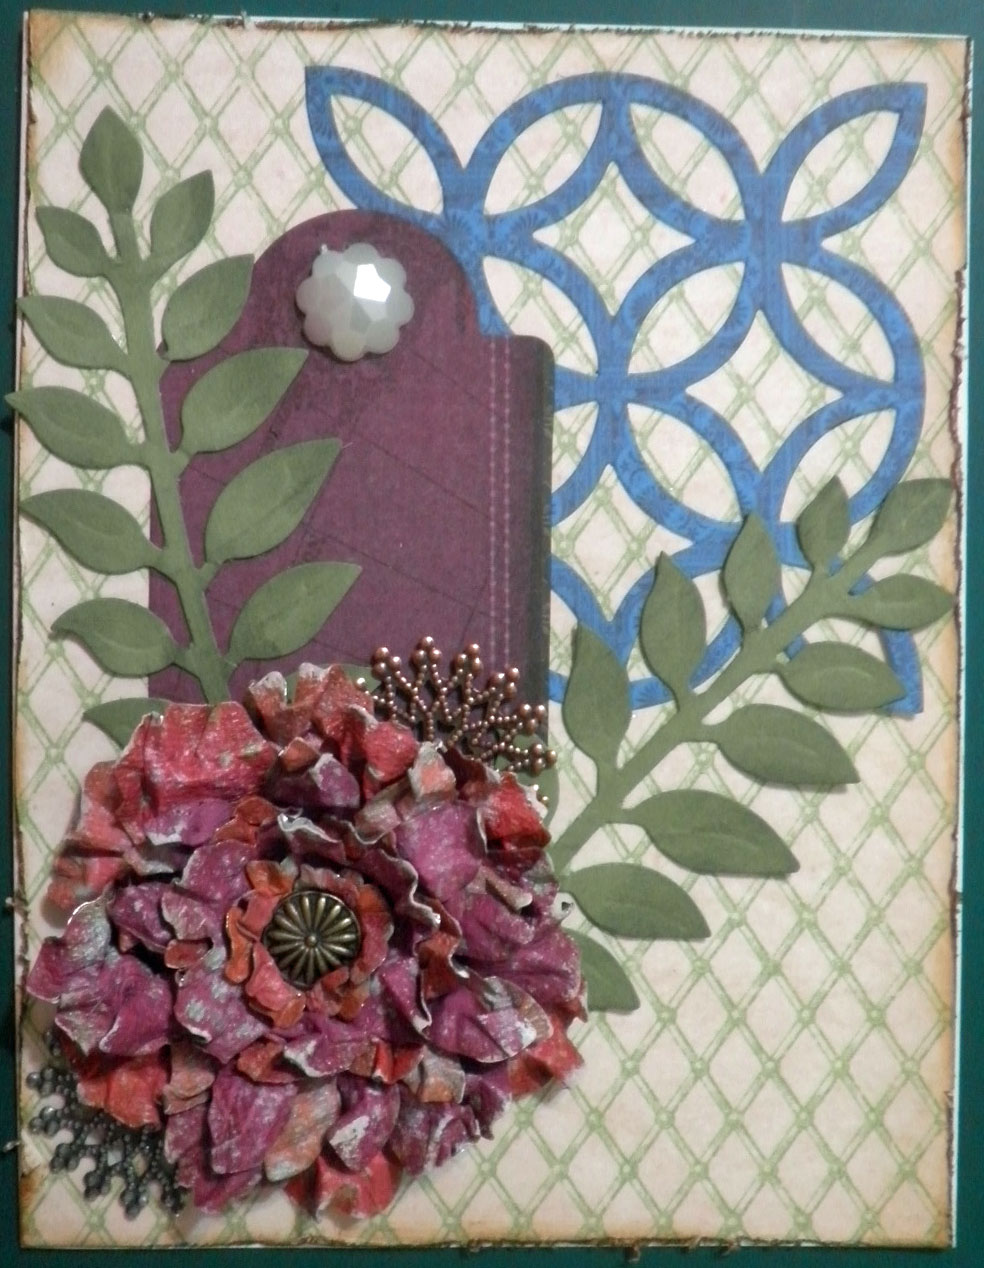
Here are all three flowers from this one sheet.
Here are a couple of cards I made using two of the flowers. I can think of many uses for these. I think they would look absolutely lovely in a mini album, scrapbook, page layout, or canvas.
~*~*~*~*~*~*~*~*~*~*~*~*~*~*~*~*~*~*~*~*~*~*~*~*~
Barbara is a mixed media artist who loves to teach. She loves to learn new techniques and to share her knowledge with other artists. She is a contributing artist in a book: Make it in Minutes: Mini Albums, and has been published in several paper and online magazines. She is currently on several design teams: ColourArte, Sin City Stamps, Altered Pages, Gina’s DesignsLasercuts, House of Cards Monthly Challenge Blog, and Craft Hoarders Monthly Challenge Blog. She has served as a design team member for The Robin’s Nest and Creative Paperclay®, as well as guest designer for Craftwell USA, Unruly Paper Arts, and Gina’s Designs.
She lives in the Memphis, Tennessee area with her very supportive husband of 32 years, and her two Yorkies, Chloe and Zoe.
You can see more of Barbara’s work on her blog at Black Hole Art Studio or via Facebook – Black Hole Art Studio
~*~*~*~*~*~*~*~*~*~*~*~*~*~*~*~*~*~*~*~*~*~*~*~*~
.
.


Barbara,
That is one flower tutorial I have not seen – and I really like the full and fluffy feel to the beautiful flowers. Thanks for sharing.