~ * ~
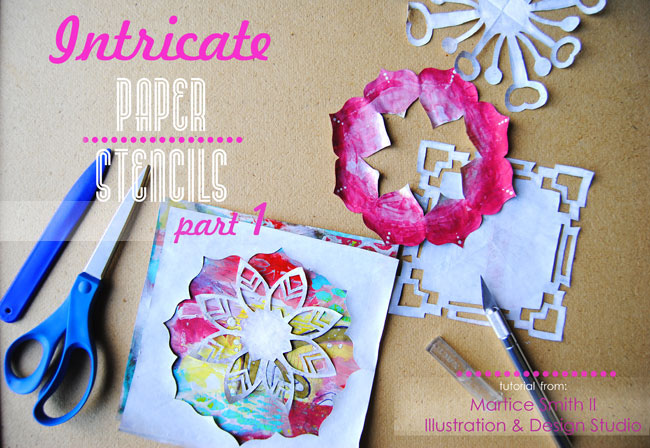
This article was written by Martice Smith II
I love creating my own backgrounds for my illustrations and art journal pages. But sometimes, when I’m learning a new technique, I can go through a stack of papers and I don’t want to necessarily throw them away and then, I’m left searching for more paper to use up. So, the next best thing is to re-purpose them by creating something entirely different!
For this tutorial, I will show you how to use pages from a phone book to create these intricate, paper stencils.You can even use up all of those ‘unsuccessful’ gelli prints and breath new life into them with this easy tutorial.
Let’s get started!
Gather Supplies & Tools
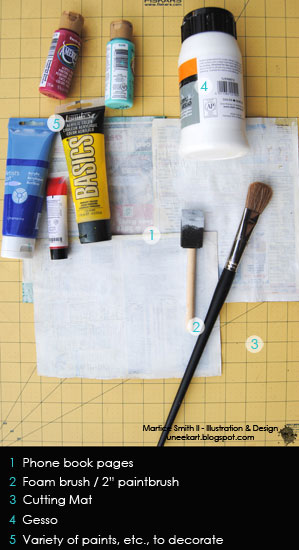
Old Phone book (pages will be torn out)
You can, certainly, use any kind of decorative paper you like for this tutorial. I’m just using up what I already have around the house and adding my own flair to it! Using something old to create something new…
Glue & Gesso
Supply needed: Glue (not pictured)
I felt that one page of phone book paper was too thin, so I glued two pages together for a little more stability and strength. (The final stencil will still appear delicate.)
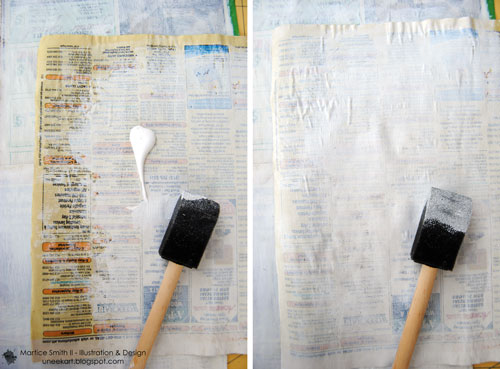
Next, use a foam brush or a 2 inch brush to apply 2 light coats of gesso to one side of the phone book paper.
Tip: I like to use a foam brush because it applies an even coverage. I like how the words and numbers peek through the gesso. This will give more depth to the final stencil.
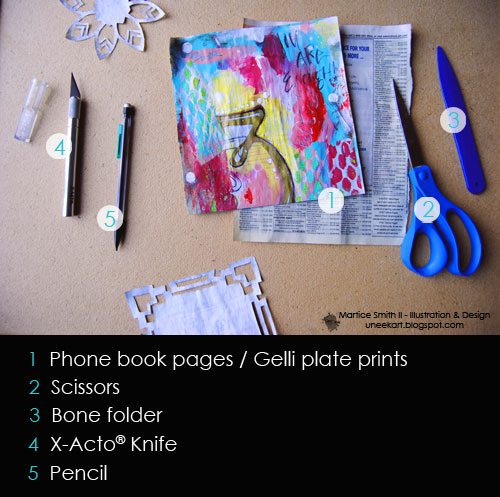
Paint & Decorate
**If you’re working on pre-designed paper, you can skip this step and proceed to the next step, ‘Create the stencil’.
Make sure you grab the supplies listed in the photo.
Now let’s paint our gessoed phone book pages with acrylics, watercolors, oil pastels- whatever we want! Keep in mind, though: the more layers of paint added, the heavier/sturdier the final stencil will become.
Create the stencil
It really doesn’t matter if your paper is right (paint) side up or wrong side up. Personally, I like to fold the paper with the ‘wrong side’ facing up, simply, because I can easily see the lines I’ll need to draw.
Fold.
For this particular design, I will need to start with a square sheet of paper.
Since phone book pages measure 7 inches (18 cm) wide by, approximately, 9 inches (22.5 cm) in height, I’ll have to trim the excess.
Take one corner and bring it up, diagonally. Line up the top edges.
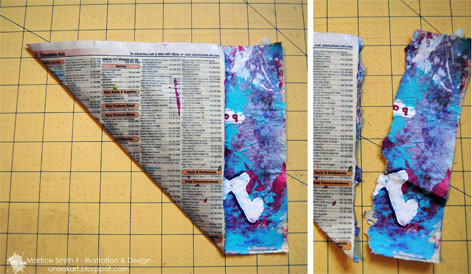
Be sure to crease all folds with a bone folder.
Phone book pages are rectangular so I’ll need to trim off the excess paper, after I make my fold.
Note: There will be a leftover strip that measures, approximately, 2 inches (5 cm) wide by 7 inches (18 cm) in height.
Cut or tear off the strip on the side.
Set this strip to the side, for now. (Later, you can make mini-stencils from this same strip.)
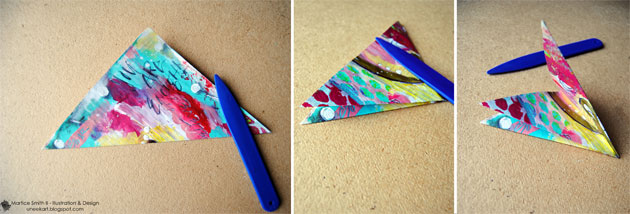
Now your page should look like a triangle.
Fold this triangle in half, twice, in the same direction. Remember to crease every fold with the bone folder.
Now, we’re ready to add our design!
Mark.
Let’s first visualize what kind of shapes and lines we want our finished stencil to have. There’s no need to measure anything- just go with the flow and enjoy the unique and organic line quality coming from your hands!
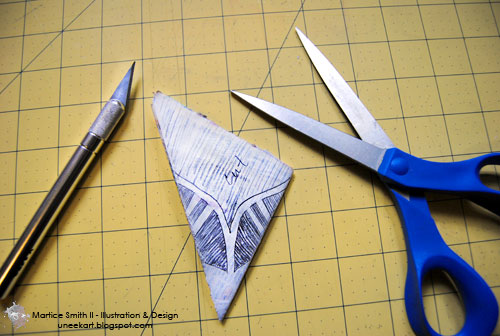
Place the fold on your right hand side. Draw your design onto the paper triangle.
To avoid cutting the wrong lines, shade in the areas that need to be cut away.
Cut out your lines.

Use scissors to cut out the largest area(s).
Next, determine if you need to continue using scissors to finish cutting out the design. A sharp X-Acto® knife would be a better choice for those narrow, hard to reach areas.
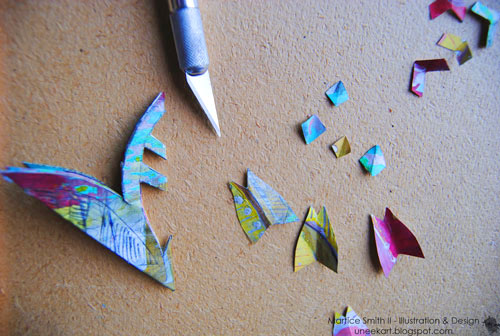
Tip: When you cut out the smaller areas, DO NOT throw them away! If you’re like me, you love to keep small bits of paper because, who knows? You might want to add them to your next collage! These small pieces can add some much needed color or texture to that ‘unsuccessful’ gelli print you have laying around.
You’ll thank me later for this tip 😉
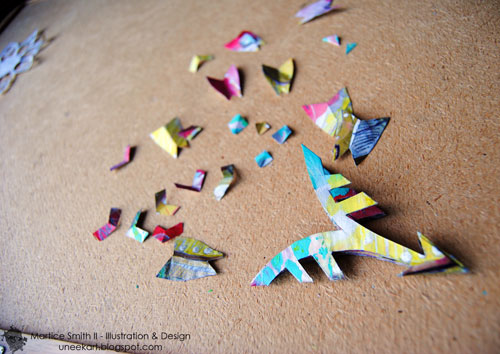
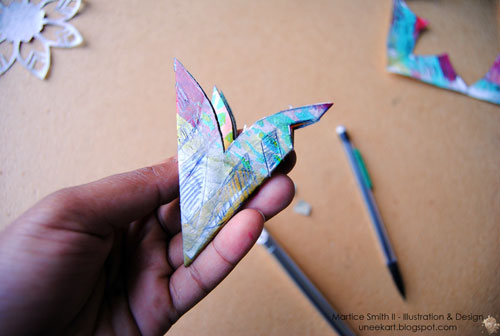
This is what the stencil looks like after cutting away a few areas. Don’t worry, we’re not done yet! Small things pack a big punch…you’ll see.
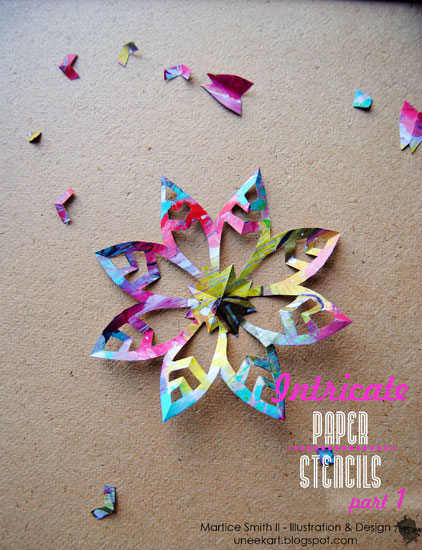
Open
Once you’ve cut out your design, slowly and gently open your intricate paper stencil. Whoa! Isn’t it beautiful?!
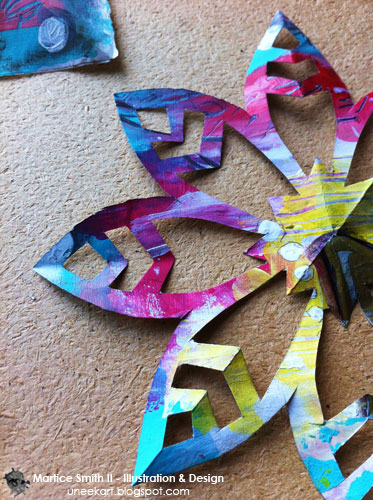
You can add finishing touches with distress inks, more paint to accent certain areas, embellish with textured stamps or add some glitter, bling bling!
Did you enjoy this tutorial? If yes, don’t miss Part 2! Look for ‘Intricate Paper Stencils, Part 2: Gift Wrap‘! I will show you how easy it is to make your own gift wrap using your beautiful, phone book paper stencils.
Until then, have fun and keep creating!
~*~*~*~*~*~*~*~*~*~*~*~*~*~*~*~*~*~*~*~*~*~*~*~*~
Author bio:

Martice Smith II is creative director of Martice Smith II – Illustration & Design Studio, based in Kansas City, Missouri and owner of Uneek Art Boutique. She established herself as a freelance Illustrator and graphic designer after receiving her Bachelor of Arts Degree.
Martice also contributes as an article writer for the Creating Mixed Media Art website.
You can see more of her work via her Facebook page or her blog. She invites you to join her monthly newsletter, Uneek Art Letter, for art biz tips, advice and free digital goodies!
~*~*~*~*~*~*~*~*~*~*~*~*~*~*~*~*~*~*~*~*~*~*~*~*~
.
.


Thanks Martice……….this is an EXCELLENT craft, and easy for anyone to implement!! I will make some this weekend! :O)
I love it you make it look so easy. I am going to try it thanks a lot, your projects are so much fun keep up the good work
excellent tutorial Martice!
Tara- You’re welcome and thank YOU for comment! I’m glad you found these instructions clear. Whenever you make some of your own, please share! I’d love to see them 🙂
KL- Yes, this project really is as easy as it looks! Thanks a bunch
Kristin- Thank you for commenting! Hope you’ll come back for part 2…until then, try tackling another project. There are a bunch of cool ones on the site.
These are lovely and look great for doing with children – looking forward to part 2.
I love the stencils you made. I will definitely give this a try.
@Debra- Thank you very much for your comment. Yes, children would love this project! They’ll probably relate them with snowflakes instead, though. I’d suggest designing with larger shapes and not too many narrow ones. A way to make them quicker and less stressful.
@Viki B- Thanks! I’d love to see what your stencils look like when you finish them. Feel free to share them with us!
Wow, just earlier this week I found an old telephone book. I said to myself initially – “I could use the pages to paint on.” but then I thought, I have too much stuff in my small apartment. So I threw it away. After seeing your site, I am now crying.
@Cassandra- Oh no! No need for crying 🙂 If you have any type of scrap paper (copy paper, ledger paper, etc.) it would work just as well as phone book paper. Try collaging various types together for a sturdier stencil.