~ * ~
This article is written by Michelle G. Brown
Last year, we had not one but two Easter Ephemera sheets to download – #11 Vintage Easter Wishes and #12 Cute Easter Cards but I hadn’t put them to good use, so for this month’s ephemera sheet, I thought I’d revisit these cute little vintage cards, with their lovely sayings, and turn them into a cad, ready for Easter this year.
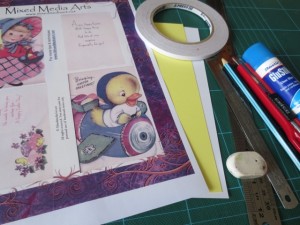
Materials
- Mixed Media Ephemera Sheet #12 Cute Easter Cards (scroll down until you find #12)
- Yellow and white card
- Glue stick
- Double sided tape
- craft knife and rulers
- Ink and sponges, to decorate
Instructions
1. Gather materials
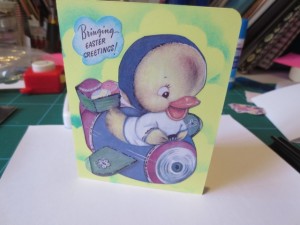
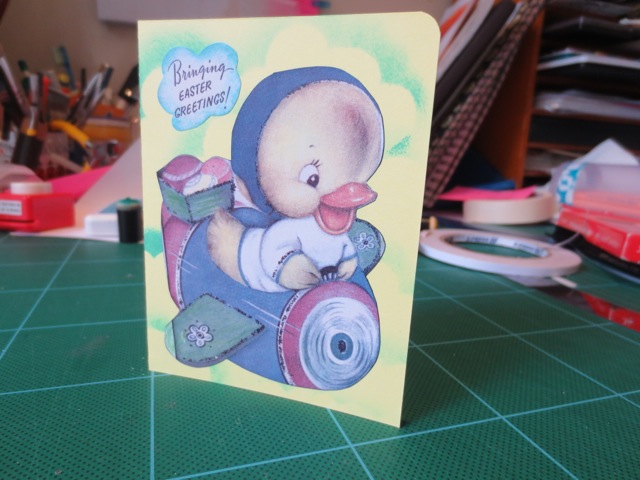
2. Cut out images for card. Here I added a bit to the airplane wing and cut a cloud around the front greeting.
3. Cut the yellow card to 165mm x 110mm [6 1/2” x 4 1/4”] and round top corners
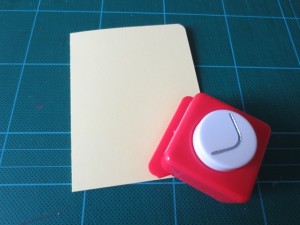
4. Cut out a cloud template from leftover card
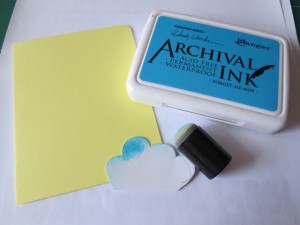
5. Sponge clouds onto card front
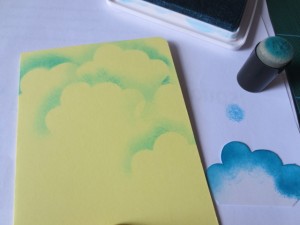
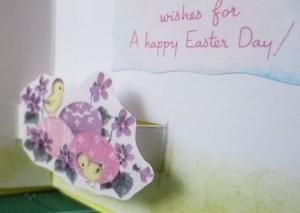
5. Sponge blue around the greeting. Edge the main image with black marker. Stick onto front of card with glue stick.
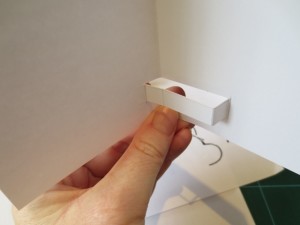
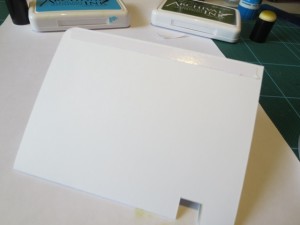
6. Cut inner card to 160mm x 105mm [1/8” smaller than the outer card]. Mark out the tab for the pop-up; 15mm from the bottom, 10mm to the left of the centre fold, then 25mm to the right, then another 10mm. Cut along lines parallel to bottom of card.
[**Note careful measuring is needed for pop-uo cards, so take your time here. it is important to have the lines parallel to the bottom of the card and parallel to the centre fold.]
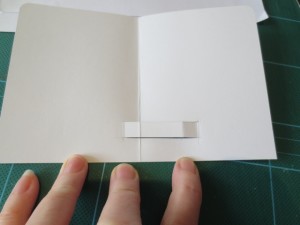
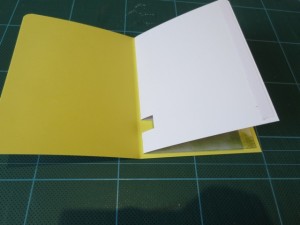
7. Carefully fold tab out and close card to check it will fold flat
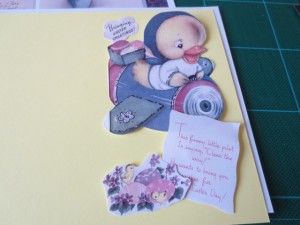
8. Decorate the inside of the card with the same cloud template as on the card front and add some green grass.
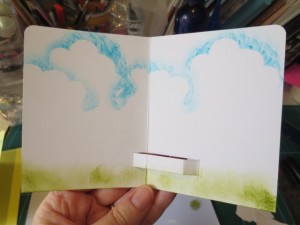
9. Add double sided tape to the top of the tab
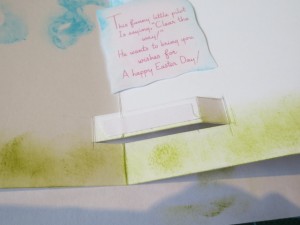
10. Add on the pop-up image and sentiment
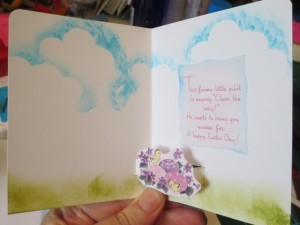
11. Now to add the inside into the card front. Again, care is needed here to make sure the card will open and close properly. Firstly hold the two sections together and check it will work as you expected.
Add a line of double sided tape to the outer edges of the inner card.
12. Attach to one side of the card front, leaving a little room in the spine to allow for the inner section to move a bit. then peel off the backing from the second piece of tape and close the card to stick these two pieces together.
13. Now your cute little Easter card is finished.
~*~*~*~*~*~*~*~*~*~*~*~*~*~*~*~*~*~*~*~*~*~*~*~*~
Michelle G. Brown is passionate about mixed media art and enjoys sharing her knowledge and techniques with you to allow you to express your own creativity. Michelle understands that many of us have an inner need to create. By learning a few basic techniques the amazing world of mixed media art is accessible to everyone!
~*~*~*~*~*~*~*~*~*~*~*~*~*~*~*~*~*~*~*~*~*~*~*~*~


We would love to hear from you