Getting Started with Beeswax Collage

~ * ~

This article is written by Debbie Davis from In Art Therapy.

Debbie has previously shared her Christmas beeswax collages with us. Now she is back to step us through the process of getting started with this interesting medium.

claybord beeswax mixed media collage

Introduction

Beeswax is a wonderful medium to use in art. It can be used as a decoupage medium for adhering papers and objects to a number of surfaces. It can be stamped into to add texture to your art and rubbed with an oil pastel to add color.

There are many options available when choosing a substrate upon which to create your collage. Here are a few:

  • Wood
  • Masonite
  • Paper
  • Canvas (small gallery wrapped or canvas panel)
  • Encaustic board
  • Clayboard
  • Metal

I have read that you should not apply beeswax over acrylic paint because it will eventually fall off. I do use small canvases that have been primed with acrylic gesso and have never had a problem with it coming off. I wouldn’t use a wrapped canvas any bigger than 5×5 inch because there isn’t as much support. I find the 4×4 inch to be the perfect size. You could also use a canvas panel which would be much sturdier.

Choosing your wax

Beeswax is sold in one or two pound blocks. It is also available in bags or jars that contain small pellets. It can be yellow (natural) or white (filtered) in color.You can find beeswax online or at a number of craft and hobby stores. Prices will vary but I usually pay around $11.00 for a 1lb block.

Heating tools options

  • Crock pot
  • Griddle
  • Melt Pot (made by Ranger)
  • Heat Gun
  • Mini iron (I love using my Clover mini iron)
  • Travelers iron (without holes)

If using a block of wax, you will need to break off pieces for melting. Put the wax in a plastic bag and hit it a few times with a hammer. Melting the wax can take a while, depending on how much you put in your pot. I like to use a small crock pot I bought at a yard sale. You should be very careful not to overheat the wax. Put it on the medium to low setting.

You could also use an electric griddle and put a pan on top with the wax in it. Just remember that whatever you put the wax in, you will not be able to use it for anything else.   Keep the temperature setting around 200 degrees. If the wax starts to smoke, the temperature is too high.

I love to use a mini iron to smooth the wax out after adding elements to the collage.  A heat gun can be used to fuse layers of wax together. You can also easily fix mistakes by melting the wax and removing any elements you are not happy with. All of these tools can be found on-line or at your local craft stores.

When painting the wax onto your substrate, use a natural bristle brush because synthetic brushes will melt. I just buy the cheap chip brushes. Also know that once you use the brush in the wax, you will not be able to use it for anything else. The wax will harden quickly on the brush but will melt again once placed back in the hot wax.

Items to use in your collage

  • Any type of paper (Scrapbook, dictionary pages, vintage book pages, magazine clippings)
  • Old photos or printed images
  • Buttons
  • Keys
  • Dried flowers
  • Found objects
  • Material
  • Lace
  • Ribbon
  • Paper napkins
  • Gift wrap tissue
  • Pattern tissue

This is where you can really have fun because if you don’t like where you put something, you can melt the wax, move the object and start over again. No need to worry about ruining your substrate.

Here are some examples of collages I have created on various substrates:

canvas beeswax collage

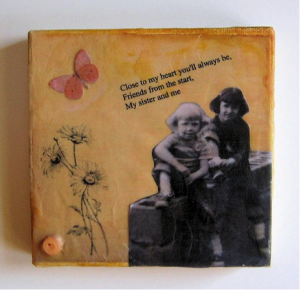
Collage on Canvas using an image of my sweet cousins, flowers and a poem stamped onto white tissue paper along with a paper butterfly and a button.

wood substrate beeswax collage

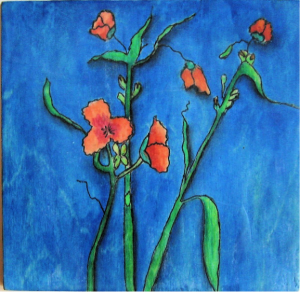
Beeswax on Wood – Ink and watercolor painting coated in Beeswax

claybord beeswax collage

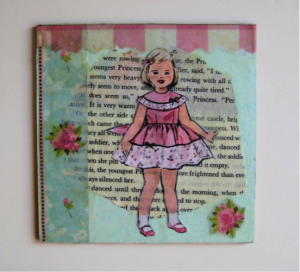
Beeswax on Clayboard – I used tissue paper, scrapbook papers, a page torn from a vintage children’s book and an image printed from my inkjet printer.

I hope you have fun experimenting with this new medium – it’s perfect for a range of mixed media projects!


~*~*~*~*~*~*~*~*~*~*~*~*~*~*~*~*~*~*~*~*~*~*~*~*~

My name is Debbie and I live in Morton, Illinois, USA. I’m happily married and have a wonderful family that includes a daughter, son, son-in-law and 2 of the sweetest grandchildren ever!

What I love most about mixed media art is that you don’t have to be an expert at anything to create beautiful art. It is a great way to recycle found objects. Art is such a wonderful stress reliever. I just wish I had more time to play!

I have a shop on Etsy called Artful Explorations where I place some of the art I have created for sale. Having been inspired by others who are willing to share their techniques and ideas, I decided to start a blog called In Art Therapy and hope you will visit me there.

~*~*~*~*~*~*~*~*~*~*~*~*~*~*~*~*~*~*~*~*~*~*~*~*~

For further reading:

.

Mixed Media Canvas – “Be Brave” Girl

~ * ~

This article and mixed media canvas was created by Melanie Statnick

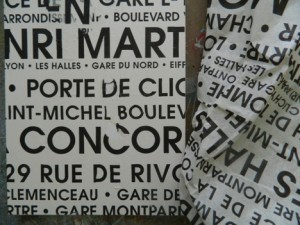
1. Start with a blank canvas. I’ll be using a hard board canvas for more support. Cover the entire service with decorative tissue paper of your choice using Gel Medium. The paper creates great texture for this piece.

Printed tissue for canvas layering

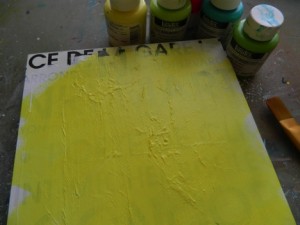
2. After you’ve dried the tissue paper start covering the surface with white acrylic paint. Dry between layers of paint.

Printed tissue is covered with bright paints

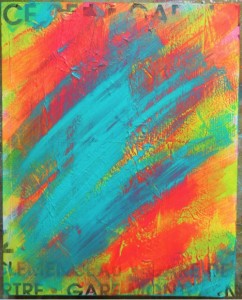
3. Start layering your background starting with the lightest paint colors first. Apply paint in a diagonal fashion using back and forth strokes with a med size brush.

Add more colours with diagonal strokes

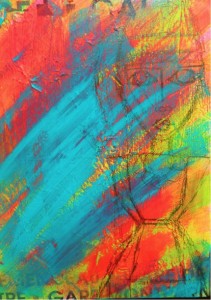
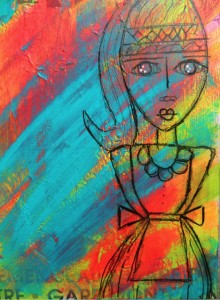
4. After your layers of paint have built a foundation as your background you’ll want to use an 8B graphite pencil to free hand sketch a character anywhere on your canvas.

Lightly sketch with graphite pencil

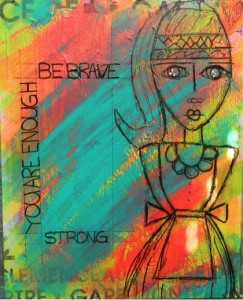
5. Next you’ll want to go over the pencil line using a black marker. I suggest a 1.2 mm.  Line the face and body. This will make your character stand out.

Define sketch with 1.2mm black marker

6. Using a ruler pick an open spot on your canvas to create a rectangular space to write. Using your black marker outline the rectangle twice creating blocks to write in words. Choose words that are inspiring to you.

Use ruler to add lines and words

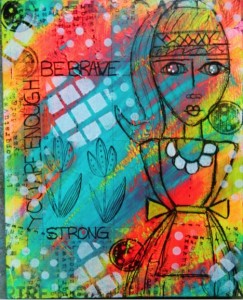
7. To complete the painting use stamps and stencils of your favorite and create the next layer to your back ground. In some spots you may want to layer over your character as you see here. Add details to your characters body face and clothing.  When using your stamps be sure to use permanent ink pad. I also suggest using lighter paint on a dark back ground when you stencil.

Stencilling and stamping add final touches to canvas

~*~*~*~*~*~*~*~*~*~*~*~*~*~*~*~*~*~*~*~*~*~*~*~*~

I’m a Canadian Mixed Media & Collage Artist out of North Carolina . I create art daily from my private studio. My artwork is fun and whimsy . I teach mixed media & Art Journaling online and in classroom. I hold mixed media workshops around the USA. My artwork can be found in art galleries and shops extensively in NC with international private collections. I have created my personal line of original stamps to purchase and use in your art. Look in my Etsy shop for my line.

Please visit my website to learn more about me and my work on Facebook.

~*~*~*~*~*~*~*~*~*~*~*~*~*~*~*~*~*~*~*~*~*~*~*~*~
.
Faux Dichroic Glass

This article has been written for us by Linda Giese

Making faux dichroic glass is a little smelly and time consuming, but a whole lot of fun and endlessly creative!  Whenever I get out all the stuff I never want to stop.  I keep adding more elements, trying new color combinations and when something works particularly well, I want to do it again before I forget what I did.

coloured glass

There is a little planning in the process and a whole lot of serendipity. I’ve been surprised more than a few times with how a particular embossing powder acts on the surface.  Some spread into flower blossoms and some leave airy spaces while others cover everything you did before.  The Asian text loses the paper and leaves the beautiful lettering.

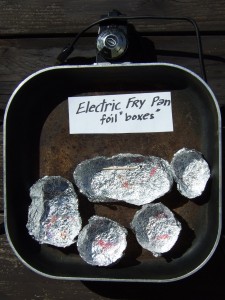
So let’s get started.  I use my 44 year old electric frying pan for my heat source.  I learned the technique from a friend with a hot plate.  We set the glass on a craft sheet, but often burned our hands or dropped the glass using tongs.  I tried to find an inexpensive used hot plate to no avail, so looked for another option.  One more of my small appliances is now dedicated to my art.  I tried putting my glass pieces on a craft mat, but soon had powder and beads all over my pan.  I also burned my fingers and dropped a few pieces.

Frypan to make your own coloured glass

I tried aluminum pans, but most had patterned bottoms so the heat was uneven and parts of the embossing powder took forever to melt.  My little foil boxes work so well.  I can pick them up easily and keep most of the powder inside the boxes. I can also easily remove the finished pieces while leaving others in place.

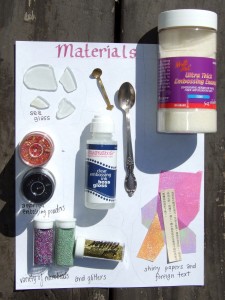
The other materials you will need are sea glass, clear embossing ink, clear ultra thick embossing powder, assorted colored embossing powders, a small spoon for adding new elements and a toothpick for moving things around.  Optional extras are microbeads, glitters, shiny papers and foreign text.

materials needed to make your own coloured faux dichroic glass

The sea glass can be clear or colored, but should be nice and flat.  If you can get real sea glass with the smooth edges, that would be ideal.  But I often uses the bag of sea glass from the craft or dollar stores.  I prefer the bottle of embossing ink with the dauber top to the pad.  I feel I have more control and get better coverage.  I found my shiny papers at the dollar store as holographic tissue paper.

The process is quite easy.  I heat the frying pan to between 250 and 300 degrees fahrenheit   I tear some pieces of aluminum foil and fold up the sides, pinching the corners for open boxes, trying to keep the bottom nice and flat.  I put embossing ink on one side of the glass and dip it in the clear ultra thick embossing powder.  Put the glass, powder side up, in the foil box and into the heated pan until it melts.

Now it is time to have some fun.  Add some papers (save the text for a near the top layer)or add microbeads, or colored embossing powders a bit at a time with a very small spoon.  Let each layer melt before adding more.  Don’t add too much powder at a time. Whenever you want something to show through, add more clear embossing powder on top.

I keep preparing new pieces while waiting for others to melt.  You will know it’s all melted when the whole top is shiny.  You won’t have to add any more embossing ink after the first layer because the wet powders will grab the additional layers.  Leave the pieces in the pan as you add things and remove when they are finished.  The top edges of the foil are cool enough to carefully lift out of the pan, but be aware that the glass will be very hot!  Let it cool before you touch it.

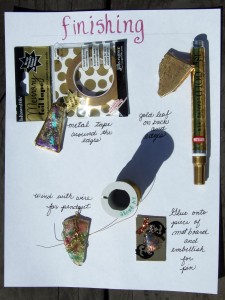
materials needed to finish your own glass

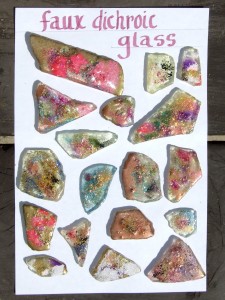
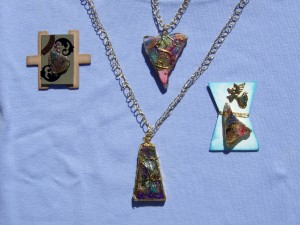
Now that you have a nice array of beautiful pieces, what do you do with them?  Most of mine are made into pendants.  I also crochet gold thread (just a chain stitch) for the necklace when I sell them.  I use 24 gauge wire, cut a piece, make the top loop, wind randomly and tighten.  Sometimes I use my gold pen on the edges and or back.  I tried the metal tape around the edge, but wasn’t pleased with the result.  I also like making the smaller pieces into pins.  I glue them (I use Aleene’s Tacky Glue) to small pieces of mat board and embellish them.  I adhere a pin back.  You can also use them on a mixed media canvas or board.

faux dichroic glass pendants and brooches

Let me know if you come up with more ideas for additions or uses.  Have fun and be creative!

Hugs, Linda

~*~*~*~*~*~*~*~*~*~*~*~*~*~*~*~*~*~*~*~*~*~*~*~*~

Linda Giese has an altered book in the Autumn 2012 issue of Art Journaling.
 She welcomes emails, questions and comments at linda.giese@yahoo.com

~*~*~*~*~*~*~*~*~*~*~*~*~*~*~*~*~*~*~*~*~*~*~*~*~

.
.

Faux Stitching

This article is written by Dawn Stegall of Faithfully Yours

I don’t know about you, but I love the look of stitching on my craft projects.  However, I really don’t want to drag out my sewing machine. Actually to be perfectly honest, I don’t want to take the time to learn the proper needle to use, tension, etc. So instead I prefer an easier and quicker method.

Supply list:
• serrated tracing wheel
• gel pen, markers, pens
• soft surface (mouse pad, etc)

Step 1: Create Holes

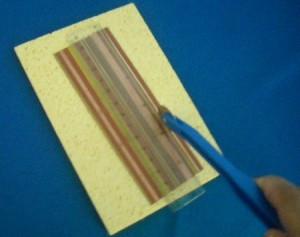
Using tracing wheel, create your holes where you want your stitching to be. I traced around the border of my patterned paper.

 Mixed media art technique

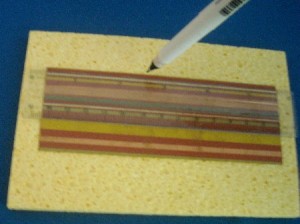
I have a clear 6 inch ruler I like to use as a guide. Be sure to press hard enough to create the holes. This is why a cutting matt will not work, you need a softer surface to create the holes.


Step 2: Faux Stitch

Using gel pen or marker of your choice, “connect the dots”.  I keep the ruler in place and simply draw a line.

Mixed media art technique

Close up of “stitches”.

Mixed media art technique


Super simple, yet effective!


Method 2:

Use a marker and draw lines freehand to create your own faux stitching. I like to use glaze pens as they dry with a slightly raised surface. This gives your stitches a more realistic look. Note: for this method do not use a ruler as the pen tends to bleed under the ruler leaving smudges on your finished project. (plus allows for a more realistic hand stitched look)

Sample card:

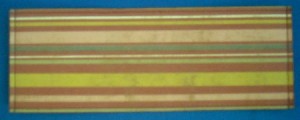
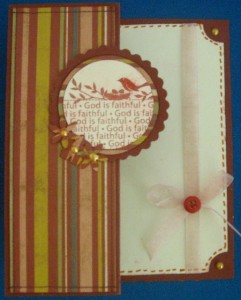
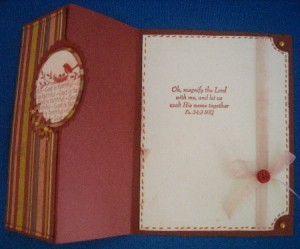
Notice the striped panel of patterned paper from the tutorial above. Inside the card I used method two and drew the stitches freehand with a glaze pen. Under the circle, I stamped a sentiment on the inside of the card.

Mixed media greeting card

Mixed media greeting card

~*~*~*~*~*~*~*~*~*~*~*~*~*~*~*~*~*~*~*~*~*~*~*~*~

Dawn Stegall strives to be a good steward while remembering God in her scrapbooks.

For a free guide and weekly inspiration visit http://www.FaithfullyYours.net

~*~*~*~*~*~*~*~*~*~*~*~*~*~*~*~*~*~*~*~*~*~*~*~*~

.
.