Journaling on the Quick

~*~

This article is written by Debbie Davis

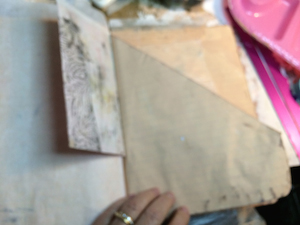
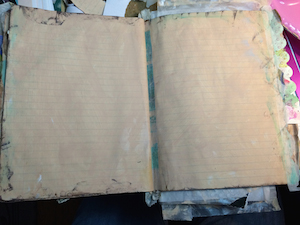
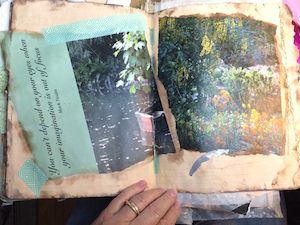
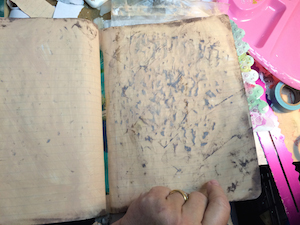
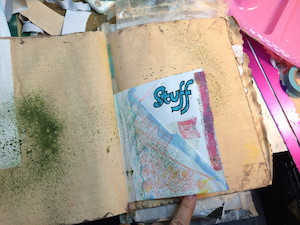
I like to keep a number of painted backgrounds at the ready in my journal books for when I don’t have a lot of time but am feeling the need to journal.  One of my favorite journals is a vintage ledger binder that I picked up from an antique store.  The ledger pages had never been used.  I sometimes keep a few of the pages handy when I’m working on other projects and use any leftover paint on them to create a background.

I had just returned from a beach vacation and was starting to think about all that needed to be done at home and work, but what I really wanted to do was journal.  I didn’t do any art or journaling on the trip and was really missing it.  Since I didn’t have much time, I used a previously created background.

Journaling Image

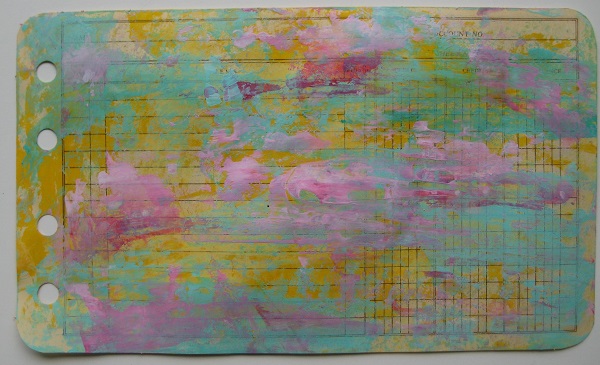
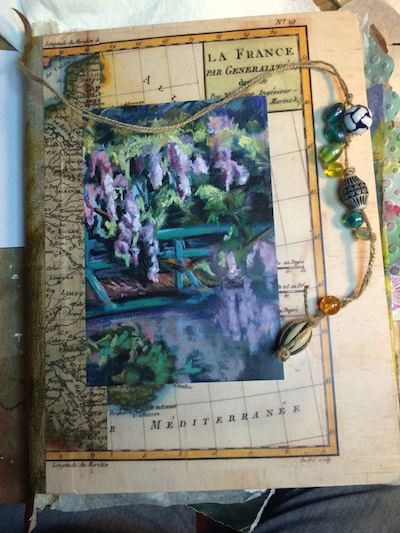
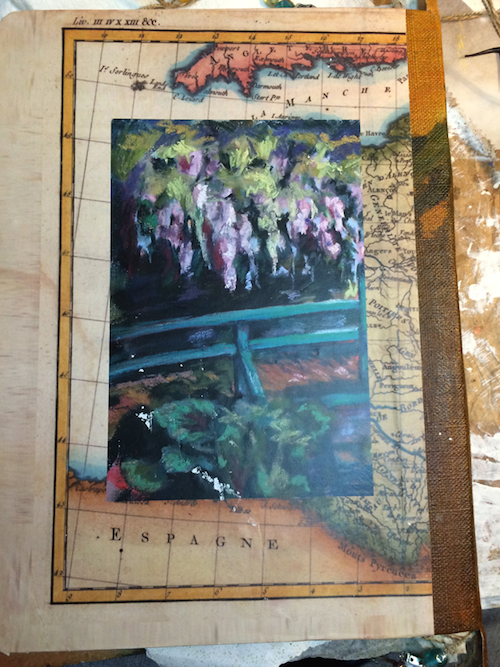
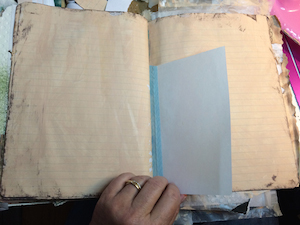
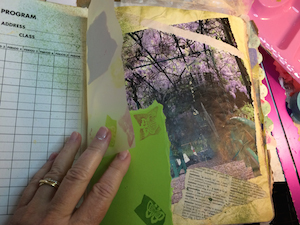
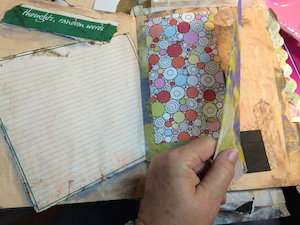
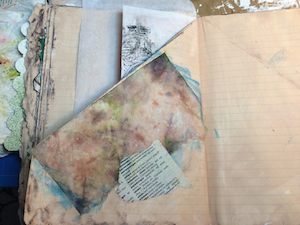
This background was made by randomly scraping pink, yellow and blue/green paints that had been loosely mixed with some white fluid acrylic paint onto the ledger journal page using an old store card.  The colors were so calming and reminded me of the beach.  I then remembered a vintage photo that I had been wanting to use in my journal for a long time.

Journaling Image

I copied and pasted the photo into a Word document and resized it so that it would fit on the journal page.  I printed, cut out and collaged the photo, along with two little beach cabanas that I had cut out of scrapbook paper, onto the page.  I outlined the photo and cabanas with a Stabilo pencil and lightly went over the pencil with a wet brush.

Journaling Image

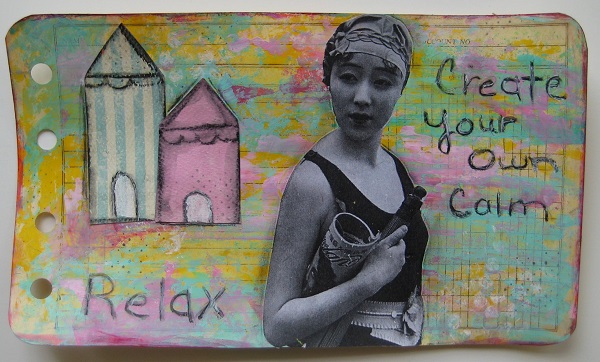
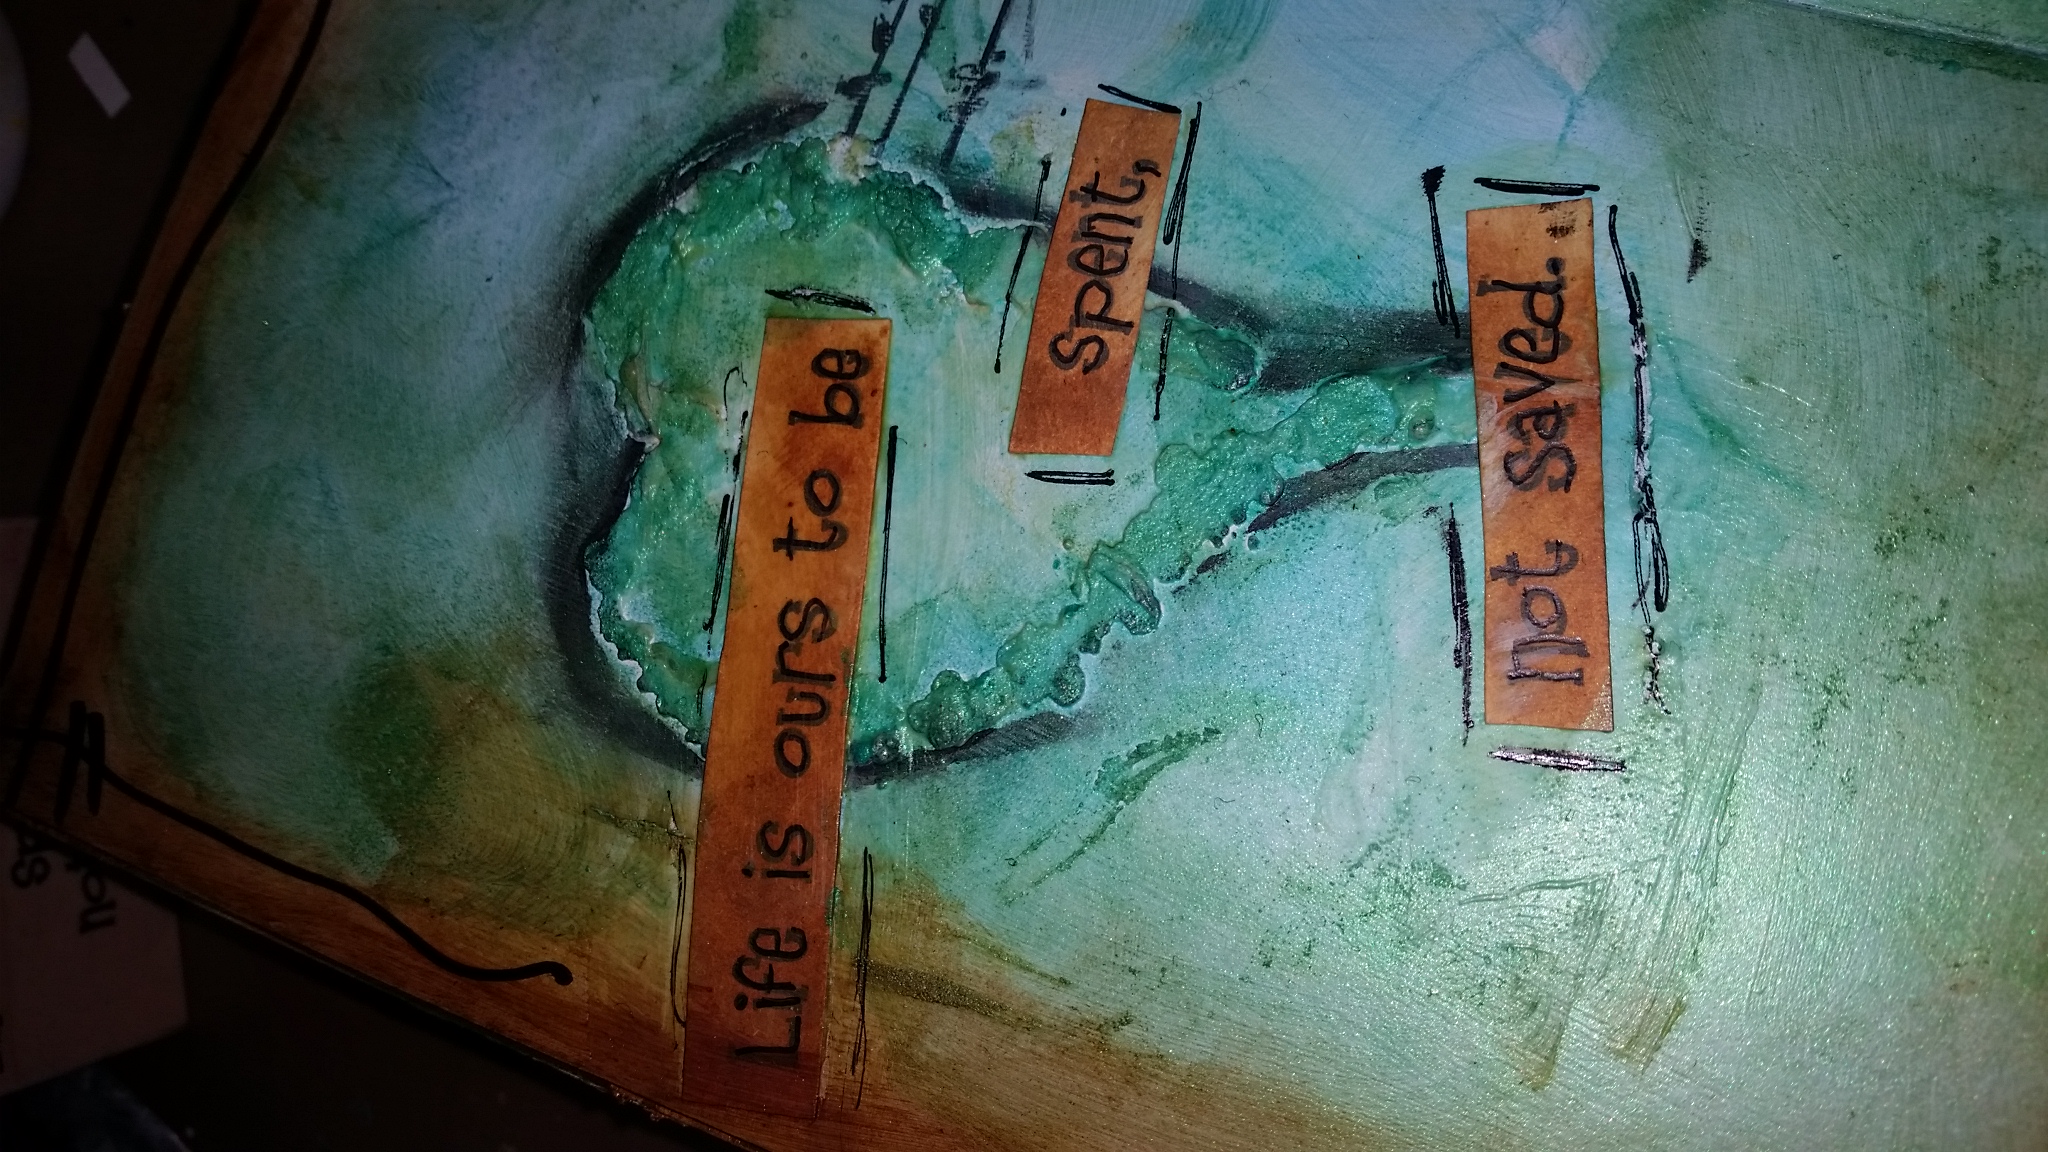
Next I wrote some words onto the page with the Stabilo pencil.  The black penciled words were standing out more than I wanted so I took a white gel pen and scribbled over the words to tone them down a bit and give them a washed out look.  This page was so quick and easy, yet I still felt that sense of contentment that I usually feel after getting in some artful playtime.

~*~*~*~*~*~*~*~*~*~*~*~*~*~*~*~*~*~*~*~*~*~*~*~*~*~*~*~*~*~

Debbie Davis is a mixed media artist living in Morton, Illinois.   She finds creating art to be a wonderful stress reliever and plays in the paint and other mixed media mediums every chance she gets.

You can find more of Debbie’s art and techniques by visiting her In Art Therapy blog at inarttherapy.wordpress.com

~*~*~*~*~*~*~*~*~*~*~*~*~*~*~*~*~*~*~*~*~*~*~*~*~*~*~*~*~*~

.

.

Life is Ours – Mixed Media Art Journal

~ * ~

This article is written by Terri Sproul

Art journals are a place to let yourself free.  There are no wrong or right way to play in your journals, so just sit down and have fun.  Playing with lots of medium made your experience even more fun, so step out of your box and purchase something new.

Alternative text: video of art journaling by Terri Sproul

Have fun with Details, Color and Texture to complete a fun experience and Art journal page

video of art journaling by Terri Sproul

Product that were used in this Art Journal page are listed below.


Products used in this Art Journal page:

CottonWood Art Journal

Silk Acrylic Glaze from ColourArte:  Guatemalan Green and Autumn Leaf

Stamps:  SinCity Stamps, and Verses Rubber Stamps

Stencil:  Unknown

Golden:  Regular Gel Matte, Light Molding Paste

Gesso

India Ink

Faber-Castell – Pitt Pens Black

FineLine Applicator

Paint Brushes, Baby Wipes

video of art journaling by Terri Sproul

video of art journaling by Terri Sproul

~*~*~*~*~*~*~*~*~*~*~*~*~*~*~*~*~*~*~*~*~*~*~*~*~

Terri Sproul is a CHA designer and a Mixed Media Artist with her own line of stamps with SinCity Stamps and own paint line with Sakura Hobby Crafts.  She and her husband have the pleasure of living on Palomar Mountain in San Diego County in California.  She present host a live show about Art Journals on Tuesday night, find all that info at her Facebook group “All things Terri Sproul”

Find more of her video at youtube.com and her blog:  terrisproul.blogspot.com

~*~*~*~*~*~*~*~*~*~*~*~*~*~*~*~*~*~*~*~*~*~*~*~*~

.

.

Art Journal Jumps

~ * ~

This article is written by Vicki Ross

What is a Journal Jumpp? A Vicki-ism for a starter journal. A journal I’ve started for you. A jump-start.

All artists have a stash of untouched journals of all sizes…some designed for writing, some for painting, spiral bound, moleskin, etc. Always on the lookout for deals, we get them gifted, and somehow most of them are never touched. Saved for a rainy day.

WELL, that is changing! If I destroy a book, whether an altered old big book, or a new cheap composition book, and it has distressed pages and a color/image theme, you won’t feel so timid about ‘ruining’ it! I already did!

This is an altered composition book. It is based around a datebook I designed a long time ago that featured Ran-DEE’s photos from Giverny. I also included on the cover a painting I did at home after the trip, a pastel. The photo of the painting is mounted on an image of an antique map of France. The spine is a piece of linen canvas, actually has some oil paint from a studio session I did while in France.

mixed media art journal

Supplies for your Art Journal Jump:

  1. Composition book
  2. Mat Medium or Glue Stick
  3. Gesso
  4. Acrylic paint for tinting the gesso
  5. Modeling paste
  6. Gloss Varnish
  7. Washi Tape
  8. Stamps, Stamp pads
  9. Stencils
  10. Various fibers, beads, other found objects

mixed media art journal with these steps

Step 1: Start with a blank composition book ($1.00). They have around 100 pages and a sturdy cardboard cover. Open it to the center and make sure it is stitched, not glued. Glued bindings will not hold up to the stress of our abuse.

mixed media art journal with these steps

mixed media art journal with these steps

Step 2: These have around 100 pages, and you want to remove about 1/3 of them evenly throughout. Tear with straight edge, and glue the facing pages (on either side of the removed pages) together for thicker pages. Group several together to hold up to embellishments, cardboard, collage, etc. Place something heavy on top of book and let dry overnight. I used a mat medium gel, although cheap glue sticks work too.

Step 3: I mixed up gesso with an acrylic color that closely matched the inside pages of the datebook, and with a 2″ sponge brush, painted every page. The lines show through some because it dries translucent. It dries fairly quickly, and I hurried it along with a heat gun. Place waxed paper between each page and repeat! Heavy weight again, overnight.

Step 4: It is best to wait until the pages are completely dry! No dampness at all. Of course, I couldn’t wait to continue. I folded some pages  at the corners and glued together to make pockets. If any of your pages are stuck, gently pull them apart. If a mark or tear occurs, cover it up or tear it out!

mixed media art journal with these steps

mixed media art journal with these steps

mixed media art journal with these steps

Step 5: I distressed the edges of every page using a Tim Holtz Distress Ink Pad, Walnut. Anything will work, just keep it rough.

Step 6: If any pages looked weak (in the binding area) after all the gesso and glue, I took a piece of deli paper, wash tape, or print masking tape (Scotch brand) and glued in the crease. MAKE SURE TO USE WAXED PAPER EVERY TIME YOU CLOSE A PAGE.

Step 7: Decorate! I used laser images printed from the original book, and decorated them with scraps of tape or printed deli paper. Deli paper prints cut in strips does great for edge trim.

mixed media art journal with these steps

mixed media art journal with these steps

mixed media art journal with these steps

Step 8: I added “tip-ins” as you can see in the image above. Assorted pieces of acetate and note papers, ragged edges and odd sizes. These are glued or taped into the spine.

mixed media art journal with these steps

mixed media art journal with these steps

Step 9: I used a stencil pattern cut out of light card stock with my Cricut Explore, and modeling paste.  (image 1 below) Let it set up a few minutes, then remove the stencil. After it dries, rub over it with an ink pad to bring up the texture. Image two on the left page is an envelope made from one of the photos. Image three below shows a dried baby wipe I had used the day before as a clean-up. The colors were random, but same used throughout. Some pages torn from a French Dictionary added some text and visual interest.

mixed media art journal with these steps

mixed media art journal with these steps

mixed media art journal with these steps

Step 10: Glue die-cut paper scraps to some edges. As long as you stay in the theme colors (mostly), stamp, write, distress to your heart’s content.

I left at least half the pages empty for someone else to fill.

Step 11: Covers. I left these ‘til last so I didn’t have to worry about keeping them clean. First, I took some threads double the length of the book. I tied assorted beads to one end, about 5″. Make sure knots are tight…can add some glue for additional hold.

Leaving about a 3″ tail at the bottom, I glue this to the OUTSIDE of the spine. This makes a bookmark, so make sure the length extends so the beads fall outside the book at the bottom after wrapping through book.

I found a partial piece of painted linen canvas that I started an underpainting while in France. Not important, but I know where it came from 🙂 it was in the color palette of greens and oranges. Cut 2.5″ wide and extending 3″ beyond each end. Glue generously, wrap around spine and weight to dry overnight. DON’T peek. It has to cure.

In the meantime, I prepared a digital collage with antique map of France and one of my paintings from Giverny. This was laser printed, cut in half, and glued to each cover. I had 3/4″ overhang. Fold in the excess to the inside, and glue.

I cut the linen where it would fold inside the cover, but clear the pages, folded it in and glued, leaving the center piece of linen free.

For the inside covers, I use laser prints of two watercolors painted on location in Giverney…one of mine, and one of Ran-DEEs.

mixed media art journal with these steps

mixed media art journal with these steps

As I keep going, I see a few places that need to be touched up. Stamps, stencils, or pieces of paper will cover any objectionable marks.

I tied a few beads to the bottom strings of the bookmark, and trimmed the linen at each end about 1/2″ from the book. I figured this added a bit of protection.

A final coat of acrylic varnish (Liquitex Gloss Medium & Varnish) and this puppy is ready for someone else to finish!

Let me know what you think!

All images © V.N.Ross

~*~*~*~*~*~*~*~*~*~*~*~*~*~*~*~*~*~*~*~*~*~*~*~*~

Vicki Ross is focused on sharing her journey to art and how life events can shape us through creativity. www.Axully.com Vicki has always been involved deeply in the creative arts, from professional soft crafts publications (knitting/crochet/needlework) to French Hand-sewing, stenciling to macramé, oil painting to encaustics. Whatever your leaning, she believes in the healing power of creating.

You can see more of Vicki’s work at VickiRossArt or via blog posts at Axully – Solid. Useful. Beautiful

~*~*~*~*~*~*~*~*~*~*~*~*~*~*~*~*~*~*~*~*~*~*~*~*~

.

.

You Can Draw Anything

~ * ~

This article was written by Melanie Statnick

Learning to draw the simplest images and save money on stamps

Learning to draw the simplest images and save money on stamps

Hi I’m Melanie and I’m anArtsupplyaholic. I have everything I could possibly need and then some. Recently I went to a craft store to find yet another pencil with a specific led type that I didn’t need. Do you find yourself in this spot often? Too often?  I know the urge to shop for all the newest toys is on your mind the next time you get paid.  However when you’re on a budget this is the worst thing you can do with your already tight income.

As I looked around at all the new papers, canvases, pens, pencils, stencils, paints, brushes the urge to “just get it”…washed over me. As I looked at some of the coolest stamps I’ve seen I thought “What am I doing buying? I can draw this.”And so can you.  I know when it comes to stamps who can resist getting the cutest one or the one that is just perfect. I can’t tell you how many times I’ve heard from students “I can’t draw astraight line”.  Or just plain “I can’t draw”.   I didn’t leave that store with anything because I was determined to learn to draw my own images and save the 20 bucks.

Learning to draw the simplest images and save money on stamps

Learning to draw the simplest images and save money on stamps

The simplest stamp of a snowman, a mason jar, pumpkin and more are some of the simplest stamps I’ve seen and we buy them for convenience. I’m a self-taught artist and I believe that I can learn anything. Over the last 4 months I’ve sat with my journals, pens, pencils, markers and watercolors and have been teaching myself to draw. Years ago I didn’t think I could until I practiced every day. That is all it takes. There are so many books on how to draw and websites that have an abundance of inspiration.  But are you any good?  Yes you are.  We have to get past being perfect, realistic and spot on. It would amaze you to know how many people appreciate the imperfect cute doodle.

Learning to draw the simplest images and save money on stamps

Draw out 6 squares in a sketch journal and get your toes wet.  Be fearless with your drawings and learn to let go of how many Facebook “likes” your photo of your drawing gets. What is most important is that you like what you draw and you can draw a straight line. Practice 6 block drawings for 21 days and watch how amazing you become. Stop buying and start drawing.

~*~*~*~*~*~*~*~*~*~*~*~*~*~*~*~*~*~*~*~*~*~*~*~*~

Melanie Statnick is a published artist/writer out of North Carolina. Melanie creates art daily from her private studio. Her style is happy and whimsy. Statnick’s artwork can be found in art galleries and shops extensively in NC with international private collections. Learn more about Melanie view her website at: www.melaniestatnickart.com

~*~*~*~*~*~*~*~*~*~*~*~*~*~*~*~*~*~*~*~*~*~*~*~*~

.

.