Turning Mixed Media Tags into Greeting Cards

~ * ~

This article is written by Michelle G. Brown

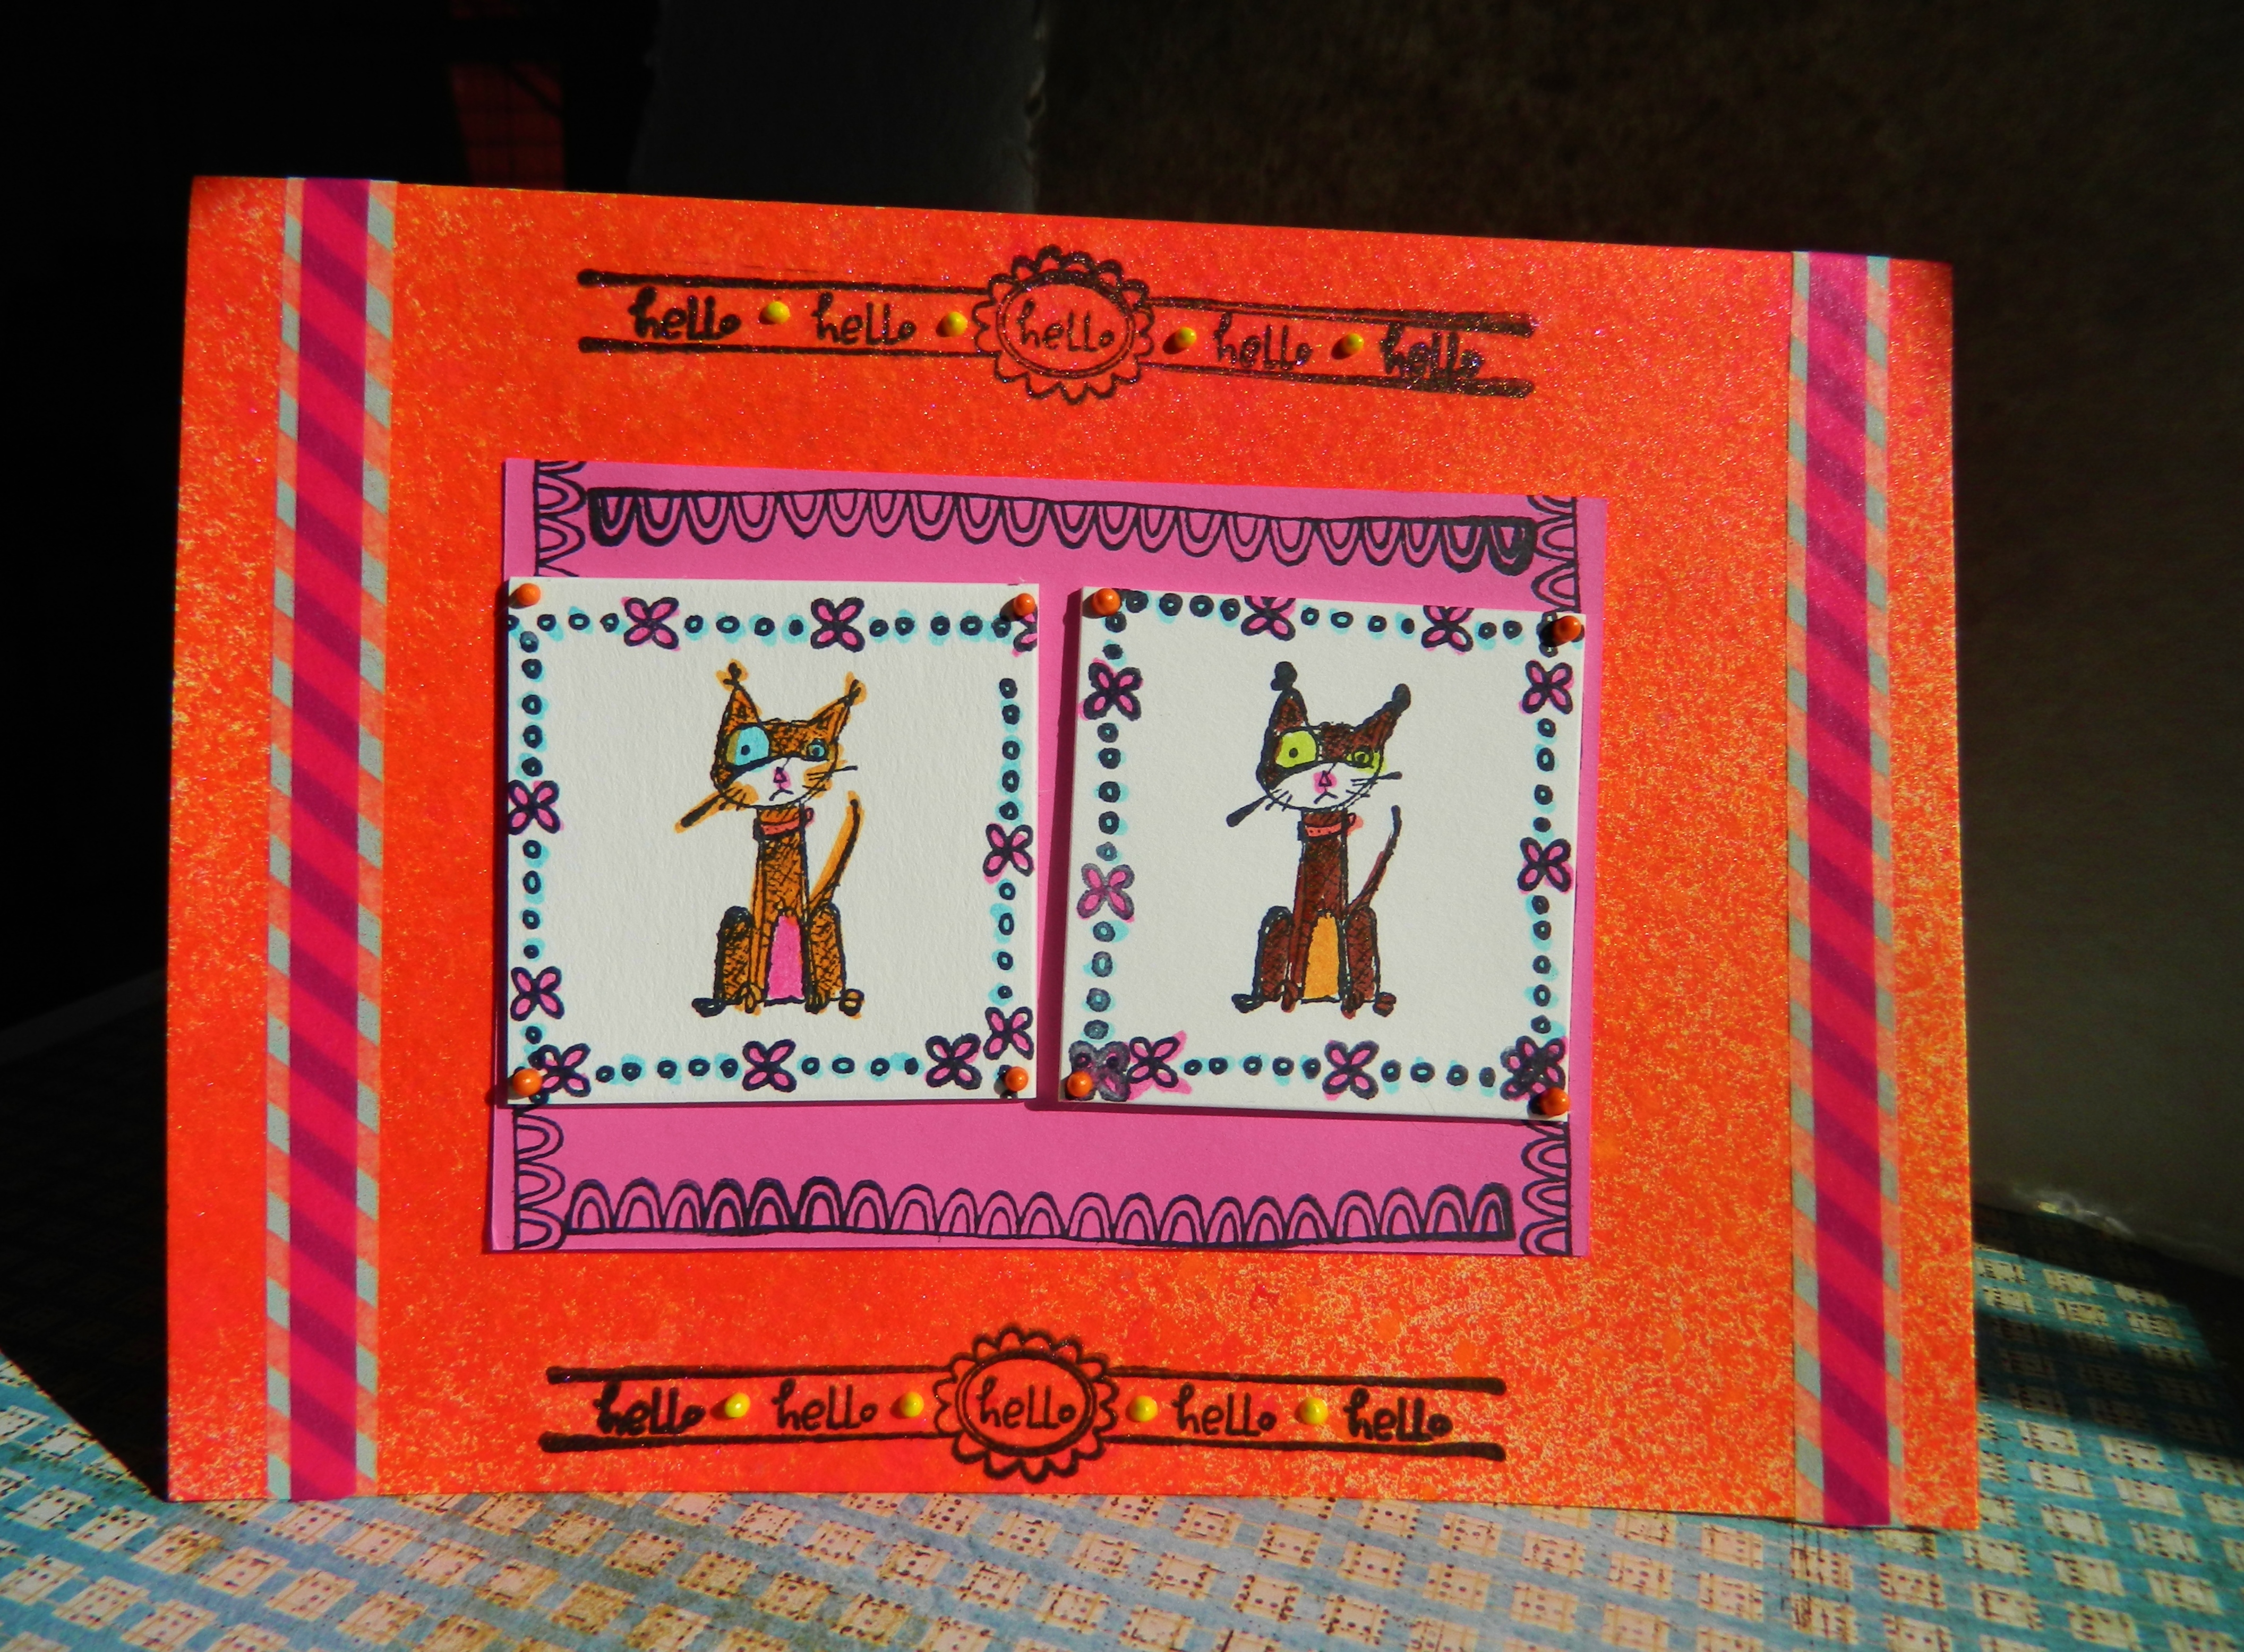
I love making handmade greeting cards from my family and friends – but I always worry that the hard work that has gone into making them won’t be appreciated and they will be discarded along with the store bought cards. I wanted to make a greeting card that would keep on giving, well after the birthday or event has passed – that’s when I decided to make a tag bookmark and integrate that into a card; that ticks both boxes – a handmade greeting card AND a gift
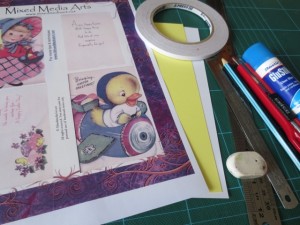
Greeting Cards from shipping tags

Materials:

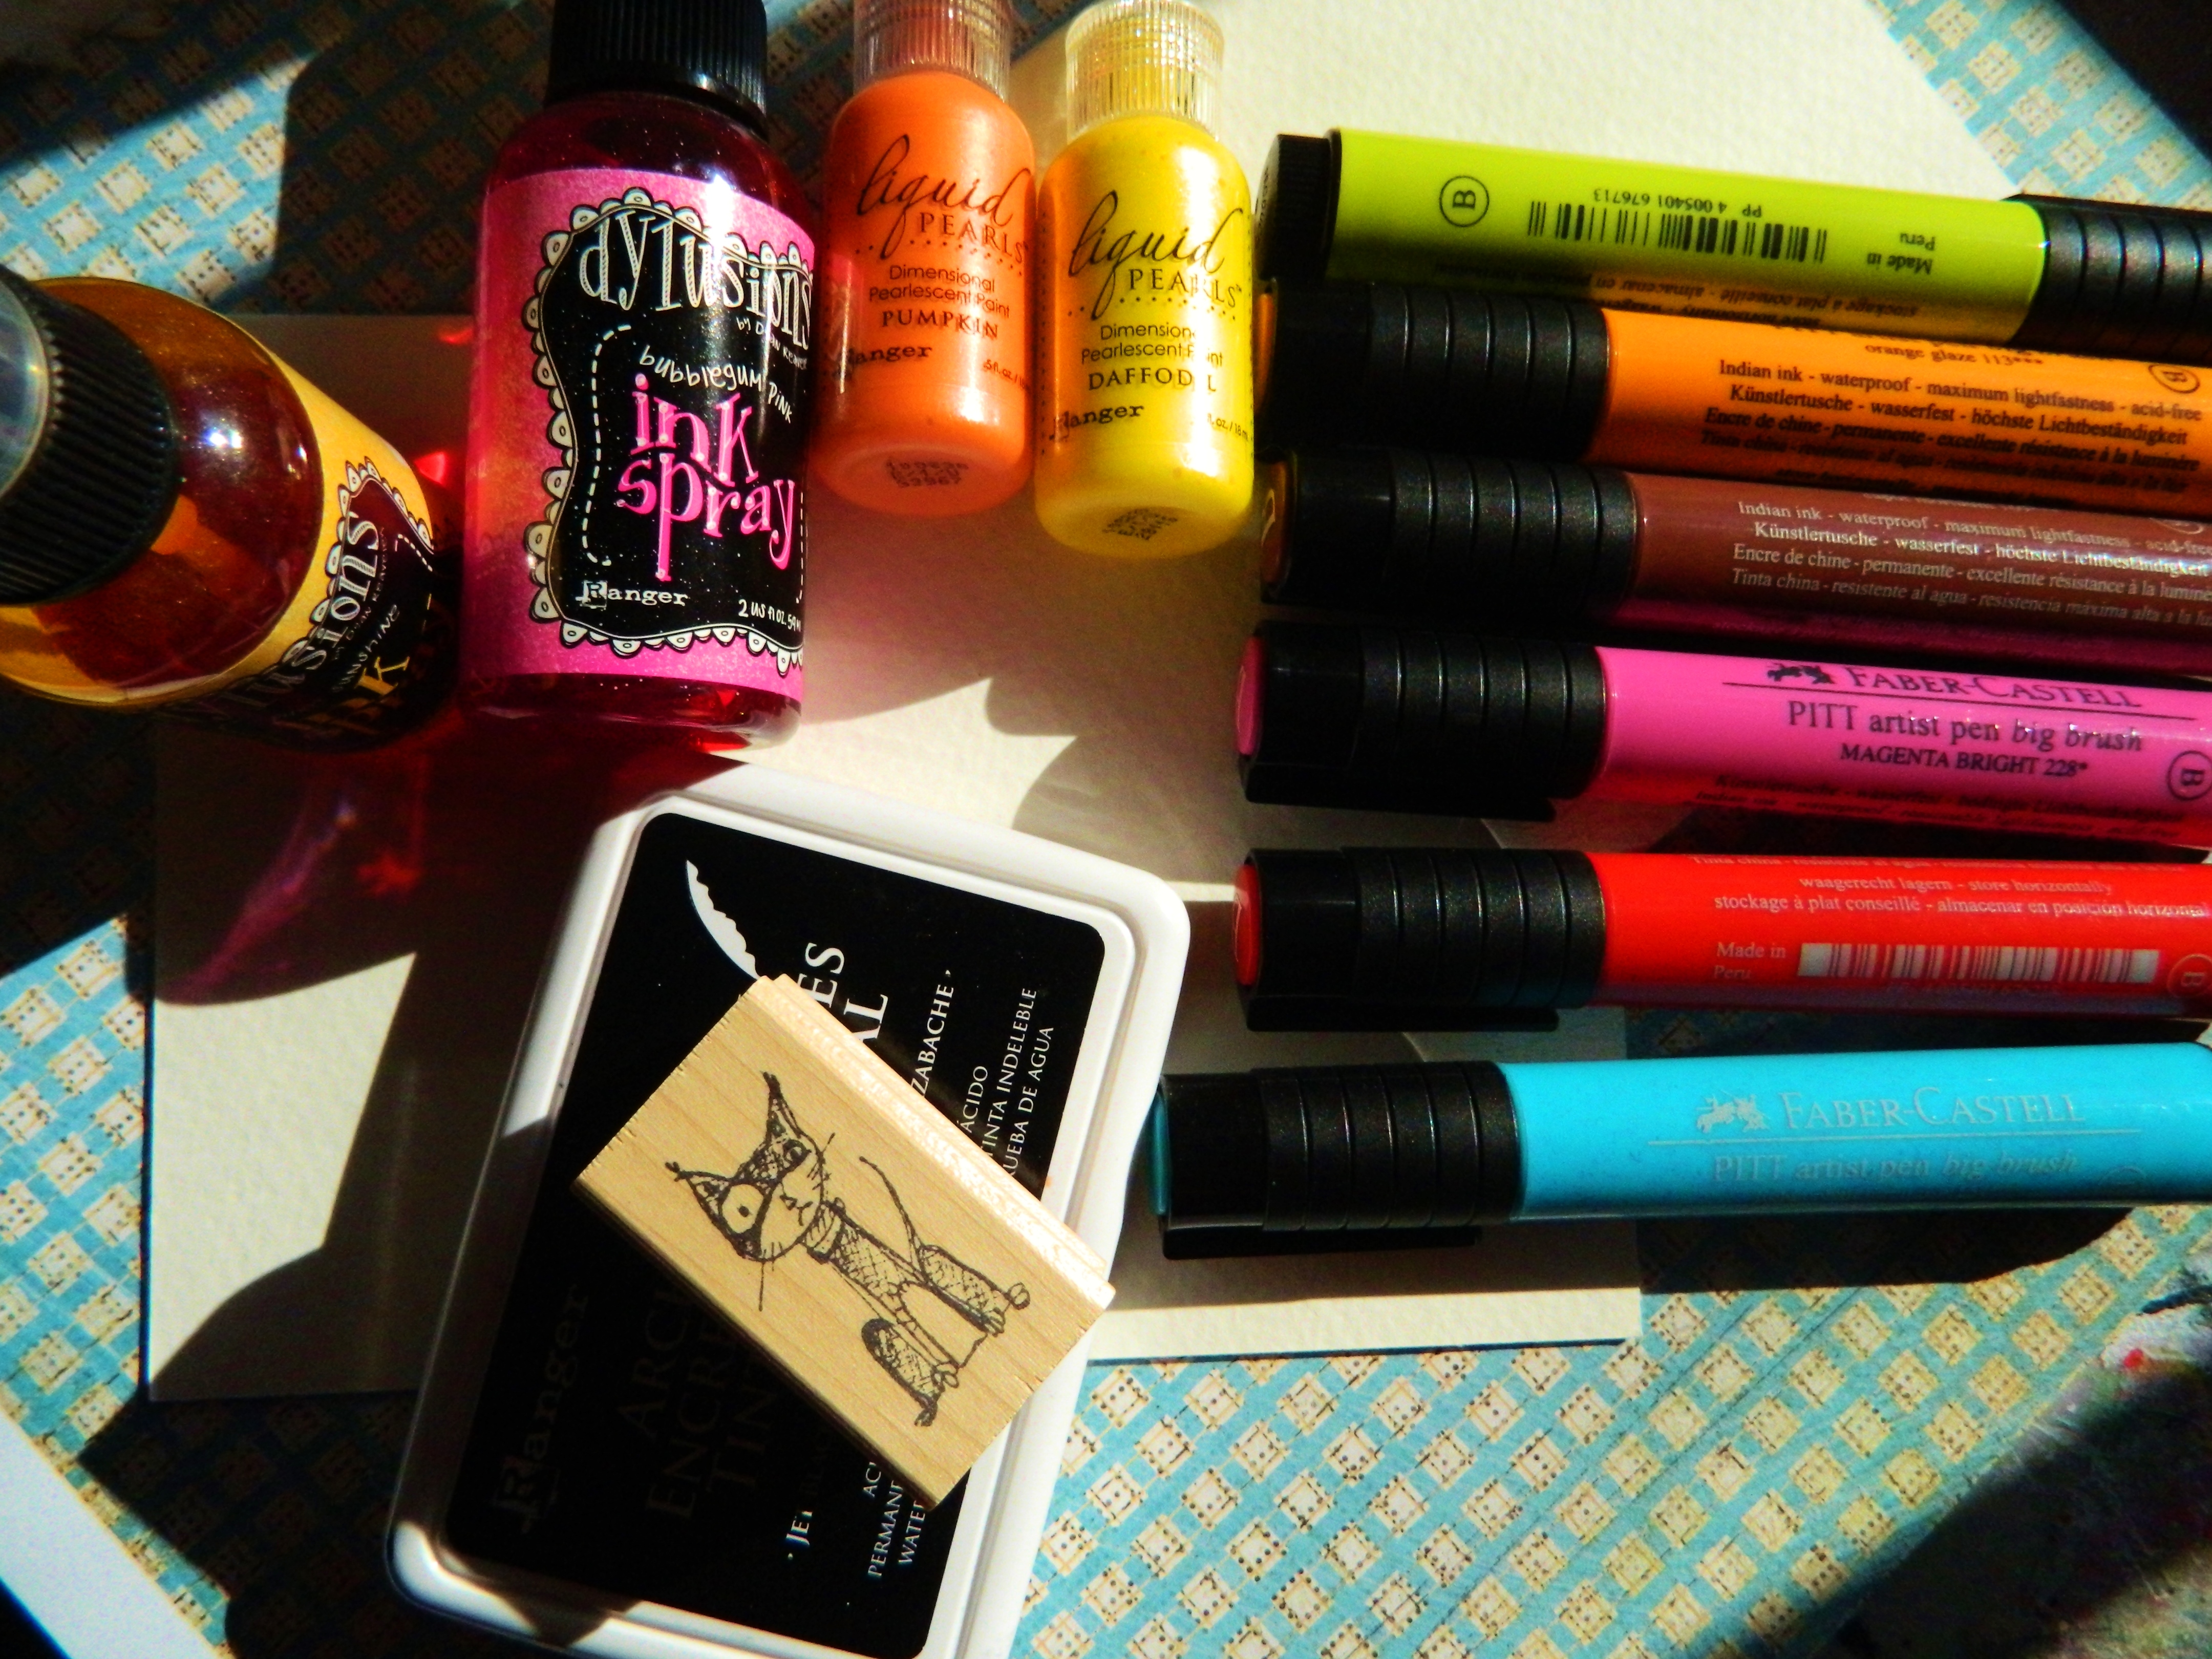
Faber-Castell Gelatos

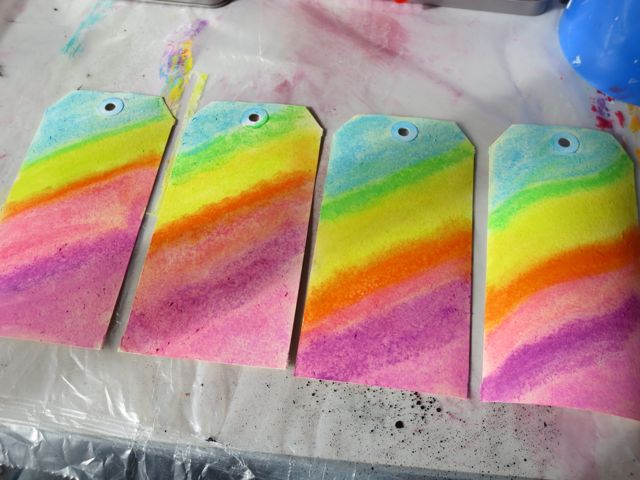
Manilla shipping tags (here we used Size 7)

Rubber stamps (for the tags we used Ranger Ink Dina Wakely Media – Face in the Crowd MDR41313)

Black ink

Black markers and pens

Cardstock in colours to match the gelatos

Craft knife and cutting mat

Ribbon in colours to match

Making your Greeting Card Tags:

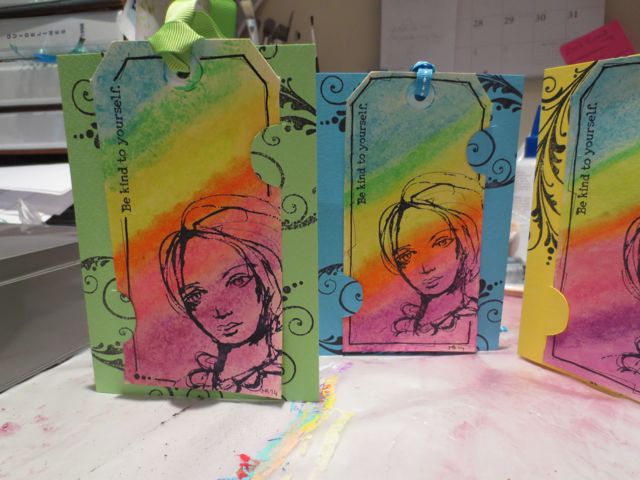
1. Gather materials and decide on colors. Here I was making Mothers’ Day cards, so I was after bright colours (and I just LOVE rainbow colours!)

handmade Greeting Cards from manilla shipping tags

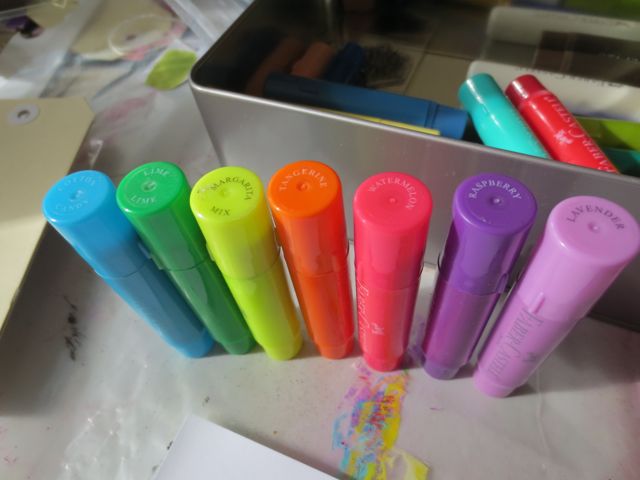
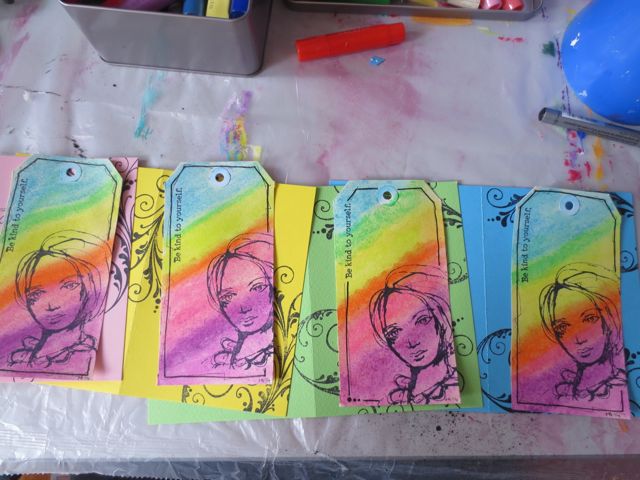
2. Create a colourful background with the Gelatos on the tags, activating them with a little water

handmade Greeting Cards from manilla shipping tags

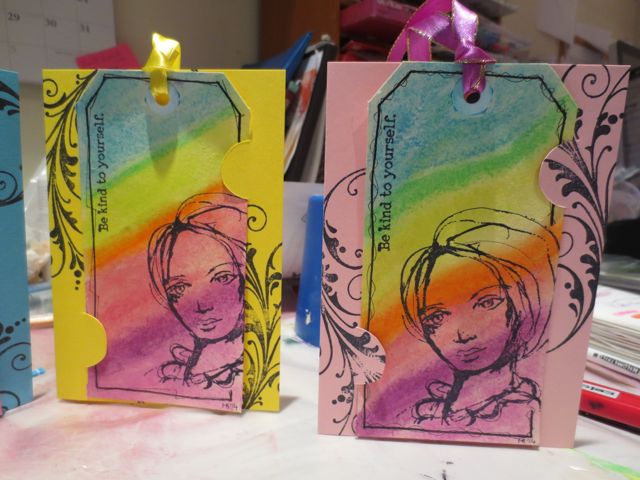
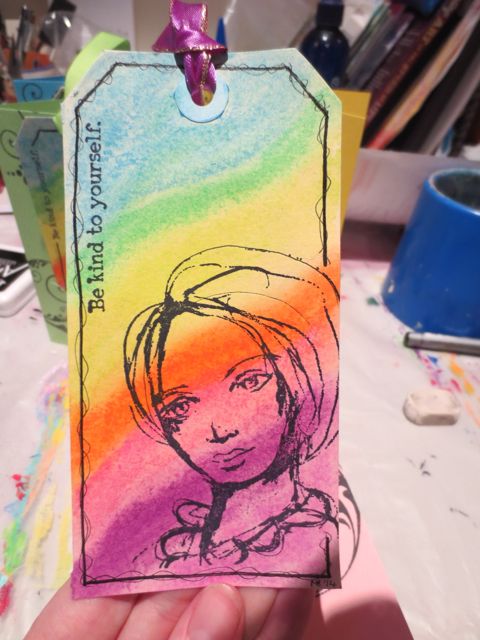
3. Add a stamped face and quote from the Dina Wakley set to your tag. Add a border with black marker. Add ribbon.

handmade Greeting Cards from manilla shipping tags

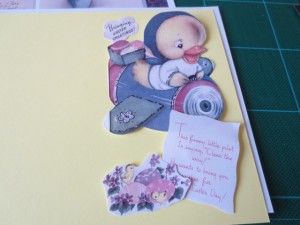
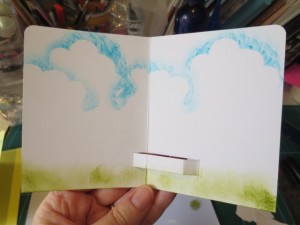
4. Add some stamped swirls to the card. Put the images around the edges as the tag will cover most of the card front.

handmade Greeting Cards from manilla shipping tags

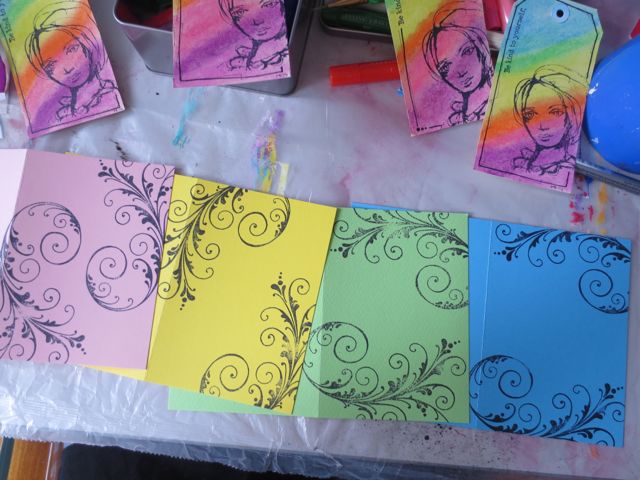
5. Match the tags to the background card stock

handmade Greeting Cards from manilla shipping tags

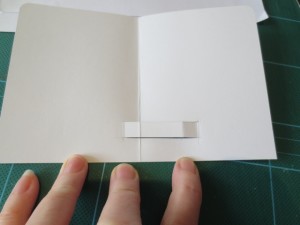
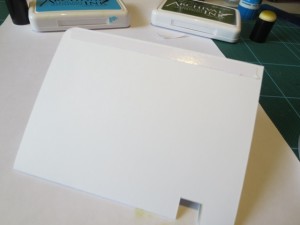
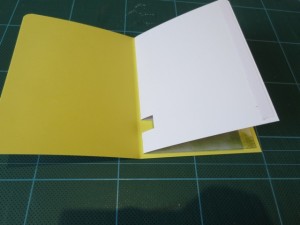
6. Now we need to create a way to attach the tag to the card. I didn’t want to glue it permanently, so I cut slots into the card.

handmade Greeting Cards from manilla shipping tags

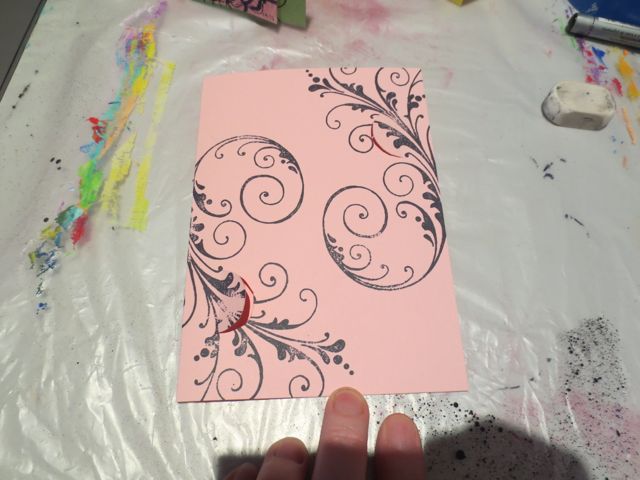
I put the tag onto the card and used a pencil to mark the top right side and the bottom left side of the tag, so I would know how wide the tag is. Then a drew half circles and cut them using the craft knife and cutting mat. Then I tested the tag and found the slits needed to extend past the edge of the tag. Then I cut the slits a bit bigger.

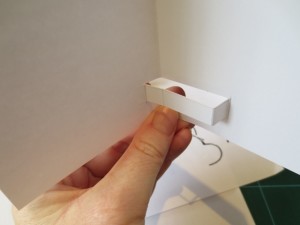
7. The easier way to put he tags into the card was to “twist” it in

handmade Greeting Cards from manilla shipping tags

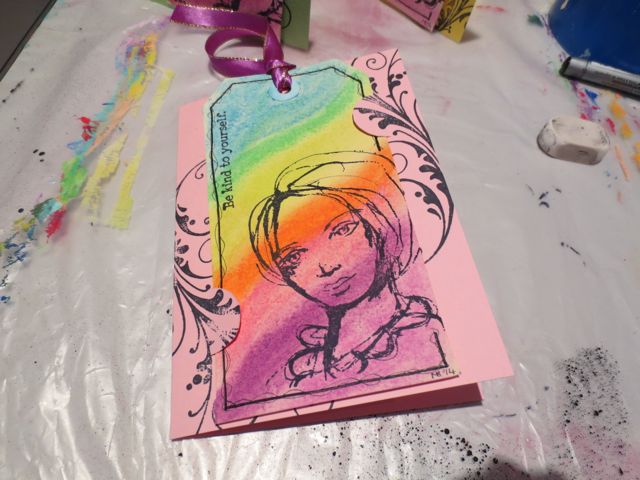
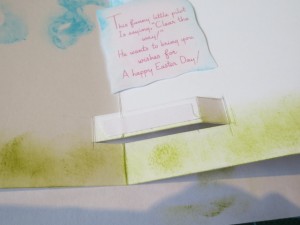
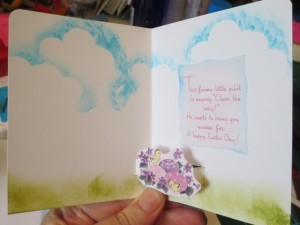
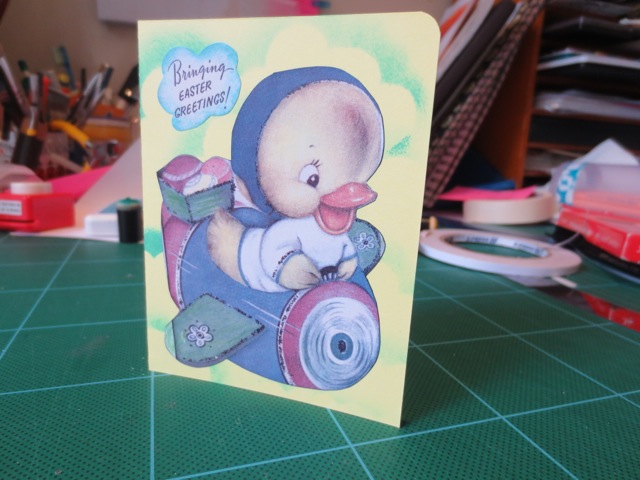
8. Your mixed media tag greeting card is finished! You can also write a note INSIDE the card to tell the recipient that the tag can be removed and used as a bookmark.

handmade Greeting Cards from manilla shipping tags

~*~*~*~*~*~*~*~*~*~*~*~*~*~*~*~*~*~*~*~*~*~*~*~*~

Michelle G. Brown is passionate about mixed media art and enjoys sharing her knowledge and techniques with you to allow you to express your own creativity. Michelle understands that many of us have an inner need to create. By learning a few basic techniques the amazing world of mixed media art is accessible to everyone!

Michelle lives with her husband and two boys in Melbourne, Australia. When she is not creating or on Facebook, she’s at karate training.

~*~*~*~*~*~*~*~*~*~*~*~*~*~*~*~*~*~*~*~*~*~*~*~*~

.

.

Handmade Greeting Card

~ * ~

This article is written by Melanie Statnick 

Handmade greeting card using watercolor paper

Greeting cards are so fun and quick to make. My mum and I would send cards to each other all the time. I really want to get in the habit of snail mail again.  I love to send gifts, happy mail, post cards and handmade cards.

Handmade greeting card using watercolor paper

I hand folded 140lbs cold press watercolor paper into a card shape. Opened to lay card flat and spray with orange and pink Dylusions ink spray. These are my favorites. Air dry or dry with heat gun.  Cut pink card stock paper to smaller size to center in the front of the card and glue. Stamp all four sides of card stock. Stamp image of 2” art squares. Glue squares to cardstock.

Handmade greeting card using watercolor paper

Stamp your greeting on top and bottom of watercolor card. Using Pitt Pen Big Brush Markers color in the stamped images. Add Stickles in your favorite colors and washi tape to the edge.

Handmade greeting card using watercolor paper

*stamp can be found at Rubbermoon.com

~*~*~*~*~*~*~*~*~*~*~*~*~*~*~*~*~*~*~*~*~*~*~*~*~

Author bio: Melanie Statnick is a published artist/writer out of North Carolina. Melanie creates art daily from her private studio. Her style is happy and whimsy. Statnick’s artwork can be found in art galleries and shops extensively in NC with international private collections. Learn more about Melanie view her website at: www.melaniestatnickart.com

~*~*~*~*~*~*~*~*~*~*~*~*~*~*~*~*~*~*~*~*~*~*~*~*~

.

.

Vintage Easter Pop-up Card

~ * ~

This article is written by Michelle G. Brown

Last year, we had not one but two Easter Ephemera sheets to download – #11 Vintage Easter Wishes and #12 Cute Easter Cards but I hadn’t put them to good use, so for this month’s ephemera sheet, I thought I’d revisit these cute little vintage cards, with their lovely sayings, and turn them into a cad, ready for Easter this year.

Vintage Easter Card by Michelle G. Brown

Materials

  • Mixed Media Ephemera Sheet #12 Cute Easter Cards (scroll down until you find #12)
  • Yellow and white card
  • Glue stick
  • Double sided tape
  • craft knife and rulers
  • Ink and sponges, to decorate

 Instructions

1. Gather materials

EasterCard materials by Michelle G. Brown

2. Cut out images for card. Here I added a bit to the airplane wing and cut a cloud around the front greeting.

Mixed media vintage Easter Card

3. Cut the yellow card to 165mm x 110mm [6 1/2” x 4 1/4”] and round top corners

Cute vintage Easter card - round corners

4. Cut out a cloud template from leftover card

EasterCard04

5. Sponge clouds onto card front

Cute vintage Easter card with ink clouds

5. Sponge blue around the greeting. Edge the main image with black marker. Stick onto front of card with glue stick.

Cute vintage Easter card front

6. Cut inner card to 160mm x 105mm [1/8” smaller than the outer card]. Mark out the tab for the pop-up; 15mm from the bottom, 10mm to the left of the centre fold, then 25mm to the right, then another 10mm. Cut along lines parallel to bottom of card.

[**Note careful measuring is needed for pop-uo cards, so take your time here. it is important to have the lines parallel to the bottom of the card and parallel to the centre fold.]

Pop up card tab

7. Carefully fold tab out and close card to check it will fold flat

Pop up tab folded

8. Decorate the inside of the card with the same cloud template as on the card front and add some green grass.

Inside of vintage Easter card

9. Add double sided tape to the top of the tab

Add image with double sided tape

10. Add on the pop-up image and sentiment

Inside of card, ready to go

11. Now to add the inside into the card front. Again, care is needed here to make sure the card will open and close properly. Firstly hold the two sections together and check it will work as you expected.

Double sided tape on inner card

Add a line of double sided tape to the outer edges of the inner card.

12. Attach to one side of the card front, leaving  a little room in the spine to allow for the inner section to move a bit. then peel off the backing from the second piece of tape and close the card to stick these two pieces together.

Half stuck in

13. Now your cute little Easter card is finished.

Michelle G. Brown makes a vintage Easter card

~*~*~*~*~*~*~*~*~*~*~*~*~*~*~*~*~*~*~*~*~*~*~*~*~

Michelle G. Brown is passionate about mixed media art and enjoys sharing her knowledge and techniques with you to allow you to express your own creativity. Michelle understands that many of us have an inner need to create. By learning a few basic techniques the amazing world of mixed media art is accessible to everyone!

~*~*~*~*~*~*~*~*~*~*~*~*~*~*~*~*~*~*~*~*~*~*~*~*~

Vintage Birthday Greeting Card

~ * ~

There is nothing that shares those special sentiments like handmade birthday cards. Michelle has used the images from the Mixed Media art Ephemera Sheet 20 – Vintage Birthday Wishes to create this lovely card. The pink image with the works “To a Dear Sister on her Birthday” captured Michelle’s imagination for this handmade birthday cards and she began to pull out pink card and embellishments.

Send your sister love with this handmade greeting birthday cardMaterials & Tools

  • Pink “To Dear Sister” image,
    downloaded and printed from 
    Mixed Media art Ephemera Sheet 20 – Vintage Birthday Wishes
  • Pink card [148mm x 210mm / 6″ x 8 1/4″ approx.]
  • Black card [94mm x 135mm / 3 3/4″ x 5 1/2″ approx.]
  • Color-coordinate paper [90mm x 130mm / 3 1/2″ x 5 1/4″ approx.]
  • Pink ribbon [12omm / 5″]
  • 5 chipboard flowers
  • Cutting mat, craft knife and steel ruler
  • Scissors
  • Double sided tape
  • Black ink and pink ink
  • Mod Podge Sparkle

Instructions

1. Print out the ephemera sheet and choose an image that appeals to you. Gather materials that suit the color scheme of the image. You will need card and a few embellishments.

Vintage birthdays

2. Fold pink card in half to create greeting card. I prefer to score the card first to make sure the fold is in the center of the card.

3. Cut black card to size. The measurements provided are approximate only – use your own judgment  to determine what size looks “right” for the layers.

4. Layer black card and ribbon onto pick card with double sided tape

5. Cut printed paper to size and attach onto card with double sided tape

6. Cuto out image from ephemera sheet

7. Edge image with black ink and attach to card

Black ink helps image to stand out from background

8. Color chipboard flowers with pink ink

9. Using Sparkle Mod Podge, attach pink flowers and leave to dry. Add other sparkle highlights to image, as desired.

10. Your handmade vintage greeting cards complete

Pretty pink birthday card with vintage image

Happy creating!

~*~*~*~*~*~*~*~*~*~*~*~*~*~*~*~*~*~*~*~*~*~*~*~*~

Michelle G. Brown is passionate about mixed media art and enjoys sharing her knowledge and techniques with you to allow you to express your own creativity. Michelle understands that many of us have an inner need to create. By learning a few basic techniques the amazing world of mixed media art is accessible to everyone!

You can see more of Michelle’s work at Mixed Media Art or via Facebook – Creating Mixed Media Art

~*~*~*~*~*~*~*~*~*~*~*~*~*~*~*~*~*~*~*~*~*~*~*~