Do It Yourself Handmade Halloween Decorations

~ * ~

This article is written by Kim Kelley

Does it drive you crazy when you walk into a store in the middle of September and there are Christmas decorations up, but no Halloween ones? It does me. Seems like we are fast forwarding through life, always looking too far ahead, skipping sections that could be memory makers, instead of stopping and enjoying what time is right in front of us.

OK, OK I know I am feeling like life is going way to fast right now. My daughter just turned 18, is a senior and is looking at college. Just yesterday I dropped her off at Kindergarten and she looked up at me like I hung the moon.

handmade Halloween decorations are easy

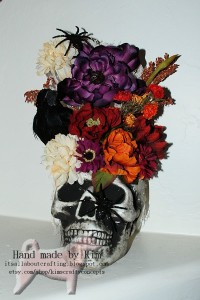
Anyway back to the task at hand…my Halloween project. This year I wanted to create something special for my BUNCO party. So I got an idea from Pinterest to decorate a skull. Now the photo I saw used real flowers, but needing something that would last I decided on fake ones. I also wanted to add a few spiders and a crow on each, thank God for Michael’s, I was able to get everything there and on sale for half off!

handmade Halloween decorations are easy

The Skulls

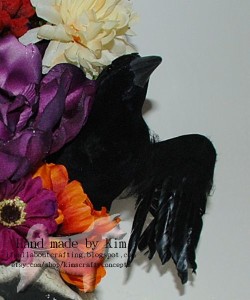
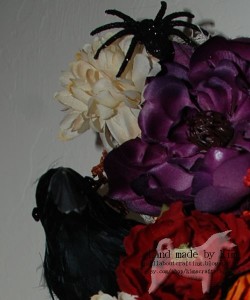
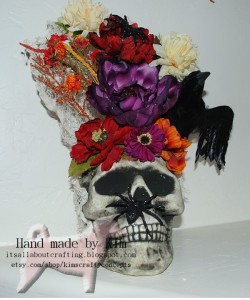
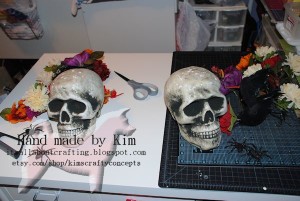
I used Styrofoam skulls so all I had to do was stick the flowers in where I wanted…you can see some of the holes in one of the pictures, I ended up pulling all of the stems out once and starting over wanting a different look. I did not like the way the stems showed from the back, so I added a thick, almost cheesecloth material hanging from the flowers and draping down the back of the skull. I glued one of the glitter spiders to the skull and one to the top of the highest flower and took my glue gun and created strings of webbing all over. All in all this was pretty easy to create.

handmade Halloween decorations are easy

Crow 1

handmade Halloween decorations are easy

Crow 2

I usually take a lot more pictures, but figured there are only so many angles you can take of fake flowers!

handmade Halloween decorations are easy

Skull 1

I hope this inspires you to get a little creative with your Halloween decorations!

Life is short, do something creative every day!

~*~*~*~*~*~*~*~*~*~*~*~*~*~*~*~*~*~*~*~*~*~*~*~*~

Kim Kelley is borderline obsessive about her crafting and her art. She loves mixed media art because you are free to go beyond your comfort zone, using your imagination and exploring an anything goes mind set. Kim loves to learn and explore new techniques and hopes that any art she creates leads someone to find their inner creative artist!

Sites: itsallaboutcrafting.blogspot.com and kimscraftyconcepts

~*~*~*~*~*~*~*~*~*~*~*~*~*~*~*~*~*~*~*~*~*~*~*~*~

.

.
Altered Library Card Pocket

~ * ~

This article is written by Melanie Statnick

How to alter old library card pockets

I miss having library cards in the back of books. When I was younger we had to look books up in the card cataloging boxes. Signing the books out with your name and seeing who borrowed it before you, or even how many times you checked out the same book.

Lets get arty and alter these library card pockets

Lets get arty and alter these library card pockets

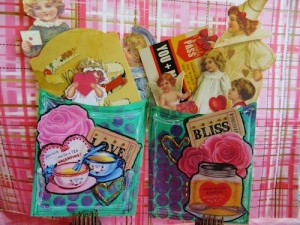
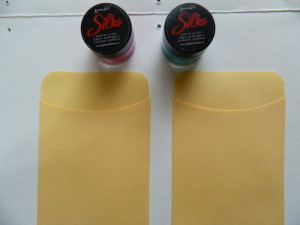
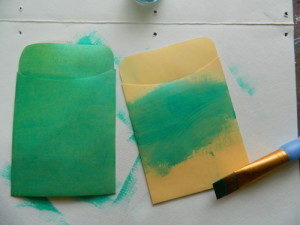
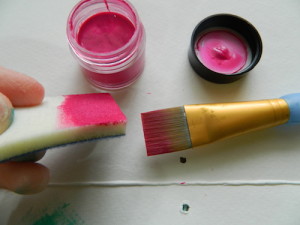
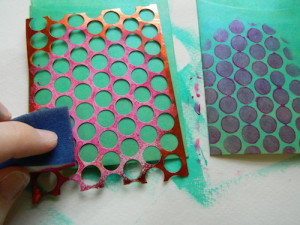
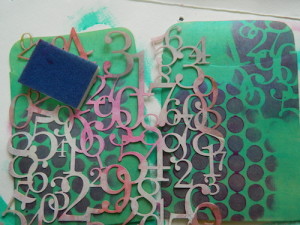
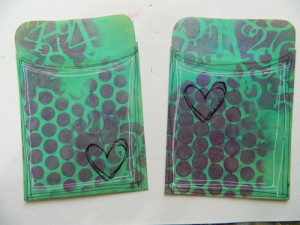
Using Silk Acrylic paints I altered these paper library pockets. I painted the first color coat onto the pocket first, then I used a paint brush to apply the second color to the applicator and rubbed it over the stencil onto the pockets in a circular motion.

Lets get arty and alter these library card pockets

Lets get arty and alter these library card pockets

Lets get arty and alter these library card pockets

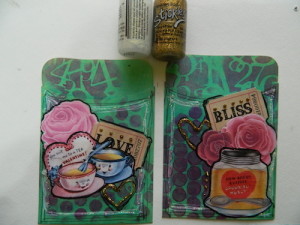
Dry the paint and add some stamps and paper collage sheets and embellishments using a gel medium or mod podge. I outlined the images using a black Pitt pen, white get pen and then added some Stickles.

Lets get arty and alter these library card pockets

Lets get arty and alter these library card pockets

I used a Valentine theme to stuff the pockets with. You can makes them however you like. Cute for sticking a magnet strip on the back and posted it onto your refrigerator and leaving notes for your sweetheart.

*All materials can be found on Altered Arts website

How to alter old library card pockets

~*~*~*~*~*~*~*~*~*~*~*~*~*~*~*~*~*~*~*~*~*~*~*~*~

Melanie Statnick is a published artist/writer out of North Carolina. Melanie creates art daily from her private studio. Her style is happy and whimsy. Statnick’s artwork can be found in art galleries and shops extensively in NC with international private collections. Learn more about Melanie view her website at: www.melaniestatnickart.com
.

.

Taking Your Art Journaling Out of a Book with Altered Art

~ * ~

This article is written by Keri Sallee

Art journaling…many of you have heard of it and probably have tons of pins on Pinterest of artist that inspire you and quotes that have you moved. There pages and pages of art, but…what if we chose to take our art journals out of their books and instead made 3-D embodiments of our feelings and thoughts?

For the second year, I was asked to help at a mentor/mentee retreat for an organization called Saving Grace. It is an amazing organization that offers transitional housing and education to girls age 18-23 who have aged out of the foster care system, are homeless or have a home living situation that is dangerous. This year, their retreat theme is “Fight Like a Girl” and I was given a plain paper mache dress form to come up with a project example  for the girls to spend time expressing themselves creatively.

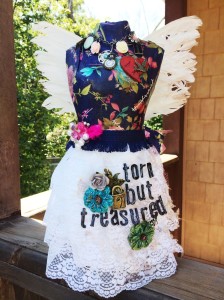
Torn but Treasured Dress Form

I wanted my piece to tell a story…to tell a story that we all struggle with…the desire to be normal and perfect despite our baggage, our history and our scars. The sides  of the dress tell that story:  one is sparkly, pristine and dazzling white, while the other is dingy, tattered and torn. Both sides of the same person.

I originally planned on making this super girly, really pretty piece, but the more I thought about the theme “Fight Like a Girl”, I thought “If I was fighting for my life, would my dress be perfect and immaculate or would it be messed up and stained and torn?” And then I thought a step farther…thought of it through the lenses of my past and thought “Would someone still love me if I showed up in a torn dress?” And the answer is…YES…even though I am torn, I am still treasured.

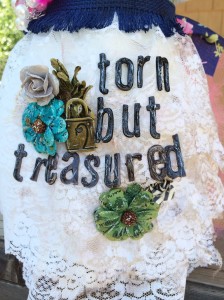
“Torn but Treasured”

I wanted to be very deliberate in my choices of embellishments and everything has some kind of meaning.  Like in the above title I added the lock because if you treasure something, you protect it.

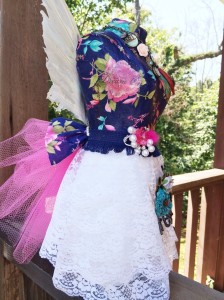
The “perfect” side of life

This side view shows the “perfect” shiny side that we try to portray, but if you look closely, you can see works like “love” and “Dream on” across the side because even in our striving to be “perfect” and “normal” we all still have dreams that we dare to dream, even if it’s only in our own heads.

The pink bustle in the back shows that, as women, we can be bigger than life, while still being women.

The wings show the desire that everyone has to excel at something.

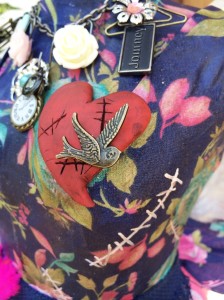
Tattered Heart

The heart was formed with red Sculpey clay. Before I bake it, etched “stitches” into it. I baked it over a small ball of wax paper to keep the shape curved. Once it was baked and cooled, I applied a layer of black acrylic paint and wiped off the excess. In some ways, we all have scars on our hearts, but  through the love of family and friends we can be stitched back together and be free just like that little bird.

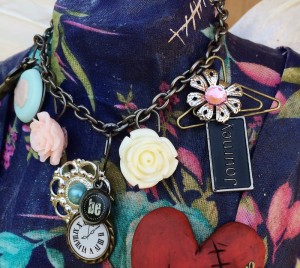
Symbolic Charm necklace

The necklace is very heavy in symbolism: the bird cage (need for freedom), the clock (everything happens in time), the word “be” (BE who you are!), roses (there are seasons for everything), and the word “journey” (we are ALL on a journey.)

You can also see the white “stitches” on one side of the dress form. I made them white for 2 reasons: (1) it would show up better and (2) because so many times we feel like our scars are bright white and everyone can see them, when in actuality, most of us keep them hidden pretty well.

So what do you think? How about we take our thoughts, dreams and desires out of our books and put them on display for all to see and to remember that art can be both beautiful and healing.

For more information on Saving Grace, check them out at www.savinggracenwa.org

Have a Blessed Day.

Keri Sallee

~*~*~*~*~*~*~*~*~*~*~*~*~*~*~*~*~*~*~*~*~*~*~*~*~

Keri Sallee is a lover of all things creative and believes that everyone has the ability to be creative in some manner. She currently designs for Graphic 45, Marion Smith Designs and The Crafter’s Workshop, as well as occasionally appearing on the blog for The Canvas Corp family of products. She loves to challenge herself and others to think outside of the box. You can find her at her blog, on Facebook and her favorite photo hangout, Instagram

~*~*~*~*~*~*~*~*~*~*~*~*~*~*~*~*~*~*~*~*~*~*~*~*~

.

.
Altered Dominoes

~ * ~

This article is written by Shari Welch

Before you take your old games to the donation station,why not take a second look at them. Could you possibly reuse the board, box, or game pieces to create something artistic and beautiful? With a little imagination the possibilities are endless.

As a mixed media artist I am always looking for new materials to use when creating my art. As an avid reduce, reuse, and recycle kinda girl this project couldn’t be more perfect. I am going to give you the basic instructions and then you can have fun deciding how to finishing them. There are so many ways you can decorate dominoes. Pinterest is full of inspirational ideas. I have a board dedicated to them.

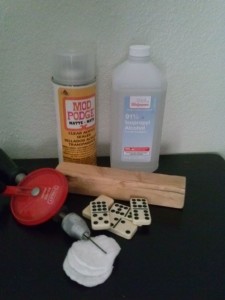
Here is what you will need:

Shari Welch creates these fun altered dominoes. Here are the items you will need to get started

  • Domino game pieces
  • Rubbing alcohol, cotton pads
  • Hand drill with a small bit
  • Small piece of wood
  • Mod Podge Matte clear acrylic spray sealer

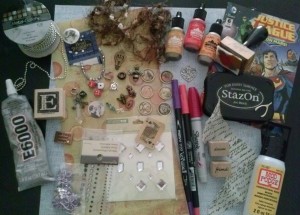
Here are a few ideas to use for finishing your dominoes:

Here are a few ideas to use for finishing your dominoes

  • Alcohol Inks, inking tool
  • Sharpie or any permanent marker
  • Found trinkets, beads, ribbon, eyelets
  • Old comic books and newsprint
  • Key chain, Ball chain, leather, magnets
  • Mod podge dimensional magic
  • Rubber stamps, permanent ink pad

Let’s get started

1.First you must wipe your domino with alcohol to insure no oils or dust is on them.

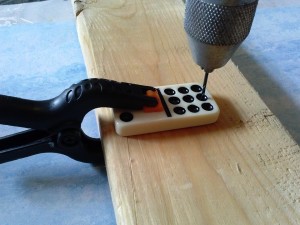
2. If you are making a necklace or want to add embellishments you will need to drill a hole. The dominoes are surprisingly easy to drill into.

The dominoes are surprisingly easy to drill

3. Add a background. Paper, alcohol inks, markers, stickers, rubber stamps.  This link will help show you how to use the inks in more detail. HINT: If you use alcohol inks and you are not happy with the results you can wipe it off with a little rubbing alcohol and start again.

4. Make sure your background is dry and then spray with an acrylic sealer.

5. After the sealer is dry you can add  more colors, stamping etc.

6. If you wish, you can now add embellishments to your domino.

Remember it is all up to you on how little or how much color and embellishments you want to add. Some of my favorite dominoes are stamped with black ink and that’s all.

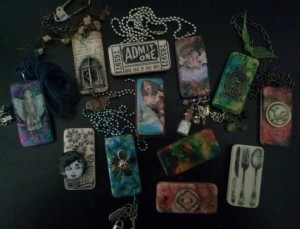
Here are a few dominoes I have made

Here are a few dominoes I have made

~*~*~*~*~*~*~*~*~*~*~*~*~*~*~*~*~*~*~*~*~*~*~*~*~

Shari Welch is a mixed media artist living in Denton Texas. She is known for using reuse and recycle materials in her artwork. She volunteers for SCRAP Denton where she is on the education committee, teaches workshops, art camp, and performs art demos. She is passionate about mixed media art and enjoys helping others discover their creativity.

You can follow Shari and see her mixed media art at her facebook page.
.

.