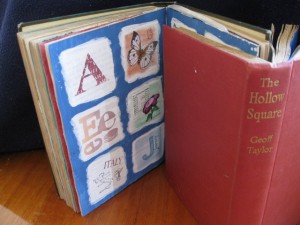
In the previous article we discussed what an altered book is and its history, what to look for when choosing an altered book and where you may be able to find them.
To recap on choosing a book: it needs to be in good condition and it must have page sections have are sewn in. To check the construction of the book, hold the book up so you can see the inner part of the spine and where the pages touch it; if you can clearly see the page sections (the little books within the bigger book) then it will have been stitched. To check further, carefully open the middle of one of the sections. If you can see cotton or thread, then the book has been stitched and is exactly what you are looking for.
In the second part of the Altered Books in Mixed Media Arts series, we will look at the technique of removing and gluing pages used to prepare the book before getting started.
Preparing your altered book
If your chosen book is dusty, it is worth wiping it down with a cloth to remove most of the dust. To warm the book up, open it gently, somewhere in the middle and carefully flex or open and close the book to get it moving. This is particularly important if your book is brand new and hasn’t been worn in.
Removing pages
As we begin to alter our book and add paint and papers and embellishments, the size of the book will grow. Often this is part of the charm of a finished altered book; it’s so full that it barely closes.
In starting out, we can help the book by removing some pages and gluing others together. This reduced the overall bulk of the book and creates thicker pages. Firstly have a quick look through the book and see if there are any pages that catch you eye; a fantastic heading or font, a lovely picture that could be incorporated into the design. These are the pages you will want to keep. Mark them with a post-it note, so they are easy to find during the next step.
Take a lead pencil and a sharp craft knife or scalpel (as we are cutting in close to the spine, it helps if the knife is a smaller one). In between the pages you want to keep, select four pages (two spreads) to begin the removal / gluing process. The middle two pages need to be cut out, parallel to the spine, leaving about half an inch (1.5cm). On the outer two pages, that now face each other, pencil a small “G” (for glue) onto the pages, to remind us that these are the pages to glue together.
Move through the book, between the pages you want to keep and remove quite a few pages (as a guide, about a quarter of the pages will be removed) and mark the pages to glue.
Don’t throw out the removed pages. These can be used later to create background papers or words used for embellishments or to add texture. As these removed pages are the same paper with the same font and format, it makes it easier to integrate these pages into our altered layouts.
Gluing pages
Now we are ready to glue our newly made sections together. Gluing pages together give us a thicker substrate to start our project. Gluing can be a frustrating process, especially if you want it to be “prefect”, so remember that this isn’t a precise art and any imperfections will add character to our final mixed media art piece.
I use a gel medium for this type of gluing; it sticks well but does take some time to dry, so it’s not the best if you are in a hurry. Start by brushing the glue along the middle of the two removed pages and ease these together. Then coat the outside of the stumps and one whole page that is to be stuck together. Carefully ease the second page up, starting from the spine out. Work from the middle out, removing bubbles as you go.
These pages need to be stuck at the right angle to the spine, so that it will close. You need to be mindful of this when bringing the pages together.
Repeat with another one or two sets of pages, then close the book, put it on a flat surface (the floor works well) sit something heavy on it and leave it to dry. After a day or two, you may need to open the book up and sit it on its end, with pages spread, leaving it to dry for a while longer. This is necessary when using gel medium or if the weather hasn’t been really warm. It needs air to circulate to fully dry.
In the next article we will continue to discuss preparing our altered books by using gesso, how to choose a theme and where to looking for inspiration.
Happy creating!
…


You really need to have photos for every step of your instructions. No matter how clear you try to be with your written instructions, they’re never really as clear as you think. Photos answer most questions. Also, pictures are more inviting than just a page full of words.
Thanks for your thoughts, Carol. This is an older article and could do with a refresh and a few more photos!
What happens if you accidentally cut the spine?
Thank you I have really enjoyed your lessons
Regards Carrie
I’m confused. You wrote “Start by brushing the glue along the middle of the two removed pages…”. Do you mean we shoul put the pages we cut out back into the book?
Thank you so much for posting tutorials like this. It is so wonderful to see and it has been super helpful.
This is a very thorough set of instructions, just what I was looking for.